Manage Users
If you are a site administrator, you can manage who has access to your site in CleverAlert. User management lets you invite new users via QR code or invite code, adjust their roles, reorder the call priority list, and cancel pending invitations.
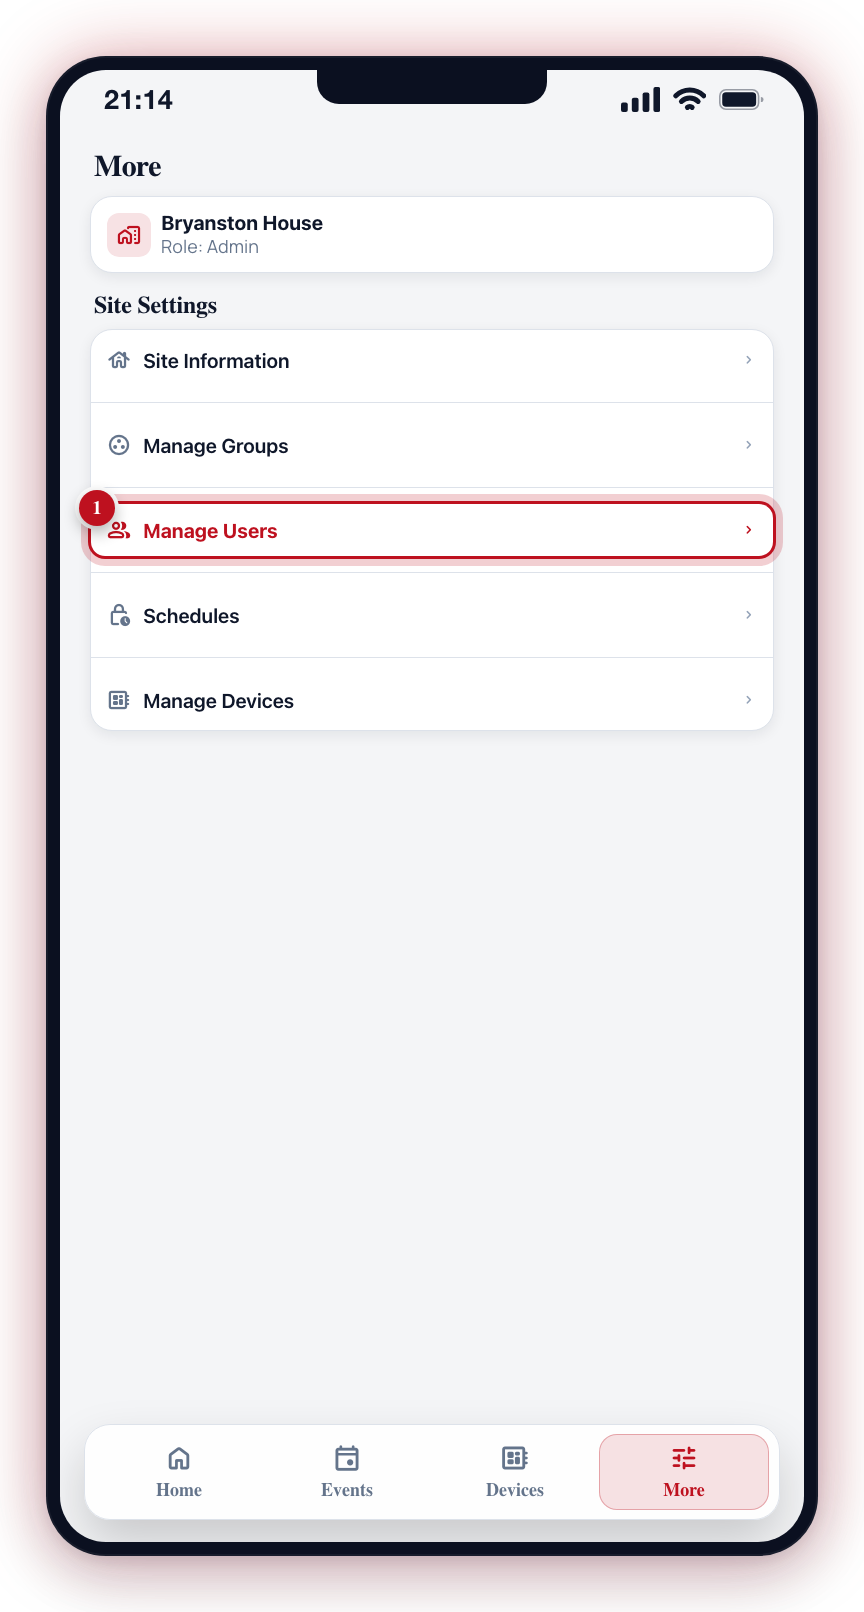
Go to More → My site → Manage Users.
Viewing the User List
- Open the More tab.
- Under My site, tap Manage Users.
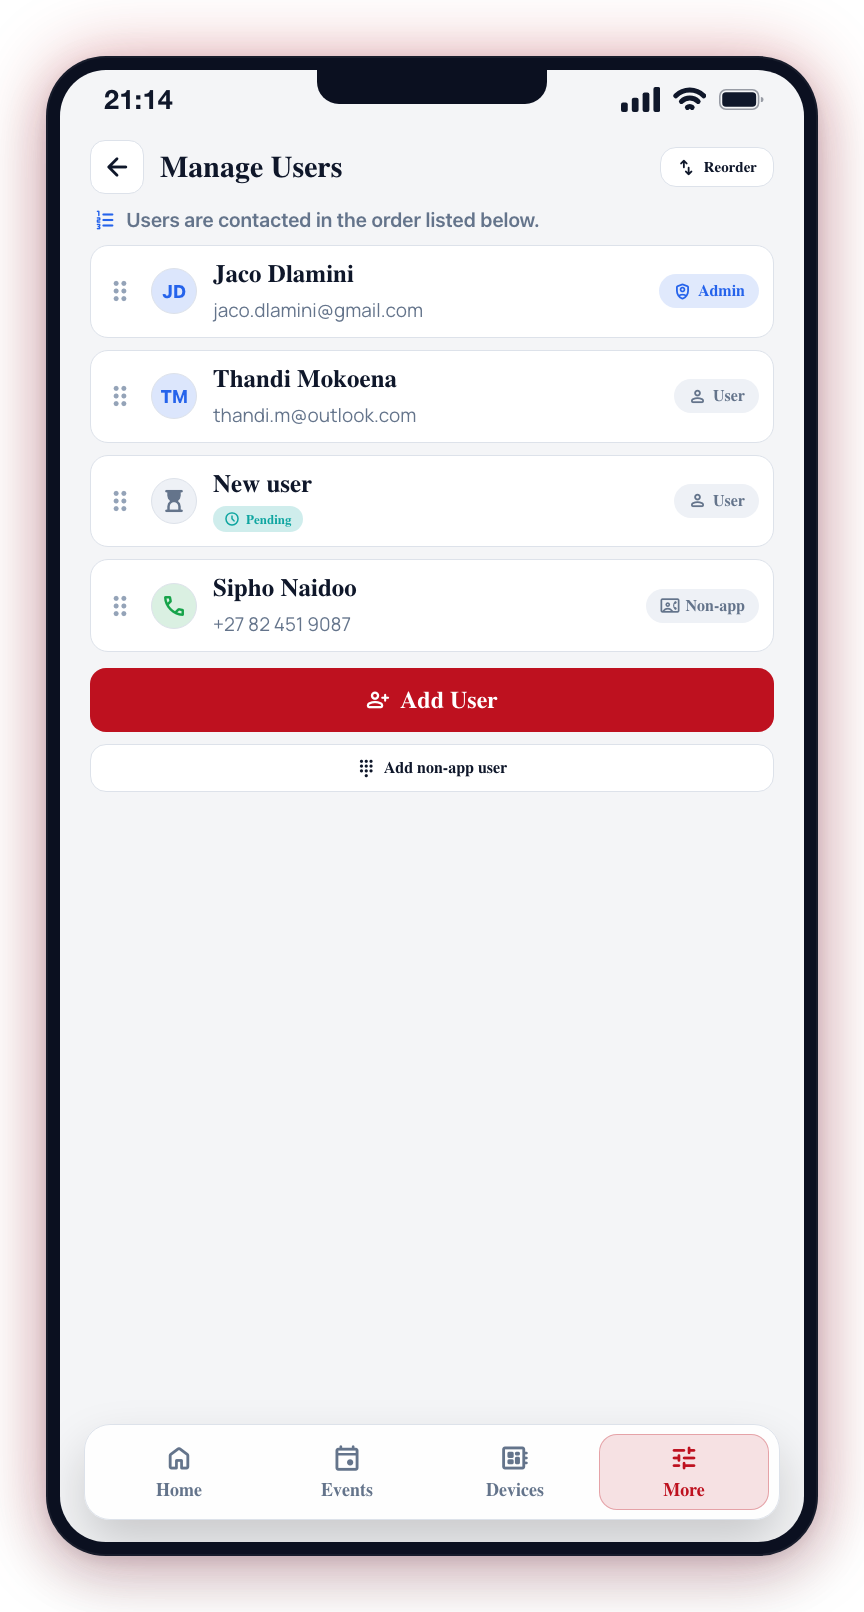
- A list of all users connected to your current site is displayed, ordered by call priority.
- Each user entry shows:
- User name and photo (or "Pending" if the invite has not been accepted)
- Email address
- Role (admin or user)
- A note reads: "Users are contacted in the order listed below."
Adding a New User
CleverAlert uses invite codes to add users to a site, rather than sending email invitations.
- Open More > Manage Users.
- Tap Add User.
- A panel appears with the heading "Add user to site" showing:
- Option 1: QR code -- A QR code is displayed. The new user scans this using the Join Site screen in their own CleverAlert app.
- Option 2: Invite code -- A short code is displayed below the QR code. The new user can type this into the Join Site screen instead of scanning.
- Share invite code -- Tap this button to share the code via the device's share options (messages, email, etc.).
- Choose the role for the new user by tapping User or Admin before closing the panel.
- Tap Done to close the panel.
- The user appears in your list with a "Pending" status until they use the code to join.
On a site set up as separate premises (each alarm area its own household — cottages, flats, units), invites you send are scoped to your own premises. This applies to app-user invites and non-app contacts alike: the people you add see, control, and are called for the same premises you belong to. Site-wide keyholders are managed by your security company.
Adding a Non-App User
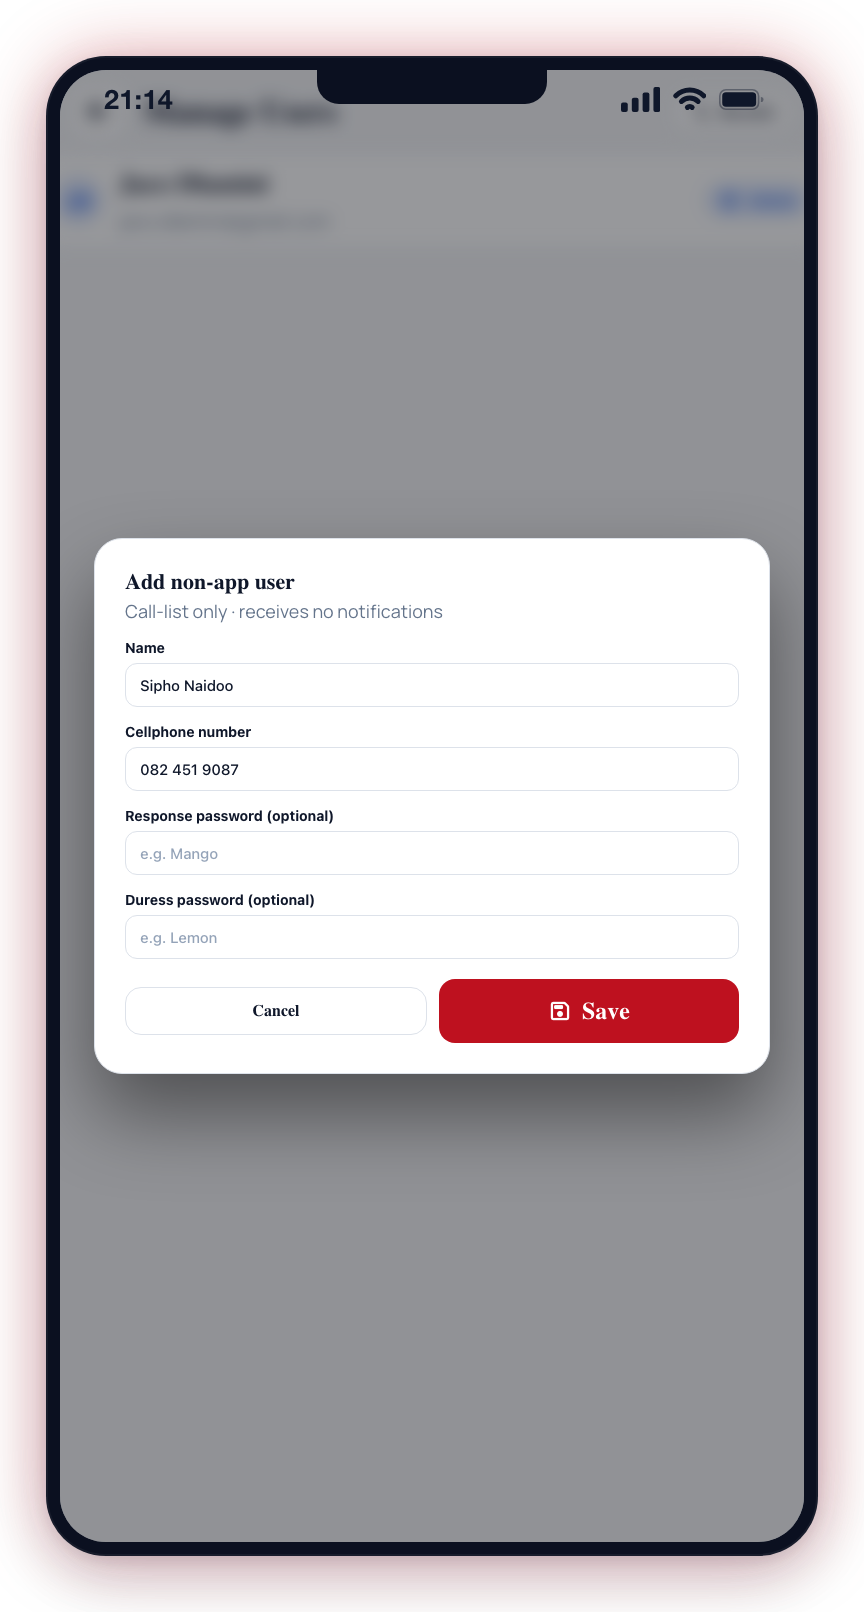
Non-app users are people who should appear on the control room call list but will not install CleverAlert (for example, keyholders or neighbours). They receive no notifications -- they are call-list only.
- Open More > Manage Users.
- Tap Add non-app user.
- Enter the contact's Name and Cellphone number. The number can be typed in local (082 123 4567) or international (+27 82 123 4567) format -- it is stored in international format so control room calls reach the contact reliably.
- Optionally set a Response password and Duress password for verification during control room calls.
- Tap Save.
The non-app user appears in your list with their phone number as the subtitle. Tap them to edit, or long-press to delete.
These two are typed words, not colours. A non-app user has no app to show the nine colour tiles to, so their password is whatever word you type here -- it is what an operator asks for on a phone or WhatsApp call, and what the person enters if they are sent a secure alarm link. App users work differently: they pick a colour instead, on their own Response Settings screen.
User Roles
There are two assignable roles:
- Admin -- Full access including user management, device management, schedules, and all configurations.
- User -- Can view cameras, receive alerts, verify events, and add notes. Cannot manage devices, users, or site settings.
The site owner role is assigned automatically to the user who created the site and cannot be changed through the app.
Technician access created by your security company (a temporary role used for service work) never appears in the user list or the call order — it is managed by the company, not through this screen.
Reordering Call Priority
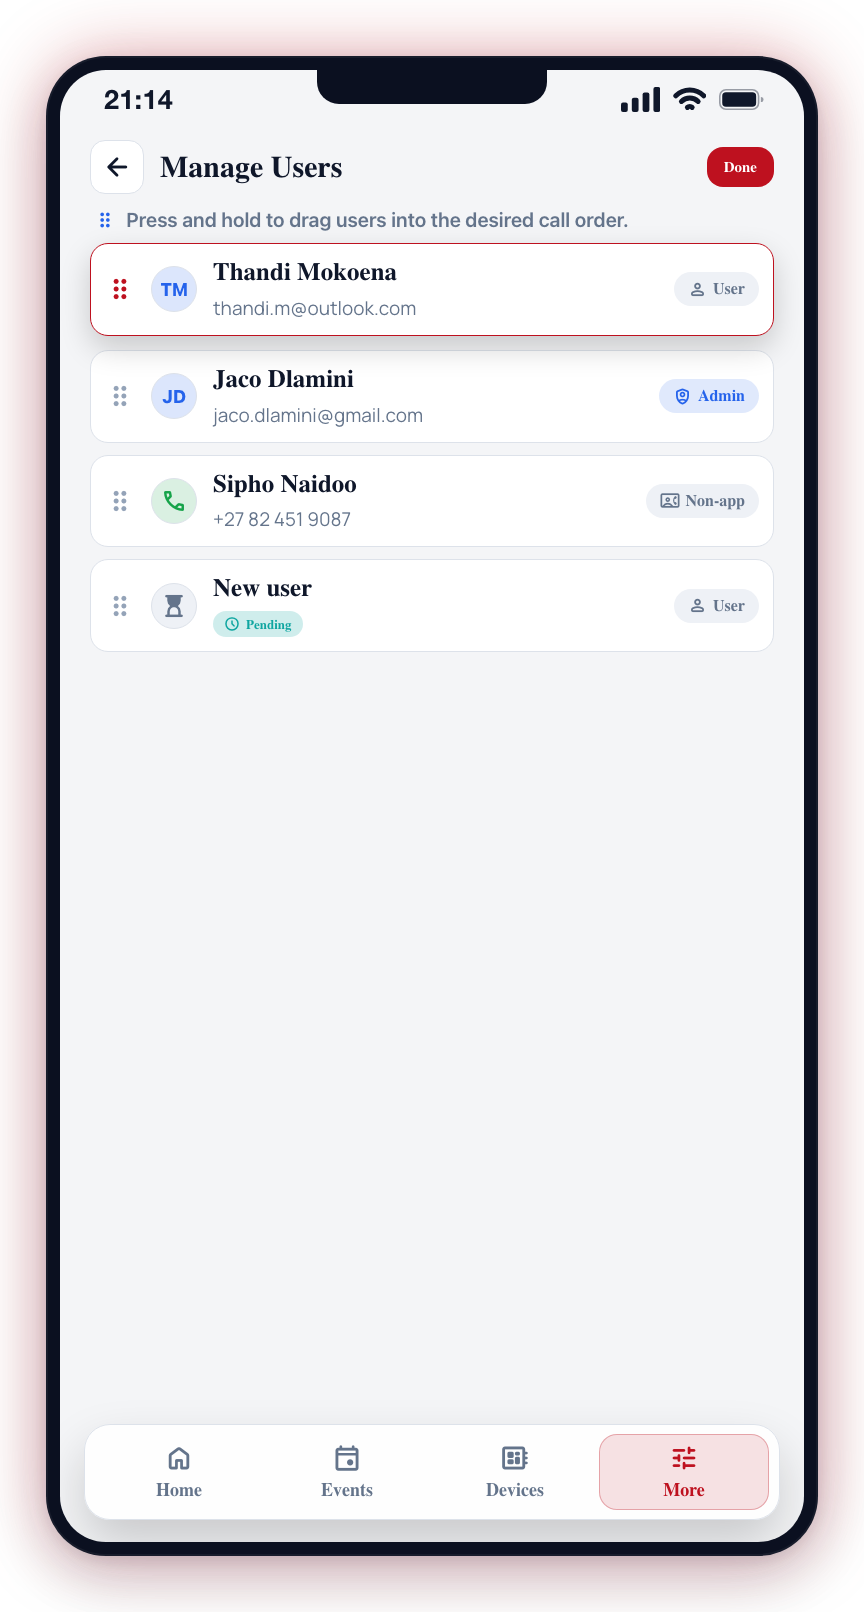
Users are contacted in the order they appear in the list. To change the order:
- Open More > Manage Users.
- Tap Reorder in the top-right corner.
- Press and hold a user entry, then drag it to the desired position.
- Tap Done when finished.
Cancelling a Pending Invite
If an invite has not been accepted yet:
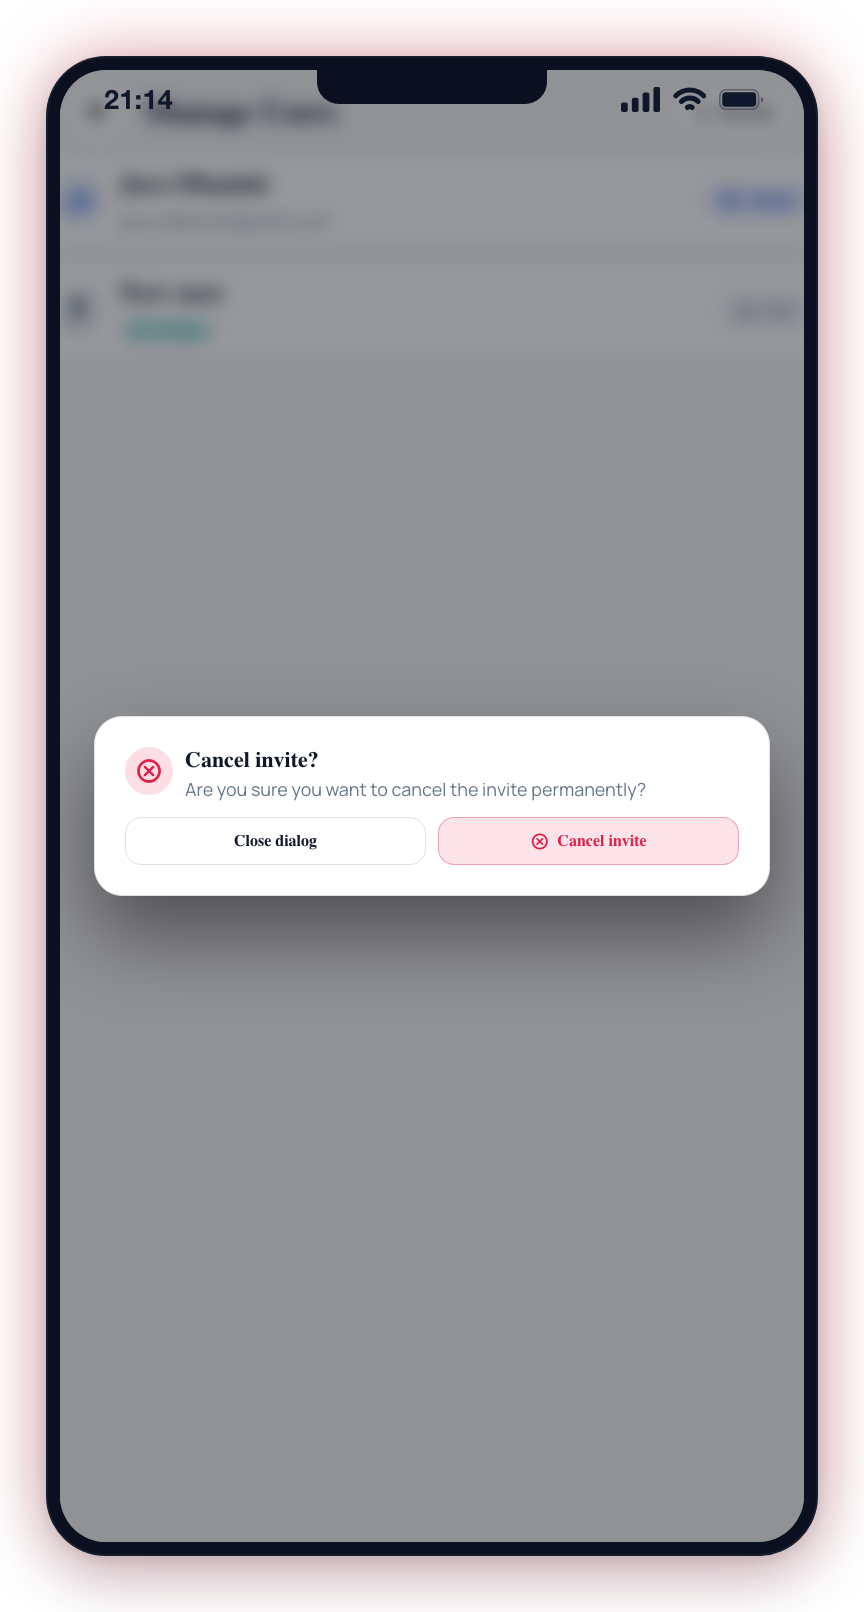
- Open More > Manage Users.
- Long-press the pending user entry.
- A confirmation dialog asks "Cancel invite?"
- Tap Cancel invite to permanently remove the pending invitation.
Long-pressing a non-app user shows "Delete non-app user?" instead -- confirm to permanently delete the contact.
Periodically review your user list to ensure only authorized people have access. Remove users who have changed roles or left the organization.