Detection Routing
Detection routing determines what happens when a camera detects something. Not every detection should trigger a full alarm — the AI may be highly confident it saw a person, only moderately confident, or a second review may have flagged the detection as a false alarm. Each confidence grade can be routed to its own outcome: a full alarm event, a quiet triage item for the control room, or skipped entirely.
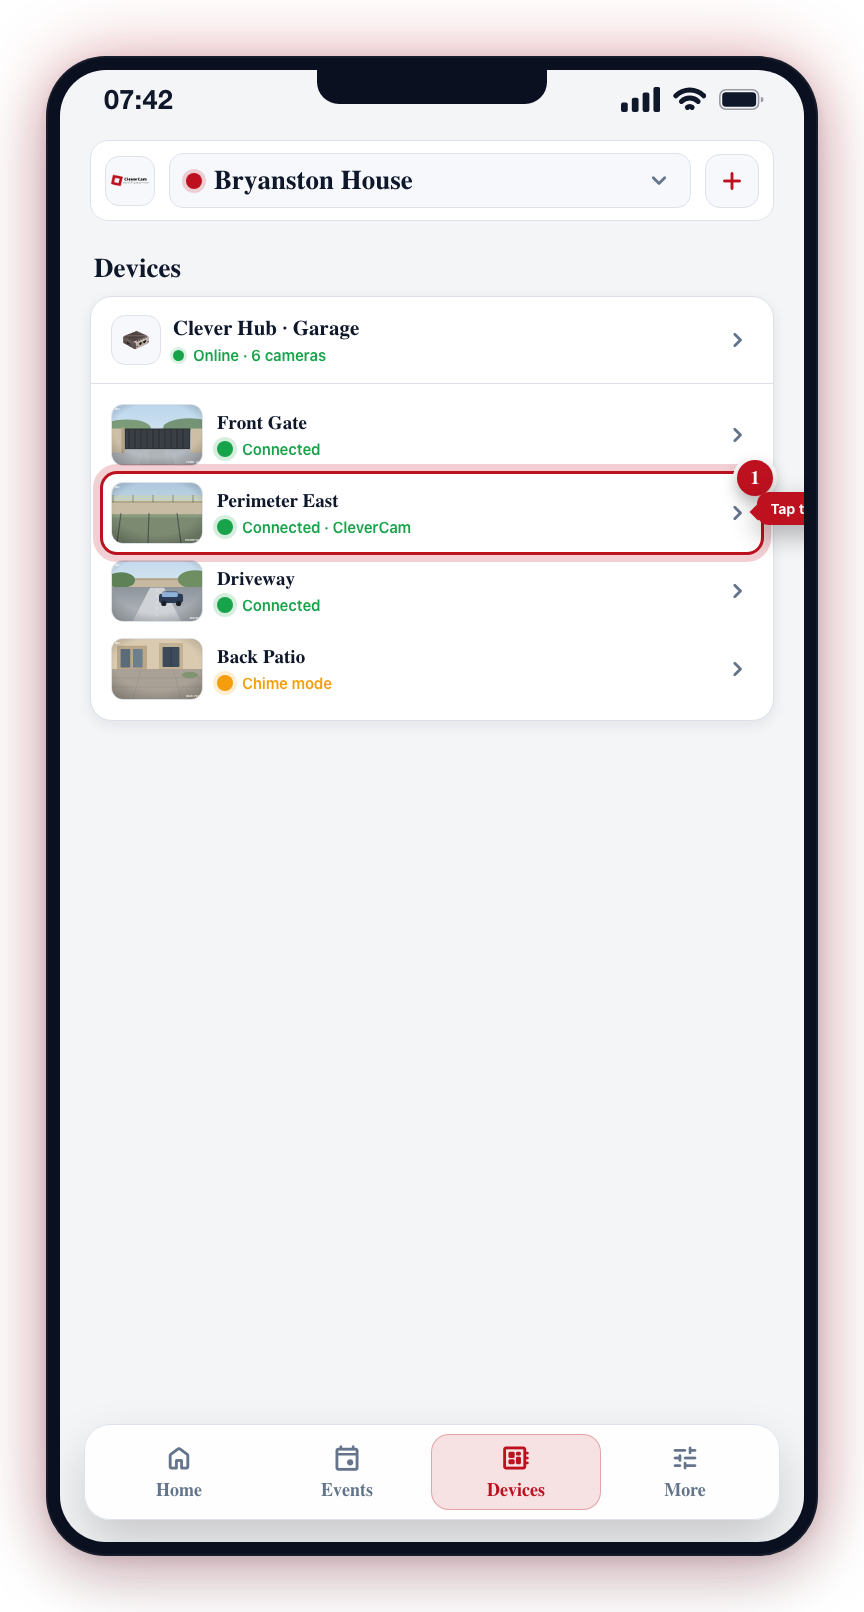
On the Devices tab, tap the CleverCam camera you want to configure — its camera sheet opens. Tap Settings to open the camera's detail screen, which carries the Detection card.
The Detection Pipeline
When a camera detects activity, the event flows through the following steps:
- Camera detects — The Clever Hub's AI engine spots a person (or vehicle, if enabled) in the camera's view.
- Double-check on the hub — The hub automatically re-checks the detection on a zoomed-in crop of the image. Passing this check means high confidence; failing it means the detection could not be confirmed.
- Cloud review — For some detections, a cloud-based second opinion reviews the image. If it decides the detection is a false alarm, the detection is downgraded to low confidence.
- Routing — Based on the resulting confidence grade and your per-camera settings, the detection becomes an alarm event, a triage item, or is skipped.
The Confidence Grades
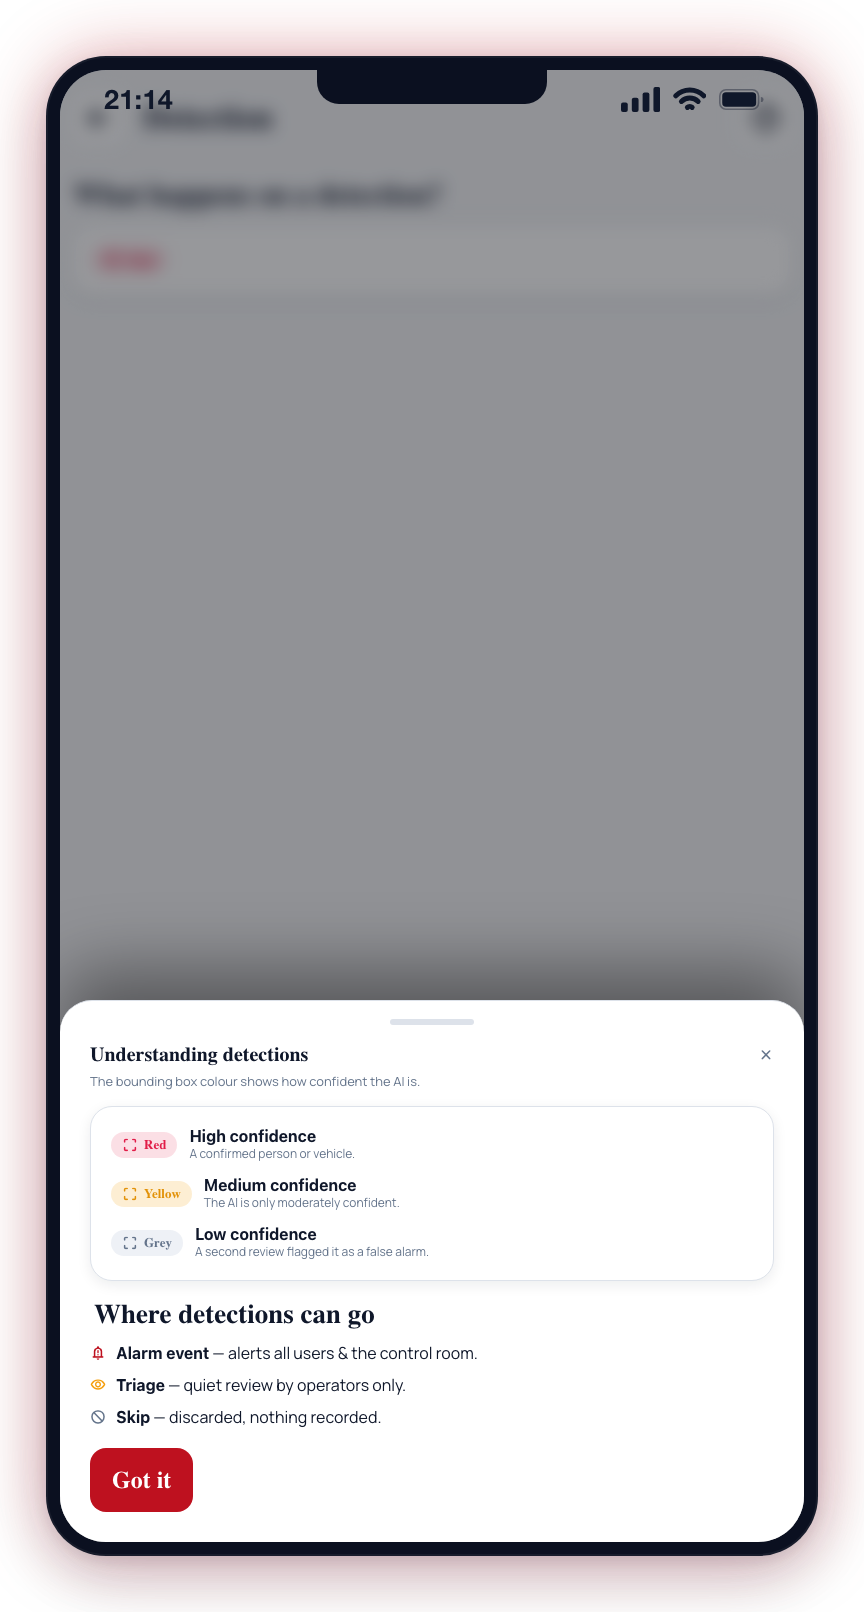
The bounding box drawn on the event photo shows the AI's confidence — the colour follows the confidence grade, not the routing choice.
| Grade | Box colour | Meaning | Default routing |
|---|---|---|---|
| High confidence | Red | The AI is highly confident — a confirmed person or vehicle | Alarm event, siren on |
| Medium confidence | Yellow | The AI is only moderately confident | Alarm event, siren off |
| Low confidence | Grey | The AI has low confidence; a second review flagged it as a false alarm | Triage |
See Detection Tiers for a detailed explanation of each grade.
Low-confidence (Grey) routing is not currently configurable in the app. Only High confidence (Red) and Medium confidence (Yellow) show routing choices. Low-confidence detections follow their existing behaviour — the grey box may still appear on event photos, but there is no chip to change where those detections go. This control may return in a future update.
Medium confidence routing also controls camera sensitivity. Routing Medium confidence to Alarm event or Triage runs the camera at high sensitivity, so it hunts for borderline detections. Routing it to Skip lowers the camera's sensitivity — borderline detections are ignored at the camera and never produce events. There is no separate sensitivity toggle; the Medium routing chip is the control.
Three Routing Choices
Every detection grade is routed to one of three outcomes:
Alarm event
Creates a full alarm event visible to all users and connected control rooms, with photos and timestamps. Push notifications are sent to all app users. A response may be dispatched depending on your service level. Armed cameras can also sound the siren (see below).
Triage
Sends the detection to a quiet review queue for control room operators only. It is not shown in the app, never sounds the siren, and expires after 24 hours. Triage only applies while the camera is armed — in chime or disarmed mode these detections are dropped. This is ideal for lower-confidence detections that need a human to review before escalating.
Skip
The detection is discarded and not recorded. No alarm is created, no notifications are sent, and the detection does not appear anywhere in the app or control room. High-confidence detections cannot be skipped.
Configuring Detection Routing Per Camera
Detection routing is available for CleverCam cameras only. If you open a camera connected to a third-party alarm panel (such as Hyyp, Onyyx, or Olarm), the Detection section reads "Detection configuration is for CleverCam cameras only."
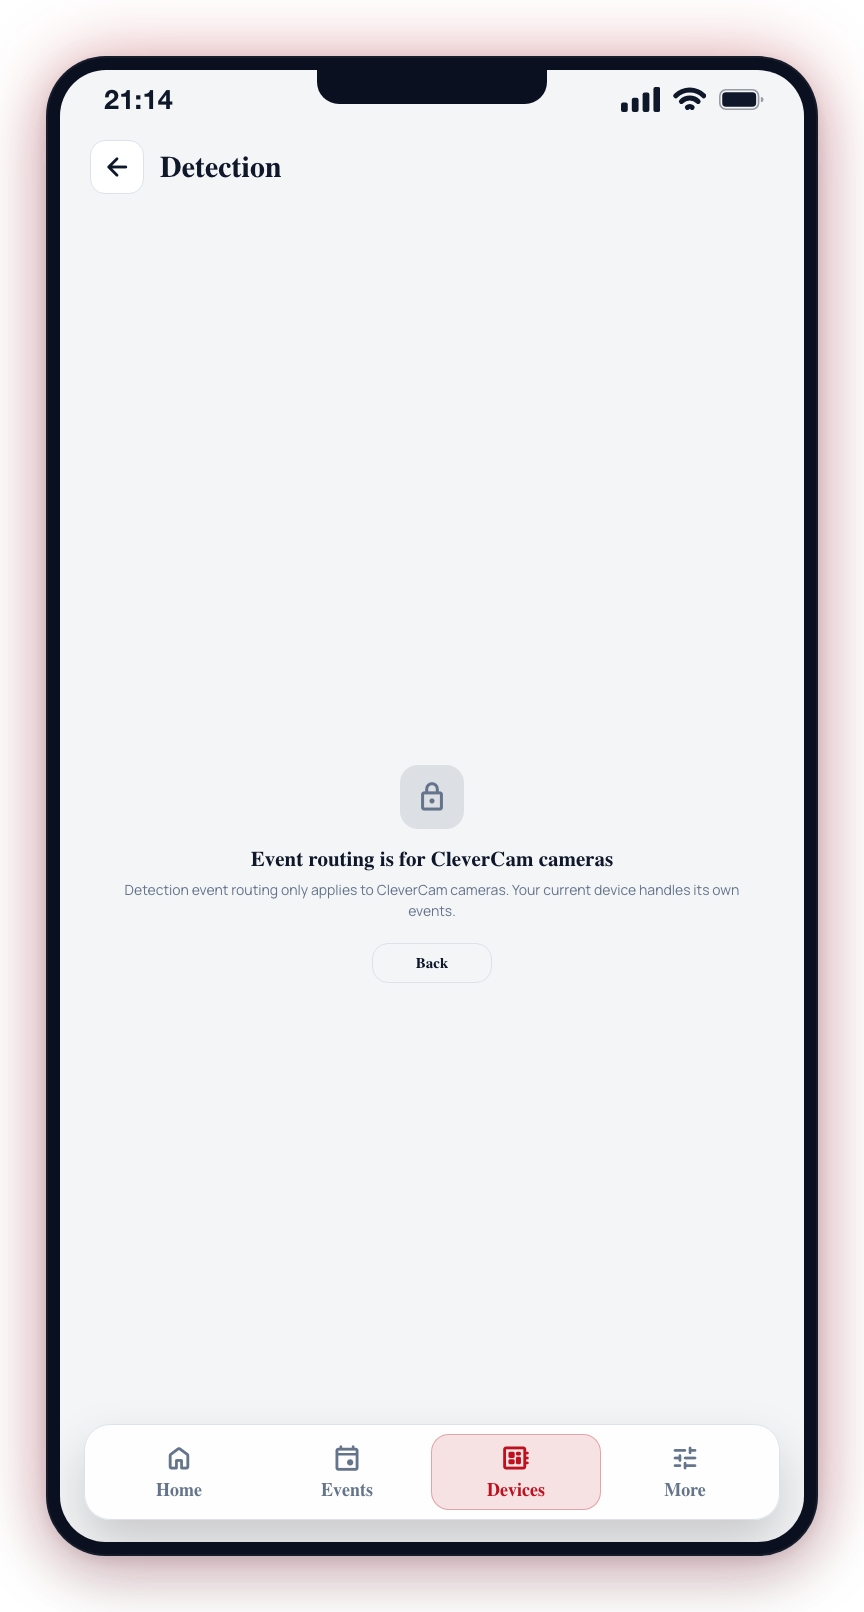
For CleverCam cameras, each camera has its own routing settings:
- Navigate to the Devices tab.
- Tap the CleverCam camera you want to configure — its camera sheet opens.
- Tap Settings to open the camera's detail screen.
- In the Detection card, find What happens on a detection? The configurable grades — High confidence and Medium confidence — each show a box colour, a plain-language description, and a row of choice chips: Alarm event, Triage, and Skip (High confidence has no Skip option).
- Tap a chip to change where that grade goes. For grades set to Alarm event, a Sound siren toggle appears below the chips (High and Medium confidence only — see below). The Medium-confidence chip also sets the camera's sensitivity, as described above.
- Changes are saved automatically as you make selections.
Tap the ? icon next to What happens on a detection? to open the Understanding detections sheet — a built-in reference explaining the box colours and routing choices.
The Sound siren toggle
For the High confidence and Medium confidence grades set to Alarm event, a Sound siren toggle controls whether that grade:
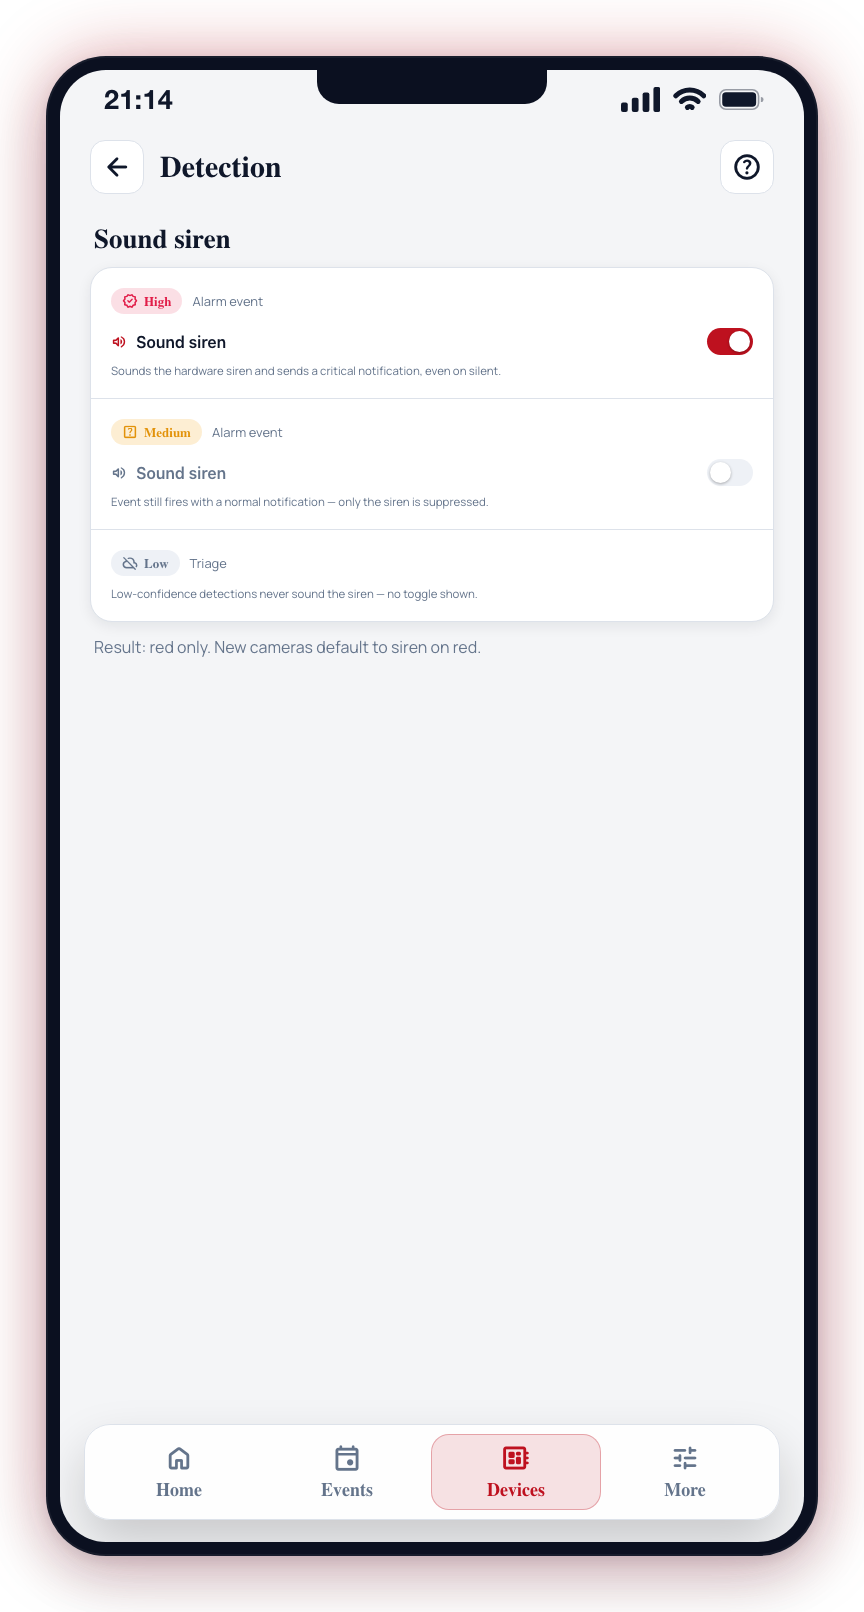
- sounds the camera's hardware siren, and
- sends a critical notification — a high-priority alert that plays a loud sound on users' phones even when the device is on silent or Do Not Disturb.
In practice that gives three siren behaviours: red only, red and yellow, or off. With the toggle off, the event is still created and a normal notification is still sent — only the siren and the critical alert are suppressed. New cameras default to siren on red.
Example Configurations
High-security perimeter camera:
- High confidence: Alarm event, siren on
- Medium confidence: Alarm event
Indoor office camera (armed at night only):
- High confidence: Alarm event, siren on
- Medium confidence: Triage
Camera in a busy area prone to false alarms:
- High confidence: Alarm event
- Medium confidence: Skip
Routing only applies while the camera is armed. When the camera is disarmed nothing fires, and in chime mode detections arrive as chimes (green box) instead of alarms.
Start with the default settings and adjust over time based on your experience. If a camera produces too many uncertain alerts, set Medium confidence to Triage or Skip.