App Overview
CleverAlert is organized around four main tabs accessible from the bottom navigation bar. Each tab gives you quick access to a core area of the app, so you can move between live monitoring, event history, device management, and account settings with a single tap.
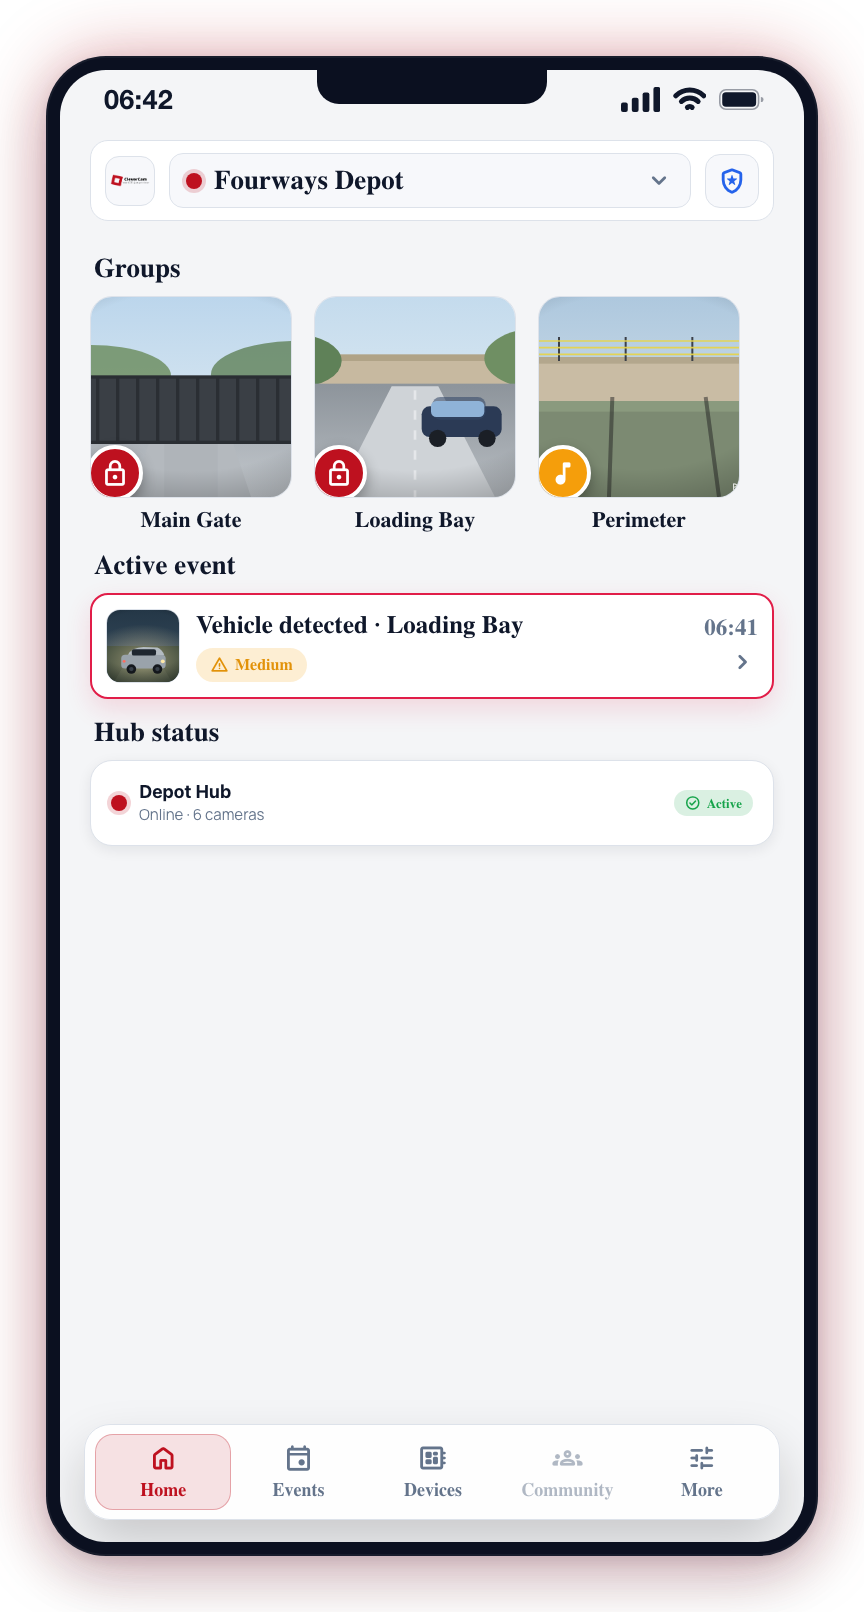
Bottom Navigation Bar
The bottom navigation bar is always visible at the bottom of the screen. It contains four tabs:
| Tab | Icon | Purpose |
|---|---|---|
| Home | House icon | Your main dashboard with the site arm tiles, groups, active events, and schedules |
| Events | Clock/list icon | The last 7 days of events, with filter chips to narrow by type |
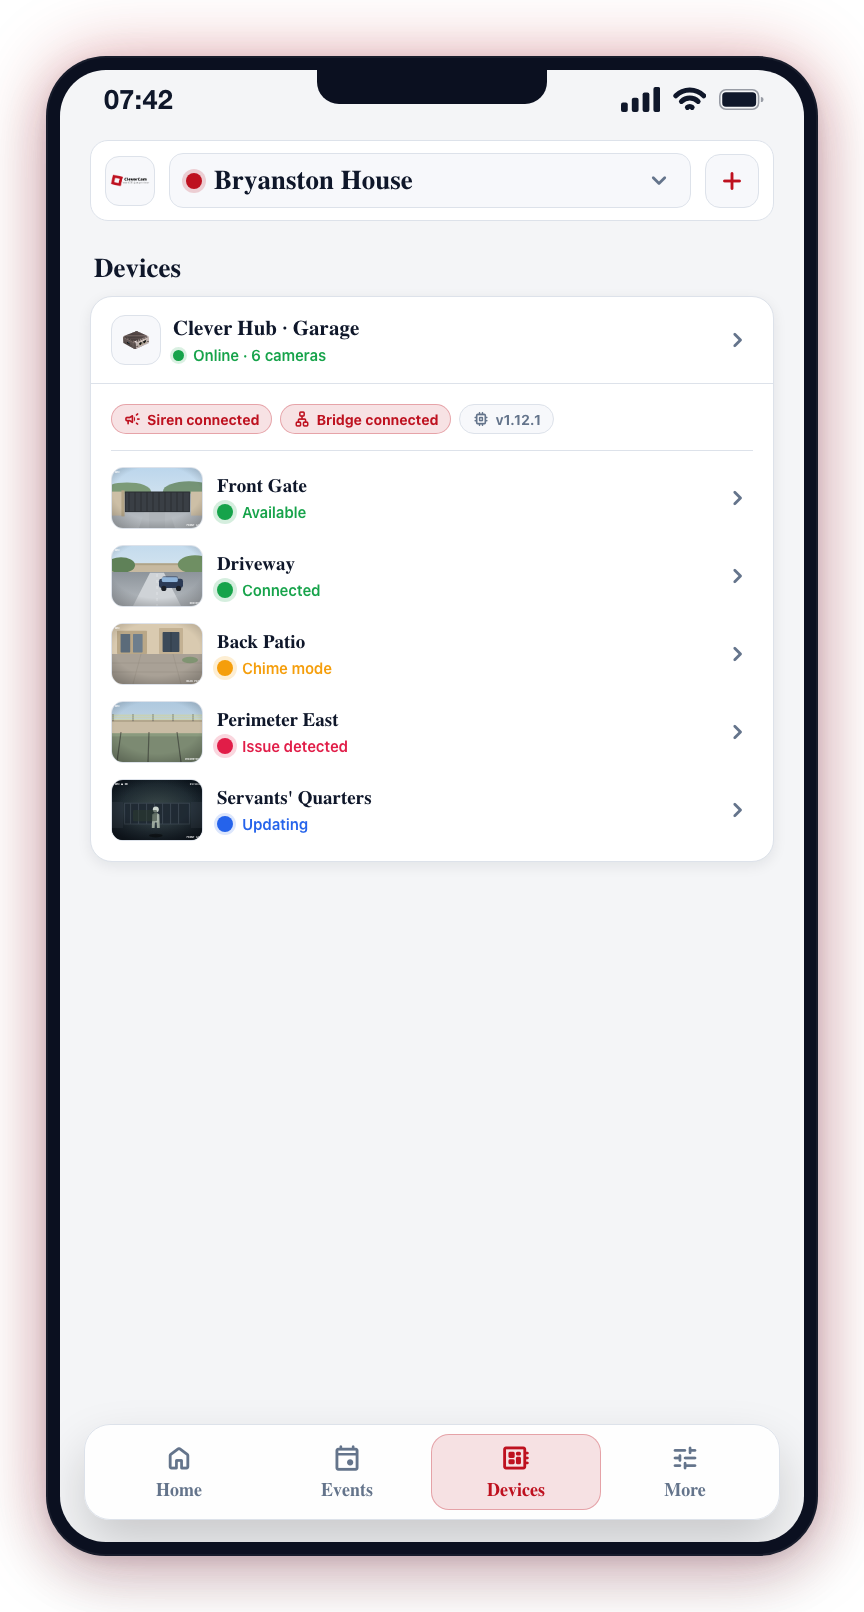
| Devices | Camera icon | Every hub, alarm area, zone, and camera connected to your site |
| More | Menu/dots icon | Help & service, account, site management, communities, and app settings |
Tap any tab to switch to that section. The currently active tab is highlighted.
A few things about the bar and header worth knowing:
- The Events tab shows a small red dot whenever any event has an unread message from your control room. Opening the event clears it.
- The header emergency (SOS) button appears on every tab — it no longer swaps to an "Add device" button on the Devices tab. Adding devices now happens inside the Devices tab itself, via the + Add pill at the top of the hub list.
- The Events and Devices tabs are hidden entirely for panic-only and community-only users — there is nothing for those tabs to show on such sites.
Optional Community Tab
If you have joined at least one community, an optional fifth Community tab (people icon) can appear between Devices and More for quick access to community chimes. You can show or hide it in two ways:
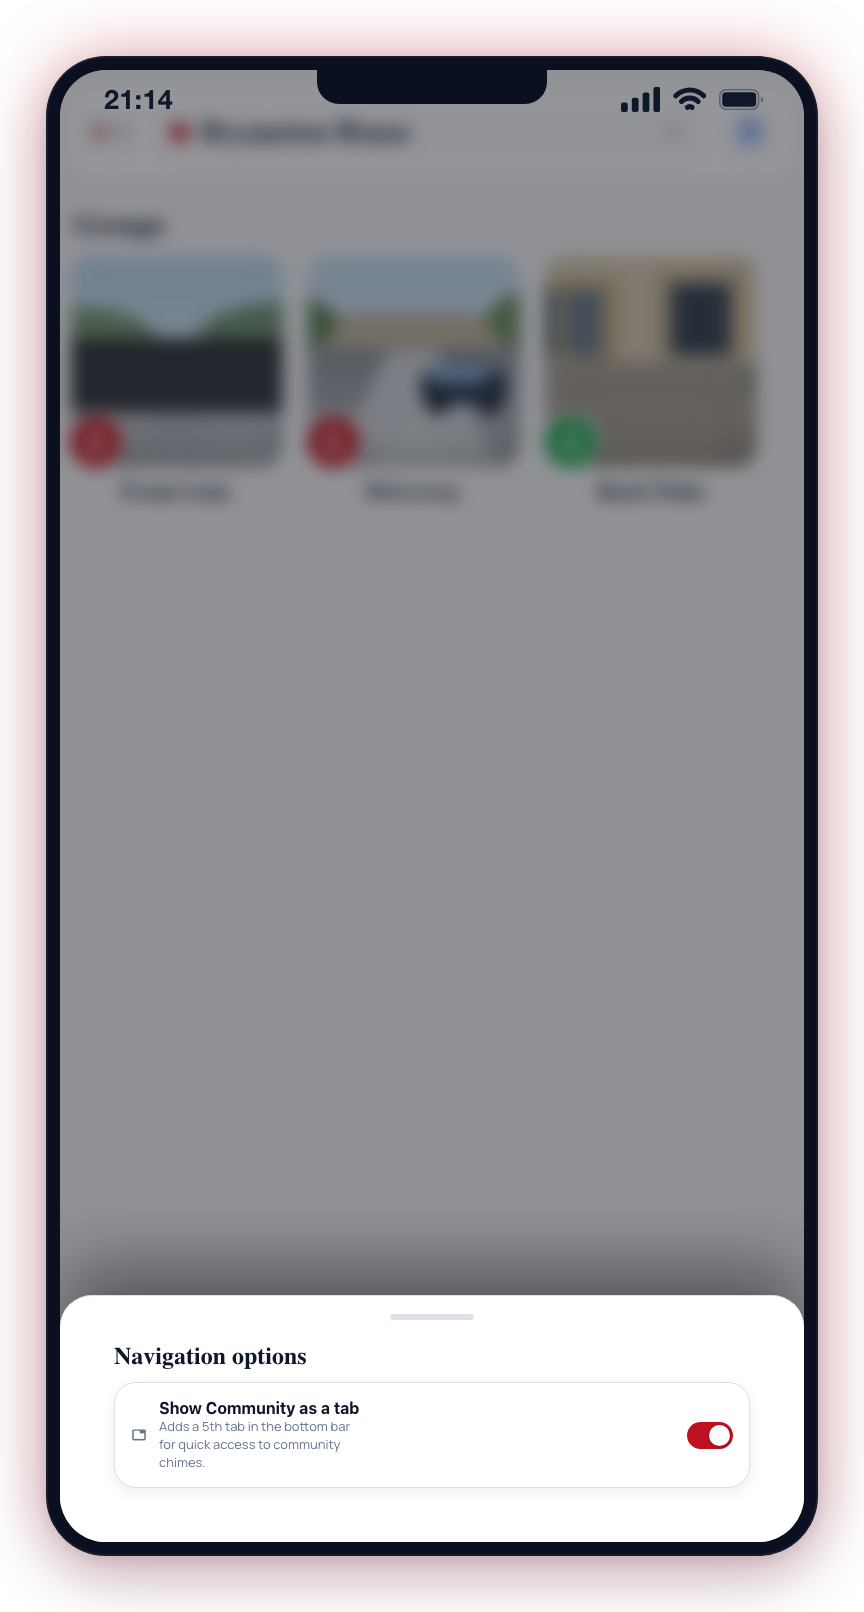
- Press and hold anywhere on the bottom navigation bar to open Navigation options, then flip the Show Community as a tab toggle.
- Open More → Manage Communities and use the same toggle there.
Hiding the tab does not remove any community features -- they all stay reachable from the More tab.
Home Tab
The Home tab is your primary dashboard. It provides an at-a-glance view of your security system status:
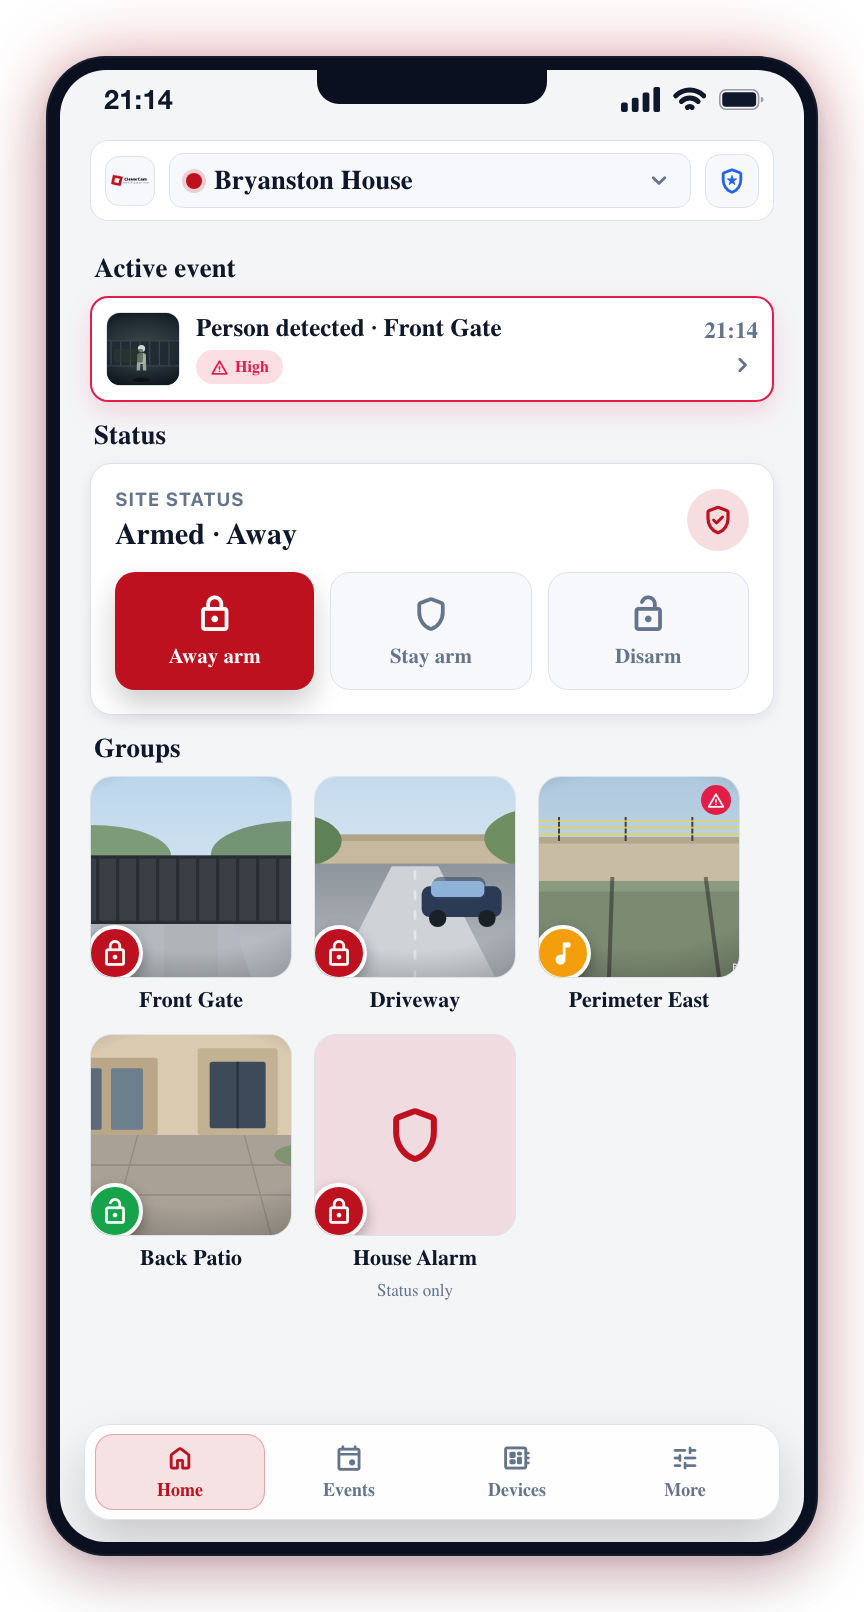
- Site arm tiles -- One card with three fixed tiles: Away arm, Stay arm, and Disarm. The active state fills its tile; the middle tile stay-arms every area that supports it. An Arm options button covers away arm and scheduled arm/disarm; long-press Away arm or Disarm to schedule instead.
- Groups -- Color-coded cards showing your camera groups and alarm areas with their arm/disarm status. Tap a group to arm or disarm it.
- Active Events -- A feed of currently active events that need attention, including detection details and thumbnails.
- Schedules -- Upcoming schedule changes, managed from More → My site → Schedules.
Pull down on the Home screen to refresh all data.
Events Tab
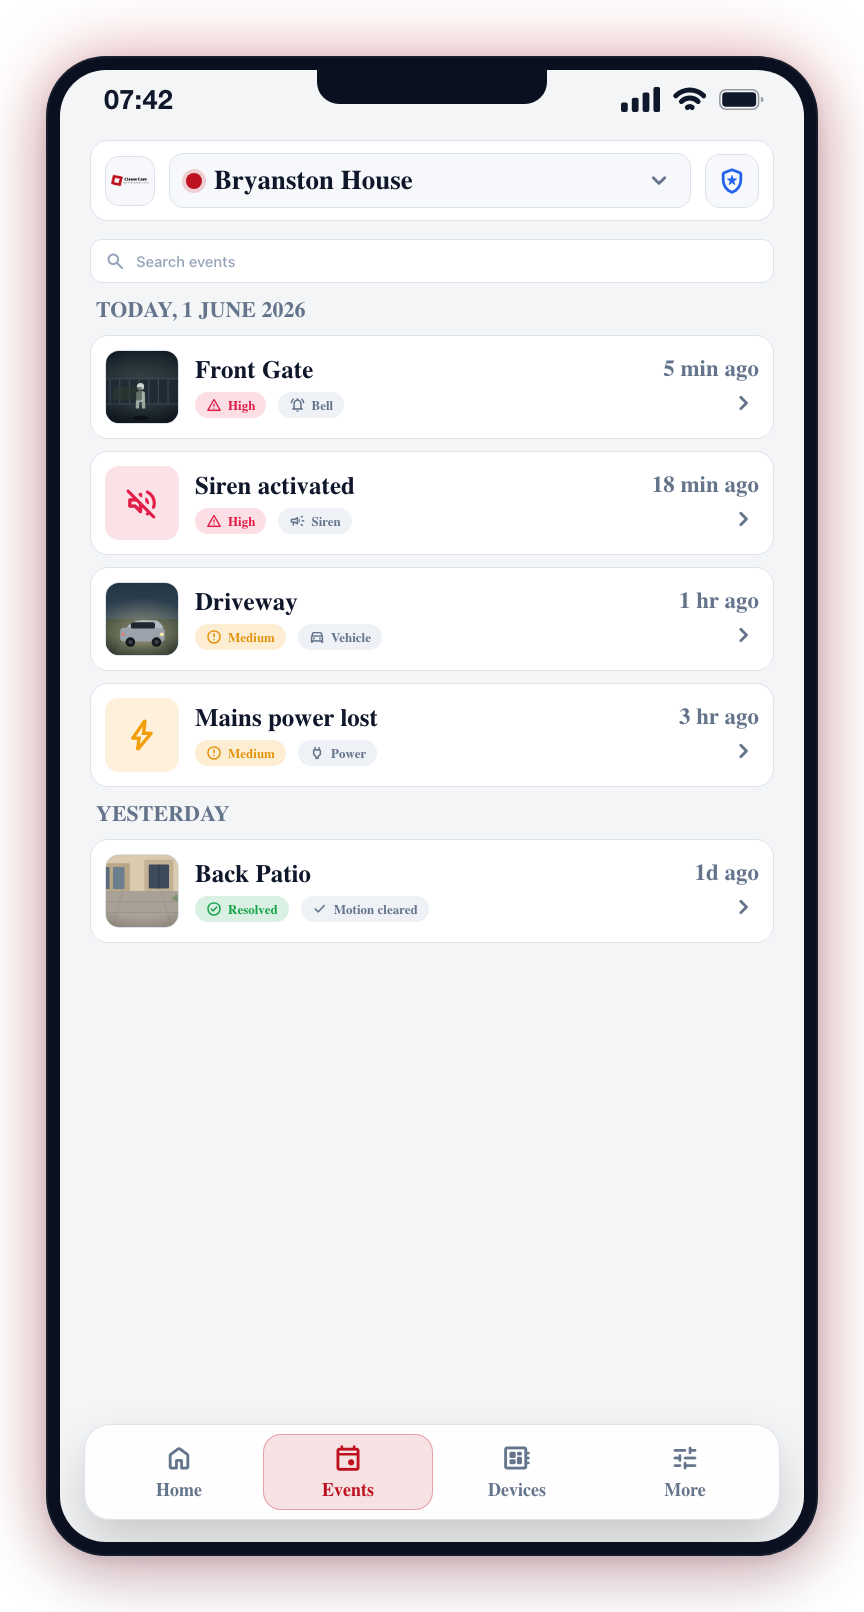
The Events tab gives you access to events from the last 7 days. Events are listed in reverse chronological order grouped by day, with 25 events per page. Scroll down to load more. A row of filter chips at the top — All · Alarms · Arm & disarm · System · Panic — narrows the list by event type. Routine events show as compact one-line rows, while active, emergency, verified, and panic events keep full cards with thumbnails. Repeated arm/disarm and hub offline/online events collapse into single expandable rows so a busy day stays readable.
Devices Tab
The Devices tab lists every hub connected to your current site as an expandable card, with its alarm areas, zones, and cameras nested inside. Alarm areas have an inline Away | Stay | Off control for one-tap arming; cameras render as a two-column snapshot grid — tap one for live view, long-press for more actions. A + Add pill at the top of the list is where you add new devices, and the search on this tab matches hub, area, zone, and camera names.
More Tab
The More tab is organised into clearly labelled sections, top to bottom:
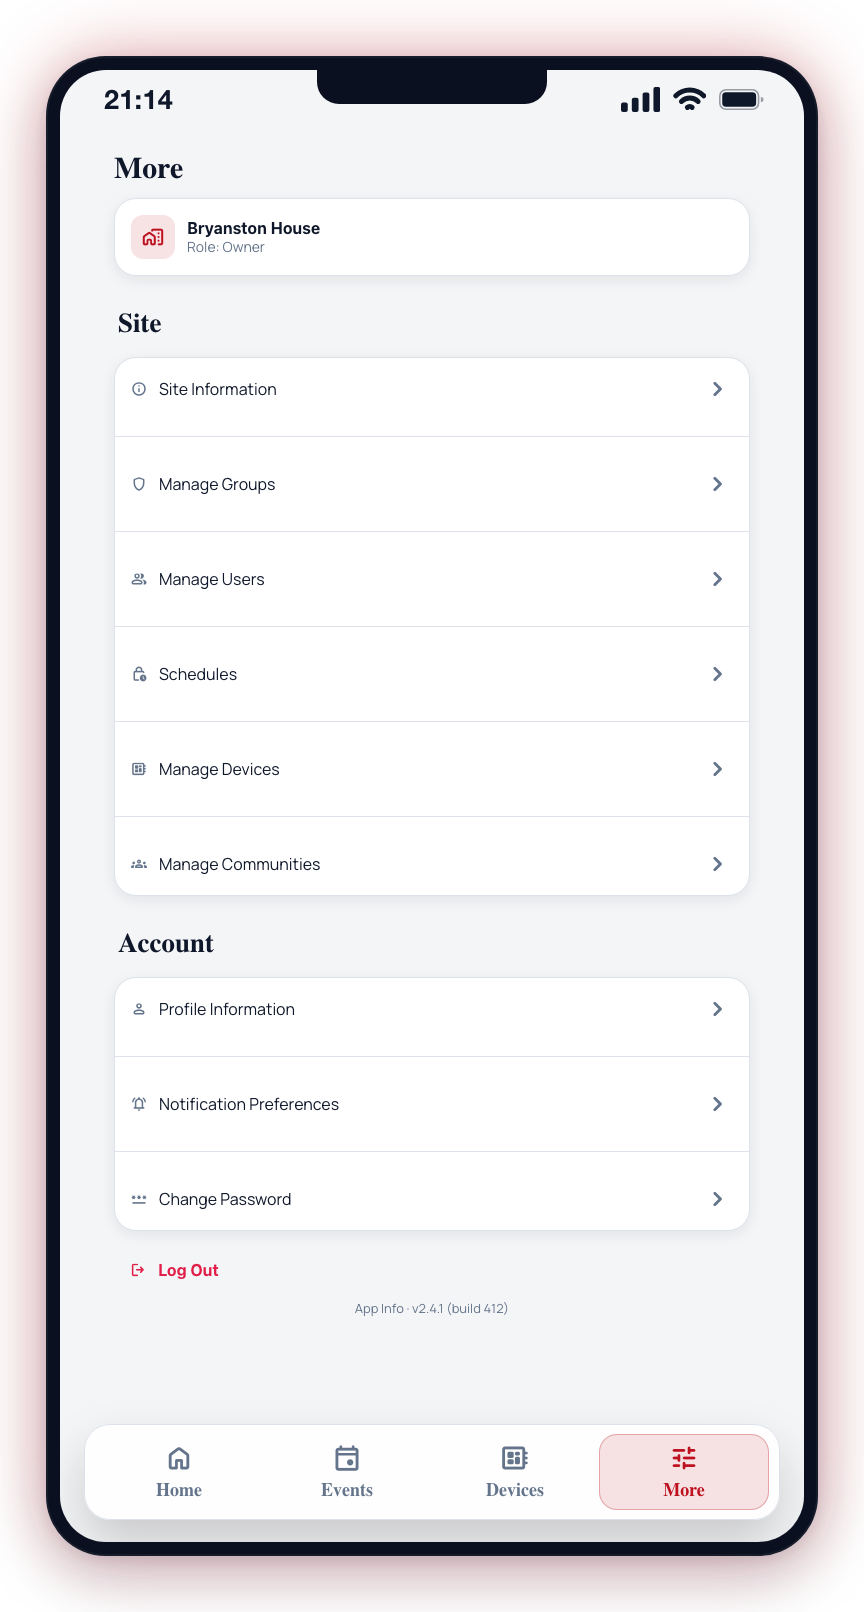
- Site card -- A tappable card at the top showing the current site and your role on it. Tap it to open the site switcher.
- Help & service -- Support requests, Service visits, I'm away, and My security company. Visible to every member of the site (which rows appear still depends on what your security company has enabled).
- Account -- Profile Information, My emergency profile, Notification Preferences, Change Password, and My Account & Billing.
- My site -- For owners and admins: Site Information, Manage Users, Schedules, Response Settings, and Advanced setup (which holds Manage Groups, Alarm groups, Alarm zones, Network, Manage Devices, Technician access, and Test alarm). All roles see Join Site, Create Additional Site, and Leave site.
- Communities & news -- News & updates and Manage Communities.
- App -- Appearance, App Info, Enable Push Notifications, and Log Out.
- Footer -- The app name and version at the very bottom.
Site Selector
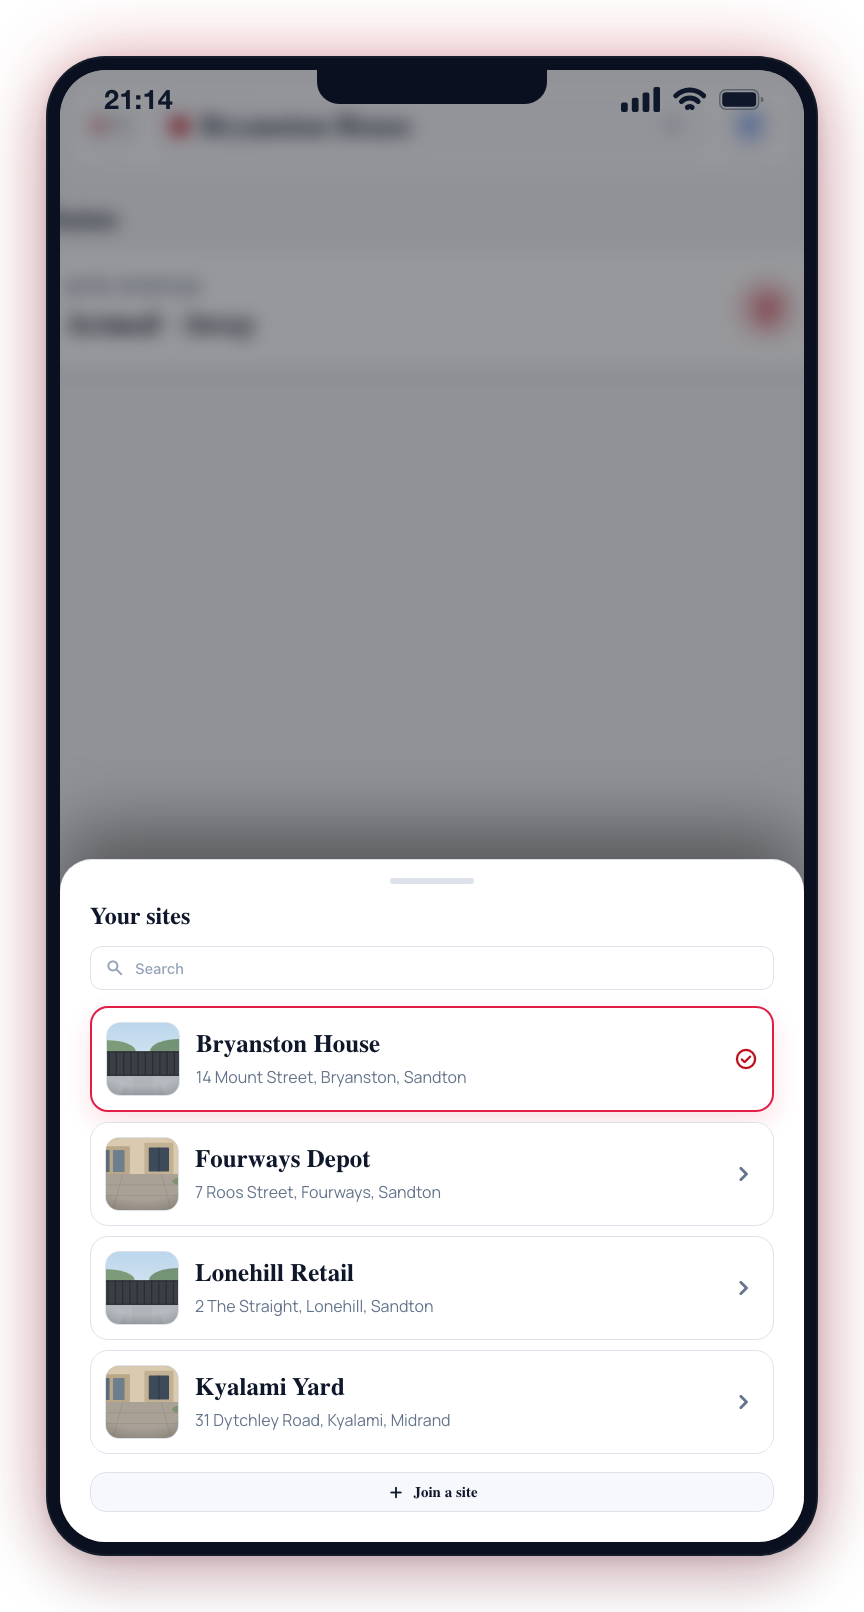
If you have access to more than one site, tap the site selector at the top of the screen. A panel opens listing all your connected sites with search. The site card at the top of the More tab opens the same switcher. When you switch sites, all data on every tab refreshes to reflect the selected site's cameras, events, and schedules.
Spend a few minutes exploring each tab to familiarize yourself with the layout. The Home tab is the best starting point for day-to-day monitoring, while the Events tab is where you go to review past incidents.