Connected Sites
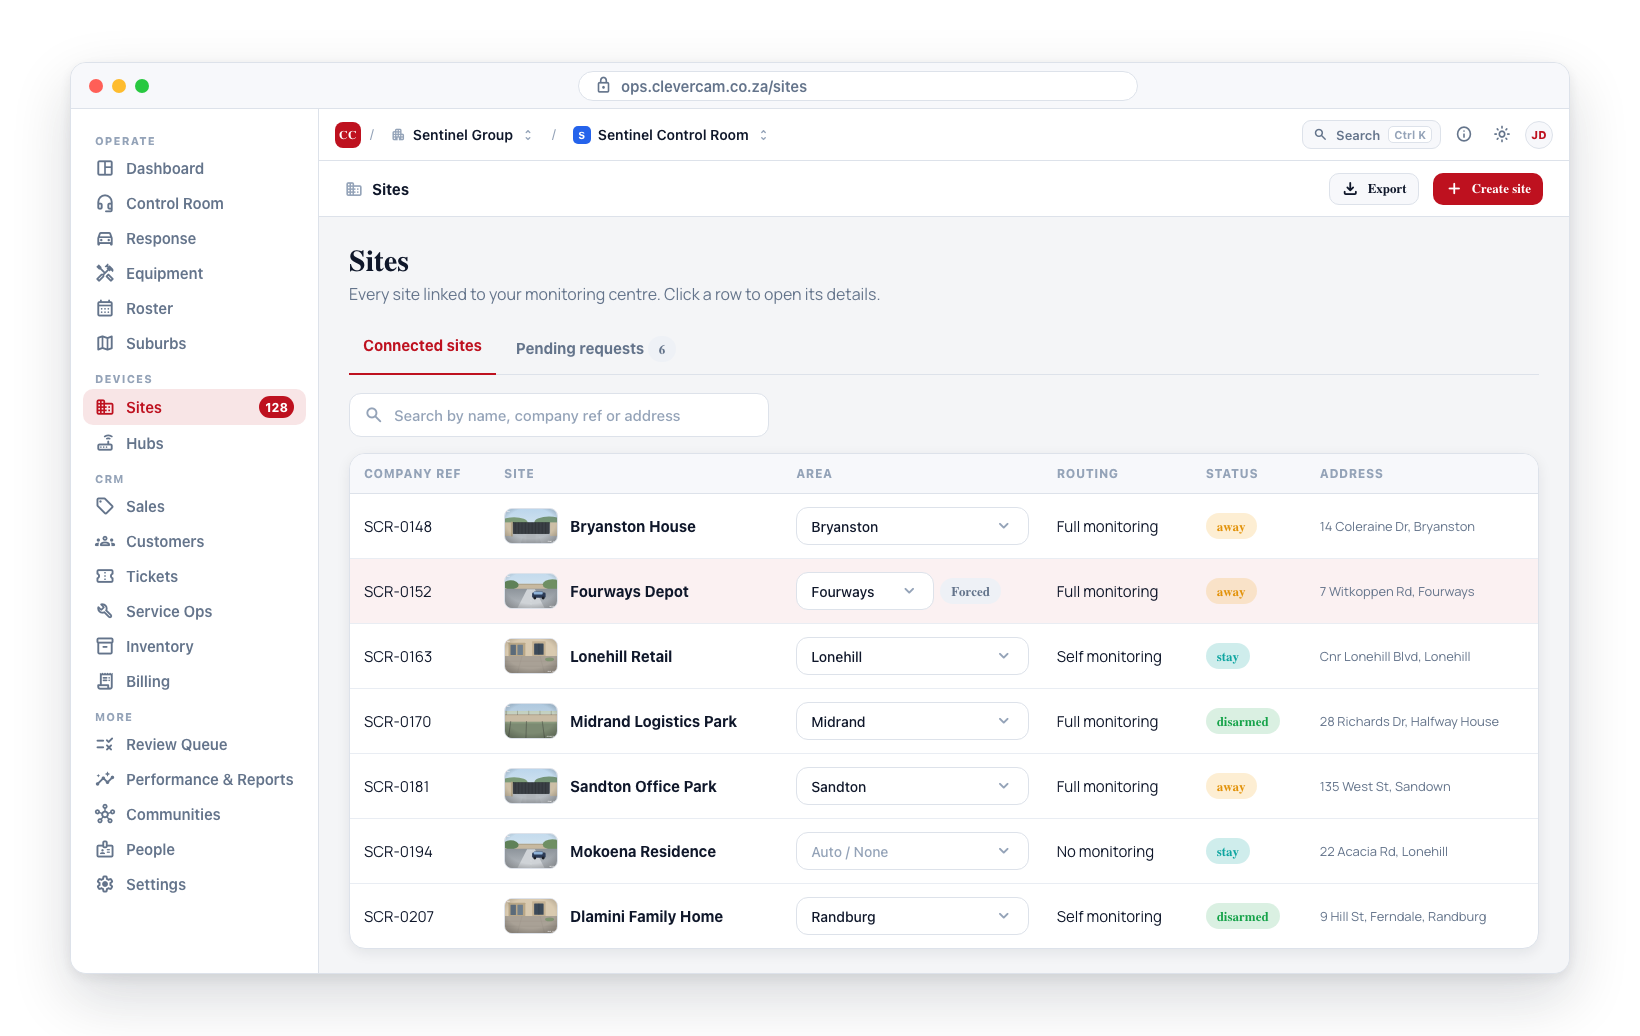
The Sites page shows every site linked to your monitoring centre. It uses two tabs — Connected sites and Pending requests — to separate approved sites from those still waiting for approval. This is your primary view for seeing which locations you are responsible for and accessing individual site settings.
Viewing Connected Sites
-
Navigate to Sites in the sidebar. The page opens on the Connected sites tab by default. If no sites are connected yet, the empty state shows an Add your first site button (for users with permission to create sites).
The page header carries two buttons for anyone with permission to create sites: Add a site (the normal, premises-based route — see Create a Site) and Add personal cover, which sets up anywhere-panic for a person with no monitored premises — see Add Personal Cover.
-
The site list loads as a table. These are the columns it can show — the first group is what most control rooms start with; everything else is a click away under Columns ▾:
The site
- Company ref — Your internal reference code for the site (empty until you set one)
- Site — The site's name with a thumbnail image. A site has one name, and your control room sets it (see Site name). This column cannot be switched off — it is what each row is.
- Setup — six dots (four without the CRM module), one per thing the desk needs before the site can be worked: pin on the map, people to call with a word (the site's own password counts for everyone on the list), something protecting it, first signal received, and on CRM control rooms the customer and a subscription. Green is done, amber is still open; the word beside them reads Ready or, say, 3 of 6. Hover for the open items.
- Customer — the customer account the site belongs to (CRM control rooms only)
- Site users — the people connected to the site (CRM control rooms only)
- Keyholders — how many people are on the call list, and how many of them hold a challenge word. Nobody to call and 0 with word are the two states a desk needs to see before an alarm, not during one.
- Site ID — the site's number, for support conversations
Where it is
- Suburb — the suburb the site sits in, editable directly from this view. When nothing has been forced the dropdown reads Auto · Suburb, naming the suburb the pin resolves to; a forced choice carries a Manual badge.
- Branch — the dispatch branch that suburb belongs to (Advanced Alarm Handling only)
- City / town — the town line of the address
- Address — The physical address of the location
- Pin — whether the site has a position on the map at all
Monitoring and hardware
- Monitoring — the monitoring mode (Full monitoring, Self monitoring, or No monitoring)
- Package — the monitoring package on the connection, where one is set
- Status — the site's arm status
- Last arm change — Armed or Disarmed, and how long ago it changed
- Hub — the hub or communicator at the site with an Online / Offline badge, its name and type (say Olarm or CCU 8), and +N when there is more than one. Hover for every hub.
- Serial — the hub's serial or IMEI
- Last heartbeat — when the hub last reported in
- TX number — the account code(s) the site's panel transmits under
- Zones and Partitions — how many the panel has
Activity and the connection
- Last event — the most recent signal or detection, how long ago, and what it was. Reads None on record for a site that has sent nothing since the live event store began.
- Mode — Installation, Test mode or Suspended while one is in effect on the site (hover for when it ends); Normal otherwise
- Link role — whether your control room is the site's Primary or a Secondary
- Connected since — when the site was approved onto your control room
- Site created — when the site record itself was made
Choosing your columns
The list does not show all of those at once. Columns ▾, above the table, is where you decide which ones it shows — tick a column to bring it in, untick it to hide it. The button says how many are currently hidden, so a column somebody switched off is never a mystery. Site is listed too, ticked and greyed with always beside it: it cannot go, and the list says so rather than leaving it out.
Put them in the order you read them. The ↑ and ↓ beside each column in Columns ▾ move it one place; a column heading's own menu (the small ▾ that appears when you hover a heading) has Move left and Move right for the same thing. Locked columns stay where the list put them, but other columns may move past them.
Your choice is yours alone and it follows you. Columns, their order and the sort are saved against your login, not the browser, so the list looks the same on the control-room machine and on your laptop, and changing it does not touch what your colleagues see. Reset to default view puts everything back.
What you start with depends on whether you run the CRM module:
| With the CRM module | Without the CRM module |
|---|---|
| Company ref, Site, Setup, Customer, Address | Company ref, Site, Setup, Suburb, Monitoring, Status, Address |
A CRM control room manages accounts, so its default spends the width there. Nothing is locked away by that choice any more — a CRM control room that wants arm status, or a non-CRM one that wants a wider view, just switches the column on. Every other column starts switched off, and the list only fetches the data behind the columns that are showing, so a page with the default set is as quick as it ever was however many columns exist.
Sorting the list
Click a column heading to sort by it; click it again to reverse. An arrow marks the column the list is sorted on. The heading's ▾ menu offers the two directions by name — A → Z / Z → A for text, Largest first / Smallest first for counts and times — so you never have to click twice to get the one you meant.
These headings sort: Company ref (the default), Site, Suburb, City / town, Status, Last arm change, Hub (online first), Last heartbeat, TX number (sites with one first), Zones, Keyholders, Last event, Link role, Connected since and Site created.
The sort is done by the server across your whole book of sites, not just the page on screen — so sorting by site name and paging forward really does walk the alphabet, rather than re-shuffling the fifty rows you happen to be looking at. Like your columns, the sort is saved against your login.
The remaining headings — Setup, Customer, Site users, Branch, Address, Pin, Monitoring, Package, Serial, Partitions, Mode and Site ID — are not sortable; their menu says so. To read the list by customer, use By customer (see The By customer View below) rather than a sort.
Filtering from a column
A column's ▾ menu is also where its filter lives, so the answer to "how do I narrow the list by this" is the same for every column. Pick a value and the whole estate is filtered; the heading's ▾ turns solid while a filter is set, and a chip naming the filter appears in the filter bar — even if you later hide the column — with × to clear it. Clear filters clears these along with everything else.
- Hub — Online, Offline (a hub is linked and none of them is online) or No hub
- Link role — Primary or Secondary
- Mode — any override in effect, or specifically Installation, Test mode or Suspended
- TX number — has one / has none
- Keyholders — Nobody to call, or people on the list but Nobody with a word
- Pin — pinned or not
- Zones — has zones or none
- Last event — Within 7 days, Within 30 days, Quiet 30+ days, or No events on record
The Suburb, Branch, Monitoring and Status columns reach the same filters as the dropdowns in the filter bar, from their heading. Column filters are session-scoped — they clear when you leave the page.
The Customer Column
If your control room has the CRM module enabled, the list carries a Customer column showing which customer account each site belongs to.
- Click the customer name to jump straight to that customer's record — the click opens the customer, not the site, so the row underneath is not triggered.
- Sites with no customer attached read Unassigned, with a small Set customer icon beside the word for anyone who can manage customers. Link them there, from the customer's Sites & contacts tab, or from Who is this for? when adding a site.
- A site you share with another control room that belongs to one of their customers reads Customer of another control room — no name, no link and no Set customer, because that customer is not yours to open or change. The CSV export says the same.
Control rooms without the CRM module do not see this column at all — sites there have no customer to point at.
The Site Users Column
Also CRM-only, and switched off by default, the Site users column answers "who is on this site?" without opening it. Switch it on under Columns ▾ if you want it. It shows the first connected person, then a quiet +N more when there are others -- hover the cell for the top few names.
- The two shown are the most senior connections — owners first, then admins, then everyone else — so the name you see is normally the one worth contacting.
- Owner and Admin are labelled next to the name. Ordinary users carry no label.
- Hover the cell to see the top three connected names (owners first, then admins) and how many more there are. The full roster is on Site Details → Users.
- Sites with nobody connected read No users.
This is a read-only summary. To add, remove, rename or reorder the people on a site, open the site and use its People tab — that is where phone numbers, call-list order and the non-app (phone-only) contacts live.
The Setup Column
Every row carries its Setup dots, computed for the page in front of you from the site's own records — the same six facts the Setup card on the site page lists, in the same order. A site is Ready when every dot is green.
- The Setup filter above the table narrows the loaded page to Needs setup or Ready to monitor. It works on the rows already on screen (the count chip then reads, say, 12 of 50 on this page), because the server knows nothing about setup — the dots are worked out here.
- Nothing about the dots is a control; open the site to fix a line.
The By customer View (CRM module)
On control rooms with the CRM module, a Sites / By customer switch sits at the right of the filter bar.
- Sites is the flat list you have always had.
- By customer folds each customer's sites under one header row — the customer's name (click it to open the customer), how many sites, and whether they are all ready or how many still need setup — with the sites beneath it. Click the chevron to fold or unfold a customer. Open customer on the right of the row opens the account.
- A site with no customer — or with another control room's customer — stays exactly where it was: a plain row of its own, never hidden in a bucket. With no customer, its Customer cell reads Unassigned with a Set customer button beside it (in either view) that opens the same link wizard the site page uses; with another control room's customer it reads Customer of another control room and has no button.
- Customers appear in the order their first site appears, so the grouping follows whatever sort the list is on. The grouped view asks for 200 rows a page so a customer's sites rarely straddle a page boundary.
The choice is remembered per browser. Control rooms without the CRM module never see the switch — their list is unchanged.
Searching
The search bar at the top of the table searches your whole estate, not just the page in front of you. It matches everything the app-wide search (Ctrl+K) finds for a site, plus the account codes an operator usually has in hand:
- Site name and company reference (the site's account code in your control room)
- The hub or panel at the site — its serial (an IMEI, an Olarm ID, a radio code) and the TX number (account code) it transmits, so typing
1847finds the site whose panel reports on account 1847 - Address — every line, including suburb, city, province and country
- The people connected to the site — the name they are saved under on that site and, for app users, their profile name (both work: a contact saved as "IANET" is still found by their real name), and their phone number
- Site notes — the monitoring, responder and site-user notes
- The customer, when the CRM module is on — their name, legal name, account number or legacy code, so typing a customer or their account finds every site billed to them (your control room's customers only: another control room's customer on a shared site is not searchable here)
- The site number itself, typed exactly
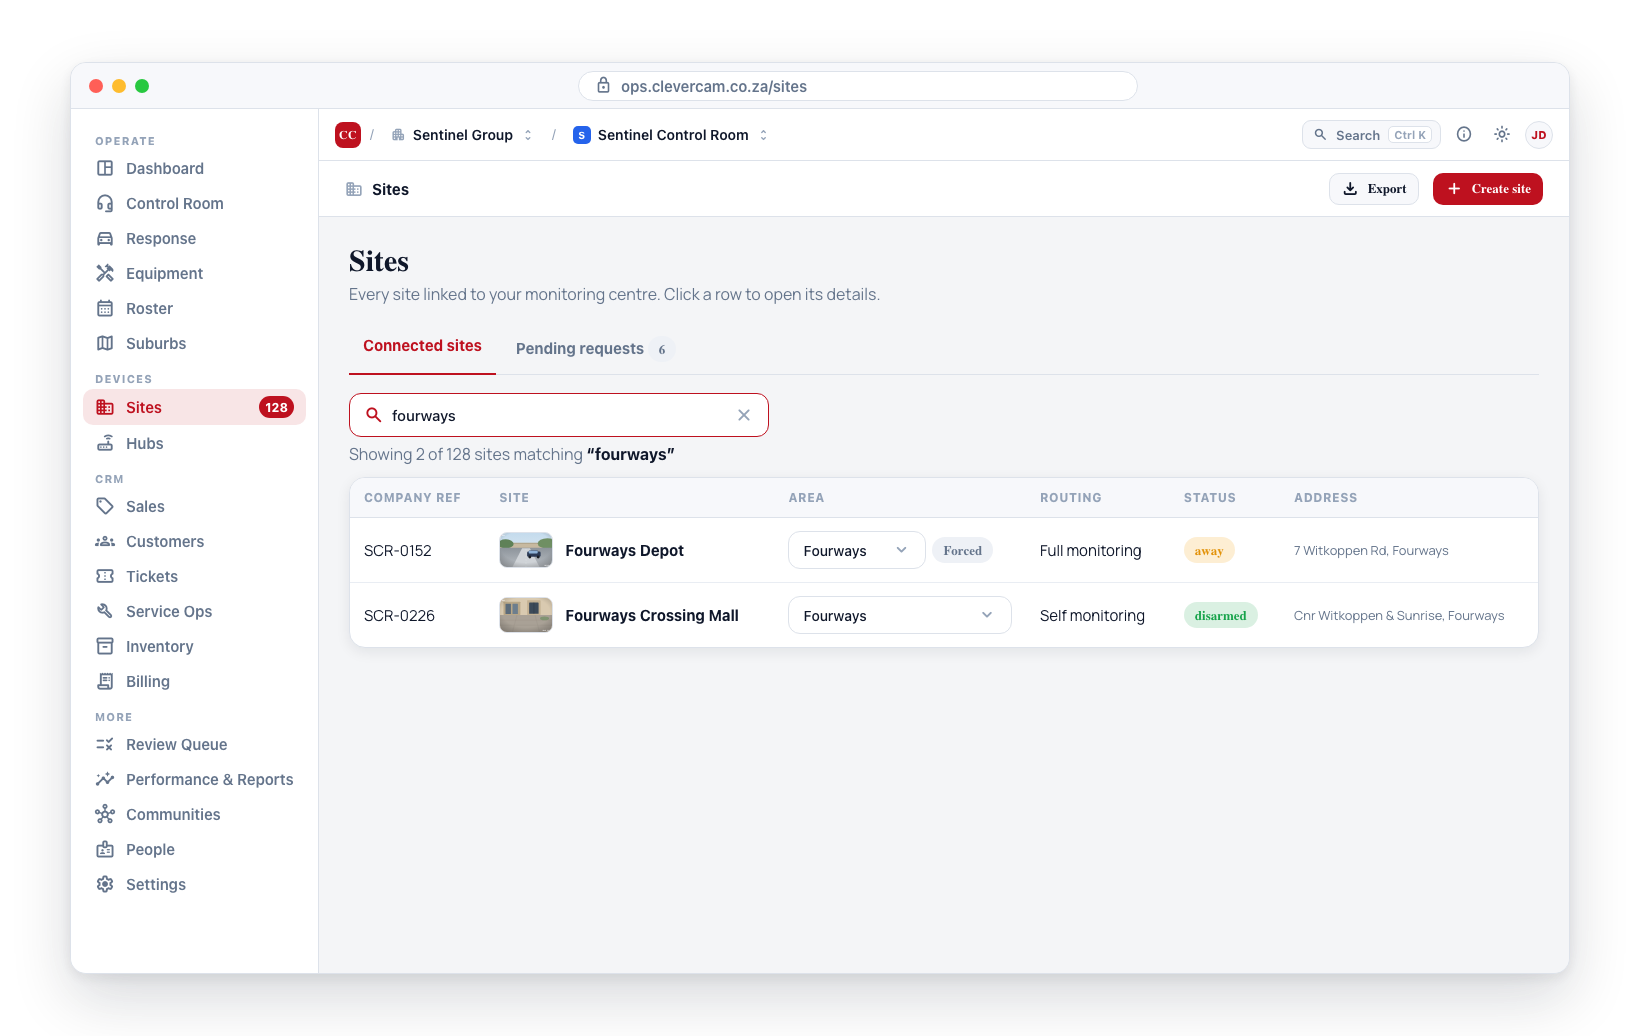
The search runs on the server, so it waits for a brief pause in your typing (about a quarter of a second) before it fetches. On a control room with thousands of sites that is the difference between a list that answers instantly and one that has to download the whole book before it can look anything up — and it means a match on site 3,000 is found just as reliably as one on site 3.
Numbers match on their last nine digits, so 0821234567, +27 82 123 4567 and 82 123 4567 all find the same person. That makes the search bar a quick way to answer "whose site is this number on?" when someone phones in.
If your monitoring centre manages hundreds of sites, use the search bar as your primary navigation tool. Typing the first few characters of a site name is usually faster than scrolling through the list.
Filtering
Next to the search bar is a row of filter dropdowns. They narrow the current tab and combine with the search text and each other. Two groups can appear:
Available to every control room
- Monitoring — filter by monitoring mode: Full monitoring, Self monitoring, or No monitoring.
- Arm status — filter by the site's current arm state (for example Armed or Disarmed). Only the states present in your list are offered.
- One dropdown per custom site field you have configured (see Site fields). A flat field (for example Type) is a single dropdown; a cascading field (for example Location) shows its options indented, and picking a higher level (say a city) matches that value and everything nested beneath it. Each field dropdown also offers Unset to find sites with no value yet.
- Tag — filter by an account tag. Sites carry tags under their name, and a + Tag picker on the row adds one. Ad hoc / Subscription and the account-health tags are applied automatically from live billing and hub state; the rest are labels you define.
Requires the CRM module
- Account health — narrow to Active accounts (a hub is linked and a subscription is running), Monitored, not billed, or Billed, not monitored. Each option carries a live count, and a quiet review line above the table calls out the sites where the two disagree. It only appears with the CRM module on, since it compares a subscription against a hub.
Requires Advanced Alarm Handling — the two dispatch filters, since suburbs and branches only mean something once this control room does its own dispatching:
- Suburb — show only sites in a patrol suburb. This uses the site's resolved suburb — the one forced on it or, if none is forced, the suburb whose map boundary the site falls inside — so geofenced sites are included, not only manually-assigned ones (the same logic dispatch uses). Choose Unassigned for sites in no suburb at all.
- Branch — show only sites in a dispatch branch, based on that same resolved suburb (forced or geofenced). It appears only once you have set up branches.
A count chip on the right shows how many sites match out of the tab total (for example 12 of 340), and when any filter is active a Clear filters button resets them in one click. Each site row also shows its custom field values as small chips under the site name. The search text, tab, and the four built-in filters are kept in the page address (bookmarkable, and the back button restores them); the custom site-field filters are session-scoped.
Every filter — including the search box — is applied by the server across the whole tab, so the counts and the pages always describe your entire estate rather than a subset that happened to load.
Exporting the list
Export CSV, beside the count chip, downloads every site the current tab, search and filters match — not the fifty rows on screen. It pages the whole set before saving, so a filtered export of two thousand sites is one file (sites-2026-09-10.csv; sites-pending-… from the Pending requests tab).
The columns in the file are the columns on screen, in your order, with Site always first — so a view built for a hub audit downloads as a hub audit. Values are the plain text of each cell; dates are written as 2026-09-10 / 2026-09-10 14:05 so they sort and open as dates. Keyholders becomes two columns (the count, and how many hold a word) so both can be summed. Setup is worked out for every exported site when that column is on, or when the Setup filter is set — that filter, which only ever narrows the page in front of you on screen, is applied to the whole export.
Paging Through the List
The table shows 50 sites at a time (200 in the By customer view), with Prev / Next and a "Showing 1–50 of 340" line beneath it. Short lists show no pagination at all.
Paging, searching and filtering all happen on the server, so the page you are looking at is fetched on demand rather than sliced out of a copy of everything. Turning a page returns you to the top of the list, so you start the new page at its first row rather than halfway down it. Changing the search or any filter returns you to page one, since a page number from the previous result set no longer means anything. The rows already on screen stay put while the next page loads, so the table does not blink between pages.
Changing a Site's Suburb
When the Suburb column is showing, you can change a site's suburb assignment directly from the table, without opening the site details. It is on by default without the CRM module; CRM control rooms switch it on under Columns ▾.
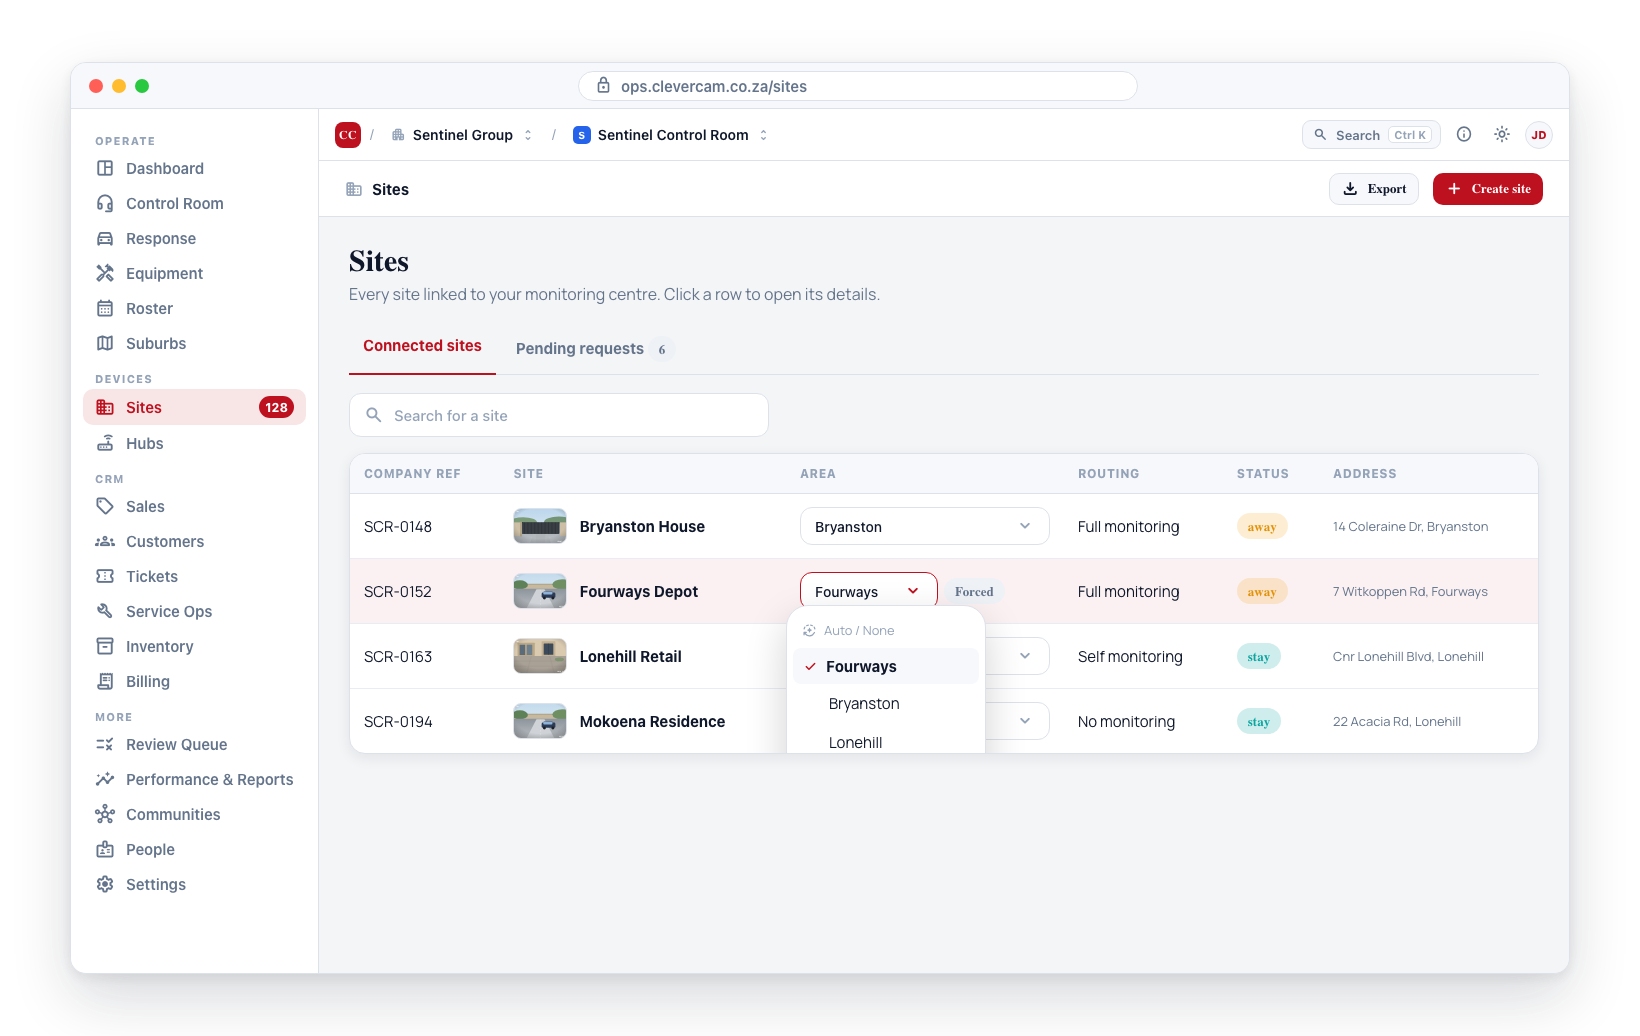
- In the Suburb column, click the dropdown for the site you want to update.
- Select a suburb from the list, or choose the Auto entry to clear the manual assignment. That entry names the suburb the site's pin resolves to (Auto · Kroonstad Noord, say), or reads Auto / None when the pin falls inside no suburb boundary.
- Manually assigned suburbs are marked with a Manual badge.
With the Suburb column hidden there is nothing to edit in. Either switch the column on, set the suburb from the site's own record, or assign sites in bulk from the Suburbs page — the last two routes are covered in Site Assignment. The Suburb filter above the table is unaffected either way.
Accessing Site Details
To view the full details of a connected site:
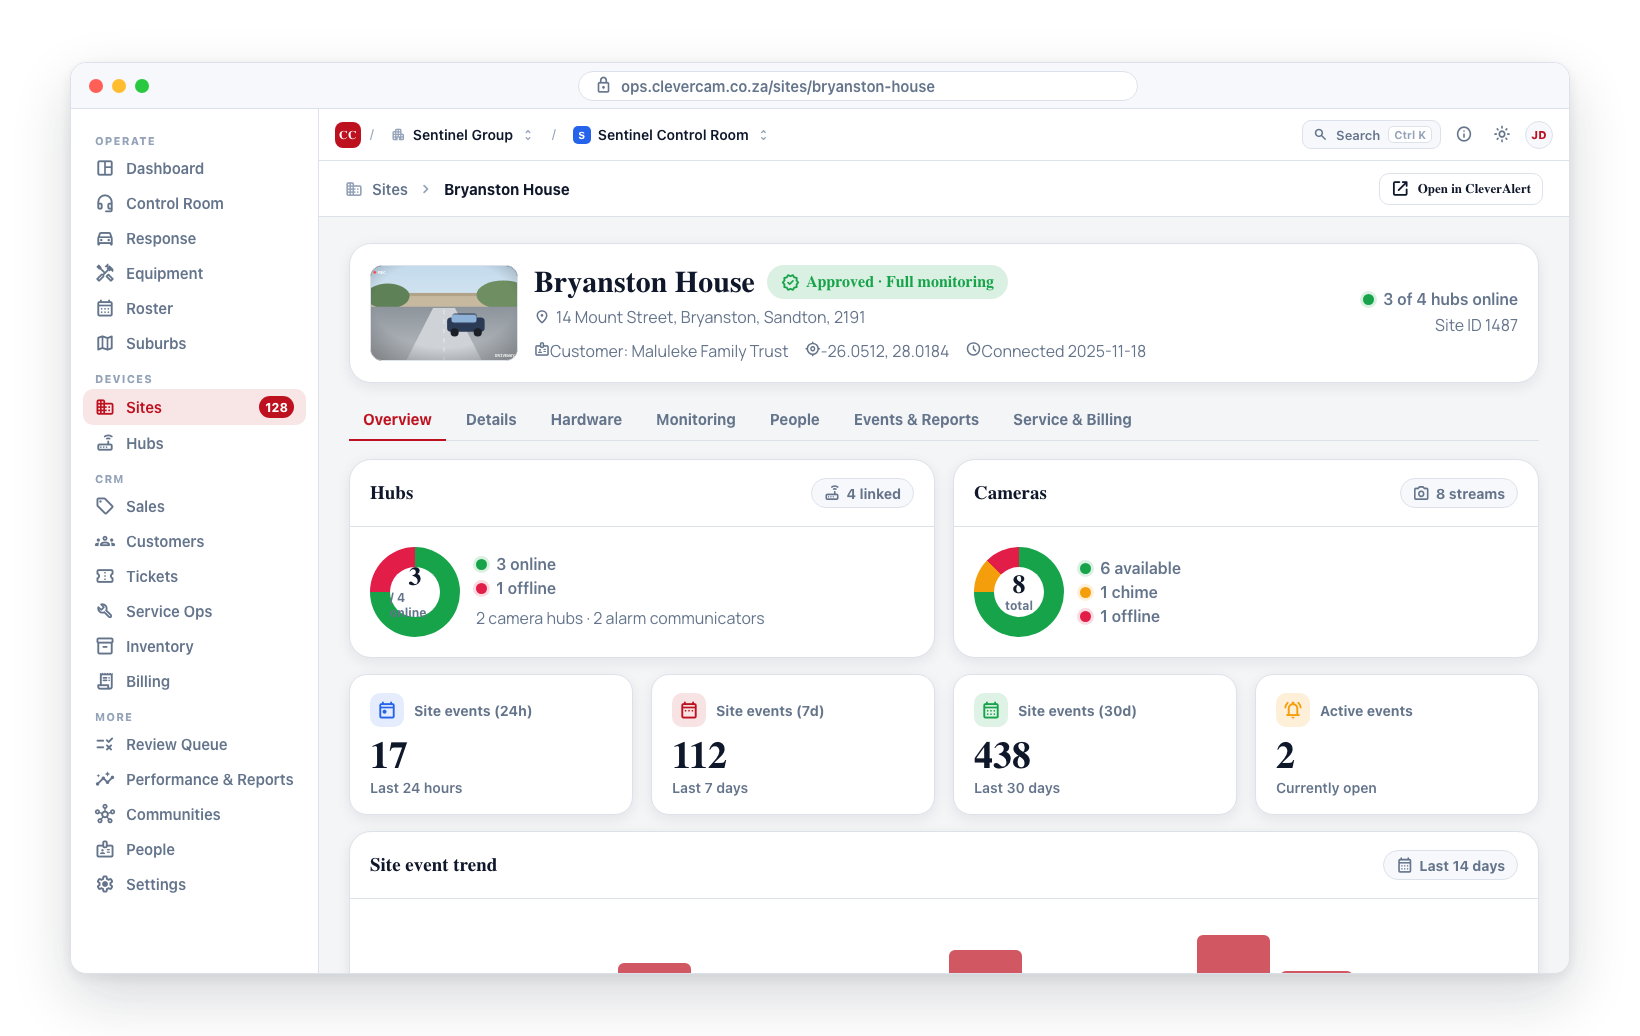
- Click on any row in the table.
- You will be taken to the Site Details page for that site.
- From there you can view camera streams, update settings, manage monitoring policies, and more.