Schedule Board
The Schedule Board is where the week gets planned. It is a grid of technicians (rows) by days (columns), broken into hour slots so you can place a 90-minute job into Tuesday at 10:00 without any manual calculation. Drag any job card to any slot — the board updates the scheduled time and assigned technician in one move.
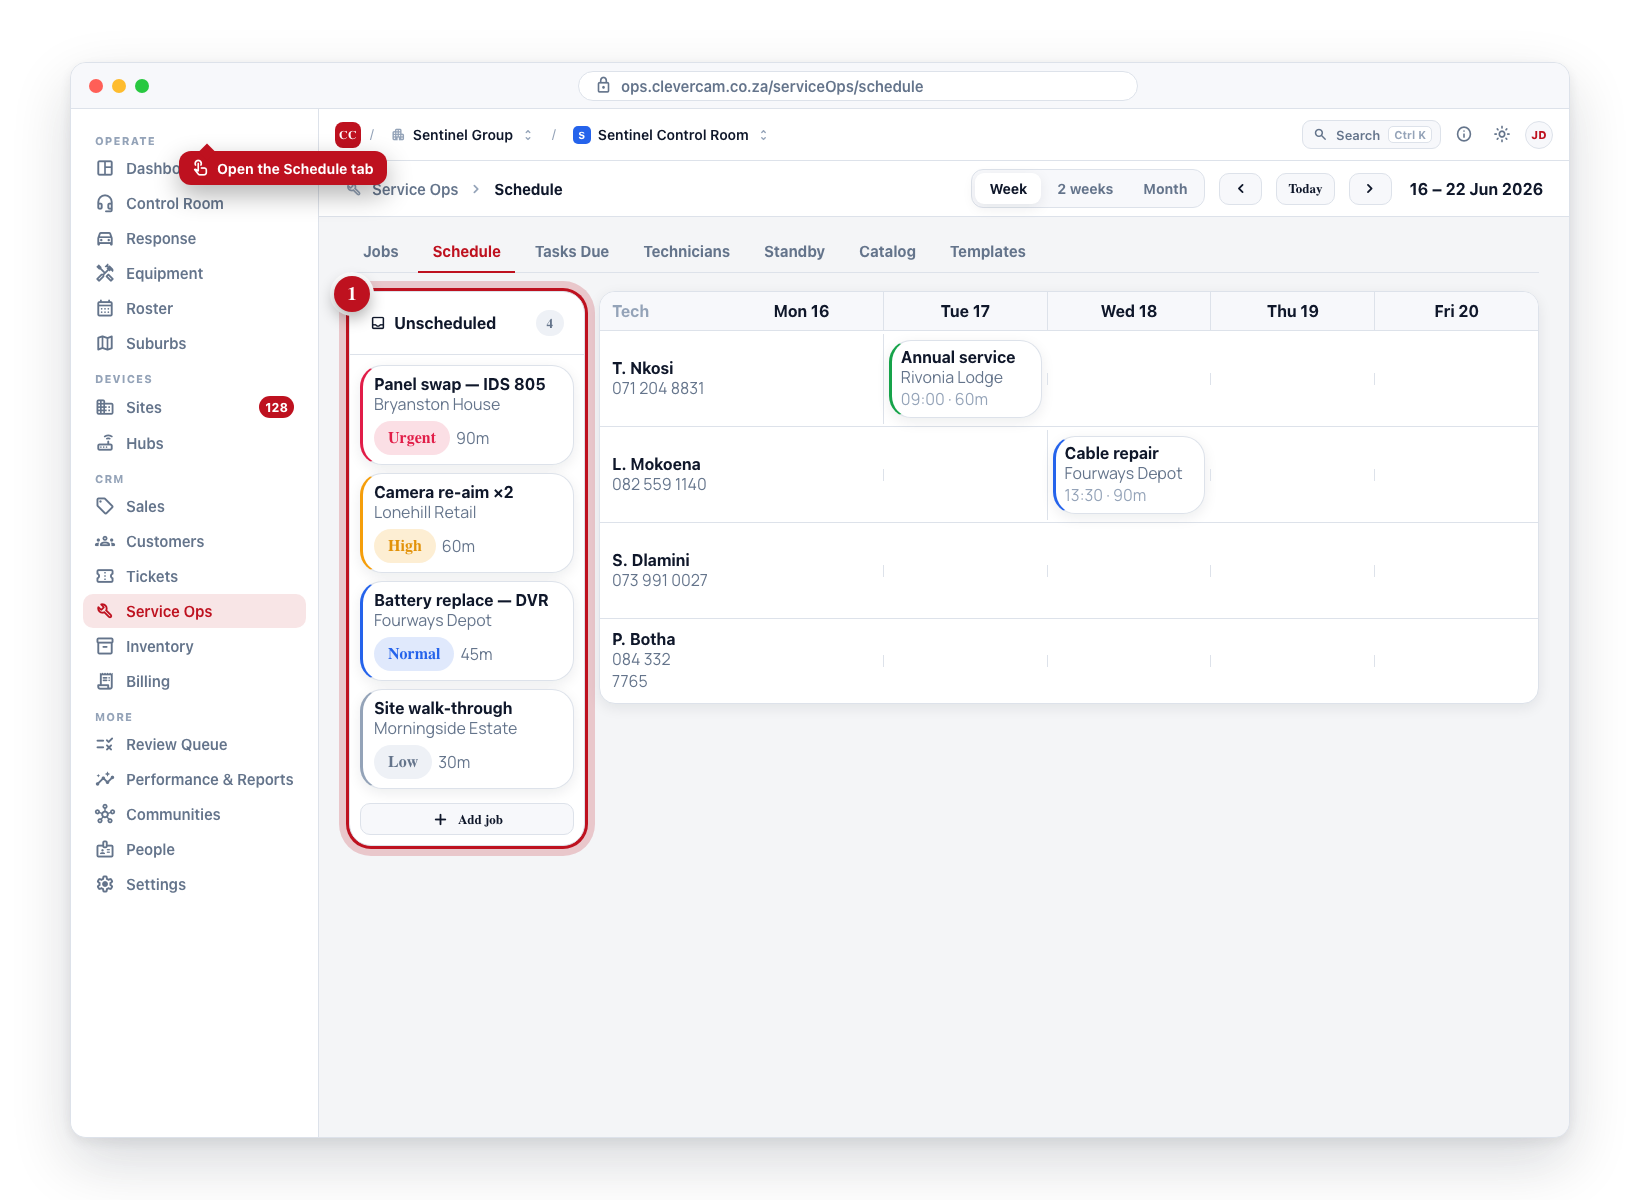
Open Service Ops → Schedule — one of the primary tabs at the top of every Service Ops page. The board was previously a view inside the Jobs page (?view=schedule); it is a tab of its own now, and old ?view=schedule links redirect here automatically.
View ranges
Pick a range at the top of the page:
| Range | Shows |
|---|---|
| Week | Monday through Sunday starting this week |
| 2 weeks | Two calendar weeks |
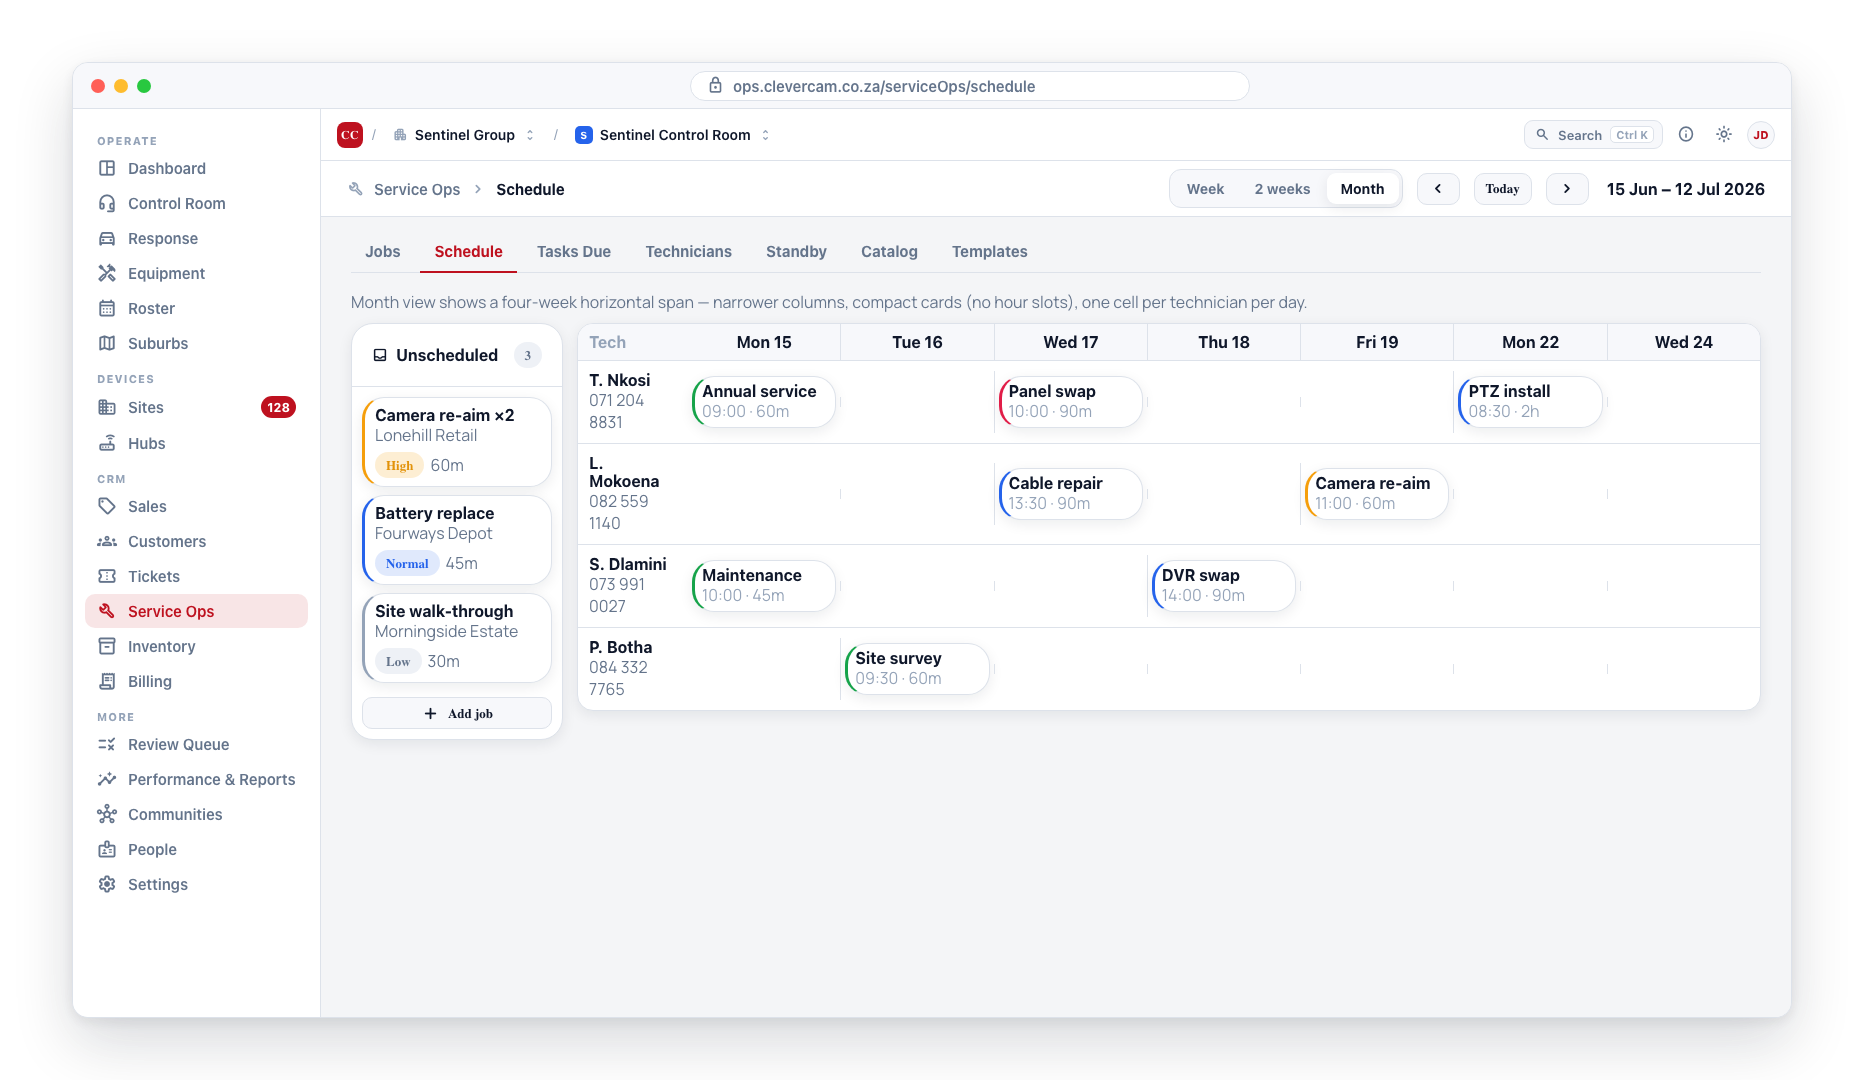
| Month | A four-week horizontal span |
The grid scales horizontally — longer ranges give narrower columns but the same hourly detail. Month is the exception: it switches to a compact four-week layout with small cards instead of hour slots.
Grid layout
- Rows — every active technician (inactive ones are hidden by default).
- Columns — one per day in the selected range.
- Hour lines — from 06:00 to 22:00, every hour, with a consistent cell height so a 60-minute job always takes up the same space.
- 15-minute snap — jobs snap to the nearest quarter-hour when dropped.
Job cards
Each scheduled job is a card placed at its scheduled start time, with a height that matches its duration. The card shows:
- Title and Customer / Site
- Priority colour stripe down the left edge
- Status badge
Drag a card to a new slot to change both its time and its assigned technician in one action. For a job with a technician team, dragging it onto a different technician's row also updates the team — the drop-target technician becomes the lead, and the other team members are kept. Drop it on the "Unassigned" row to remove the technician assignment (this clears the whole team). Jobs that have not been scheduled yet appear in the Unscheduled backlog pane on the left — drag from there onto the grid to schedule them.
Creating a job from the grid
Click any empty cell to open the Create job form pre-filled with:
- The scheduled time (the start of the clicked slot)
- The assigned technician (the row you clicked)
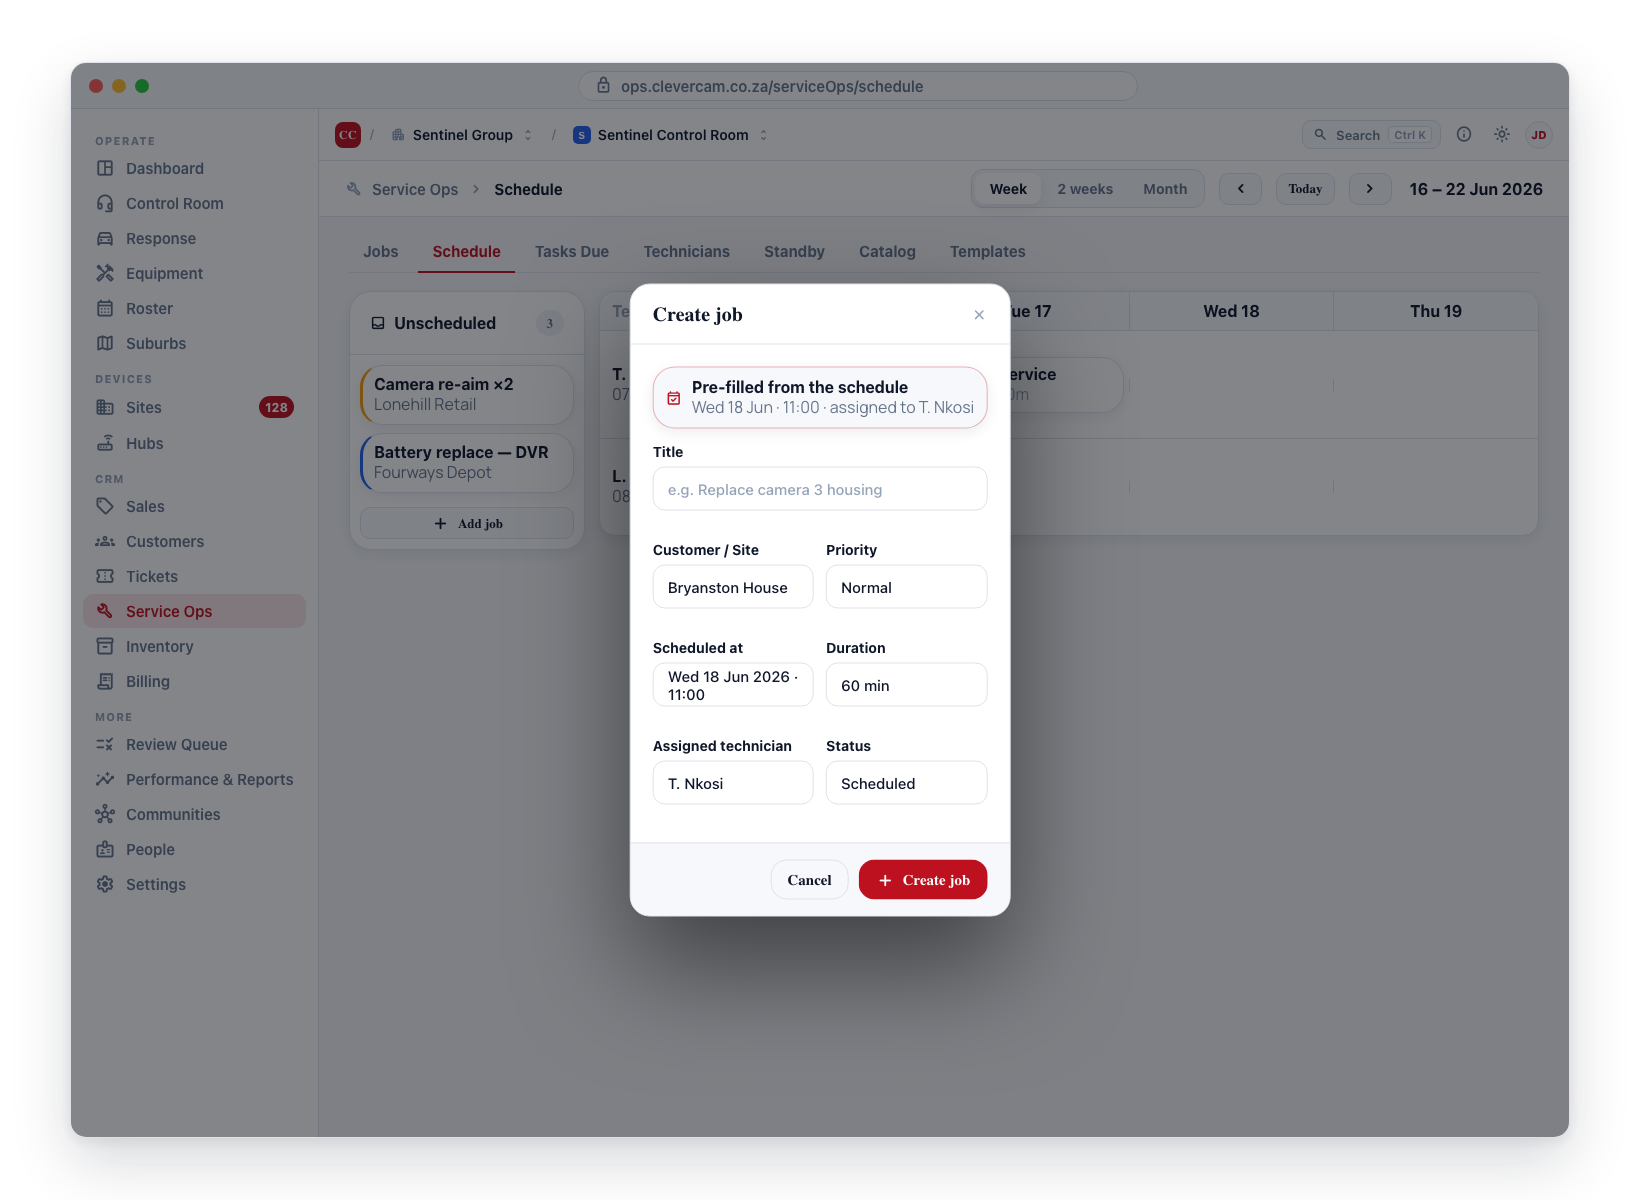
Fill in the rest and save — the card appears in place.
Smart scheduling warnings
When you drop a job, the board checks five conditions — four against the technician's working schedule, and one against the map:
| Warning | Trigger |
|---|---|
| Outside working hours | The drop time is before or after the technician's working hours |
| Not a working day | The drop is on a day not in the technician's working days |
| Overlaps time off | The drop time falls inside a time-off block for that technician |
| Overlaps another job | Another job for the same technician has an overlapping time slot |
| A long drive from the previous job | The site is 25 km or more from that technician's previous stop that day |
The distance warning names the previous job and its time, and gives a rough driving estimate ("About 38 km from 'Panel swap' at 09:00 — roughly 65 min of driving in between"). It is straight-line distance, not road distance: the question the board is answering is "is this the other side of town?", which crow-flies answers honestly and cheaply. Only the job immediately before the drop is compared — warning about every pair would fire on any rural day and be ignored by the third drop.
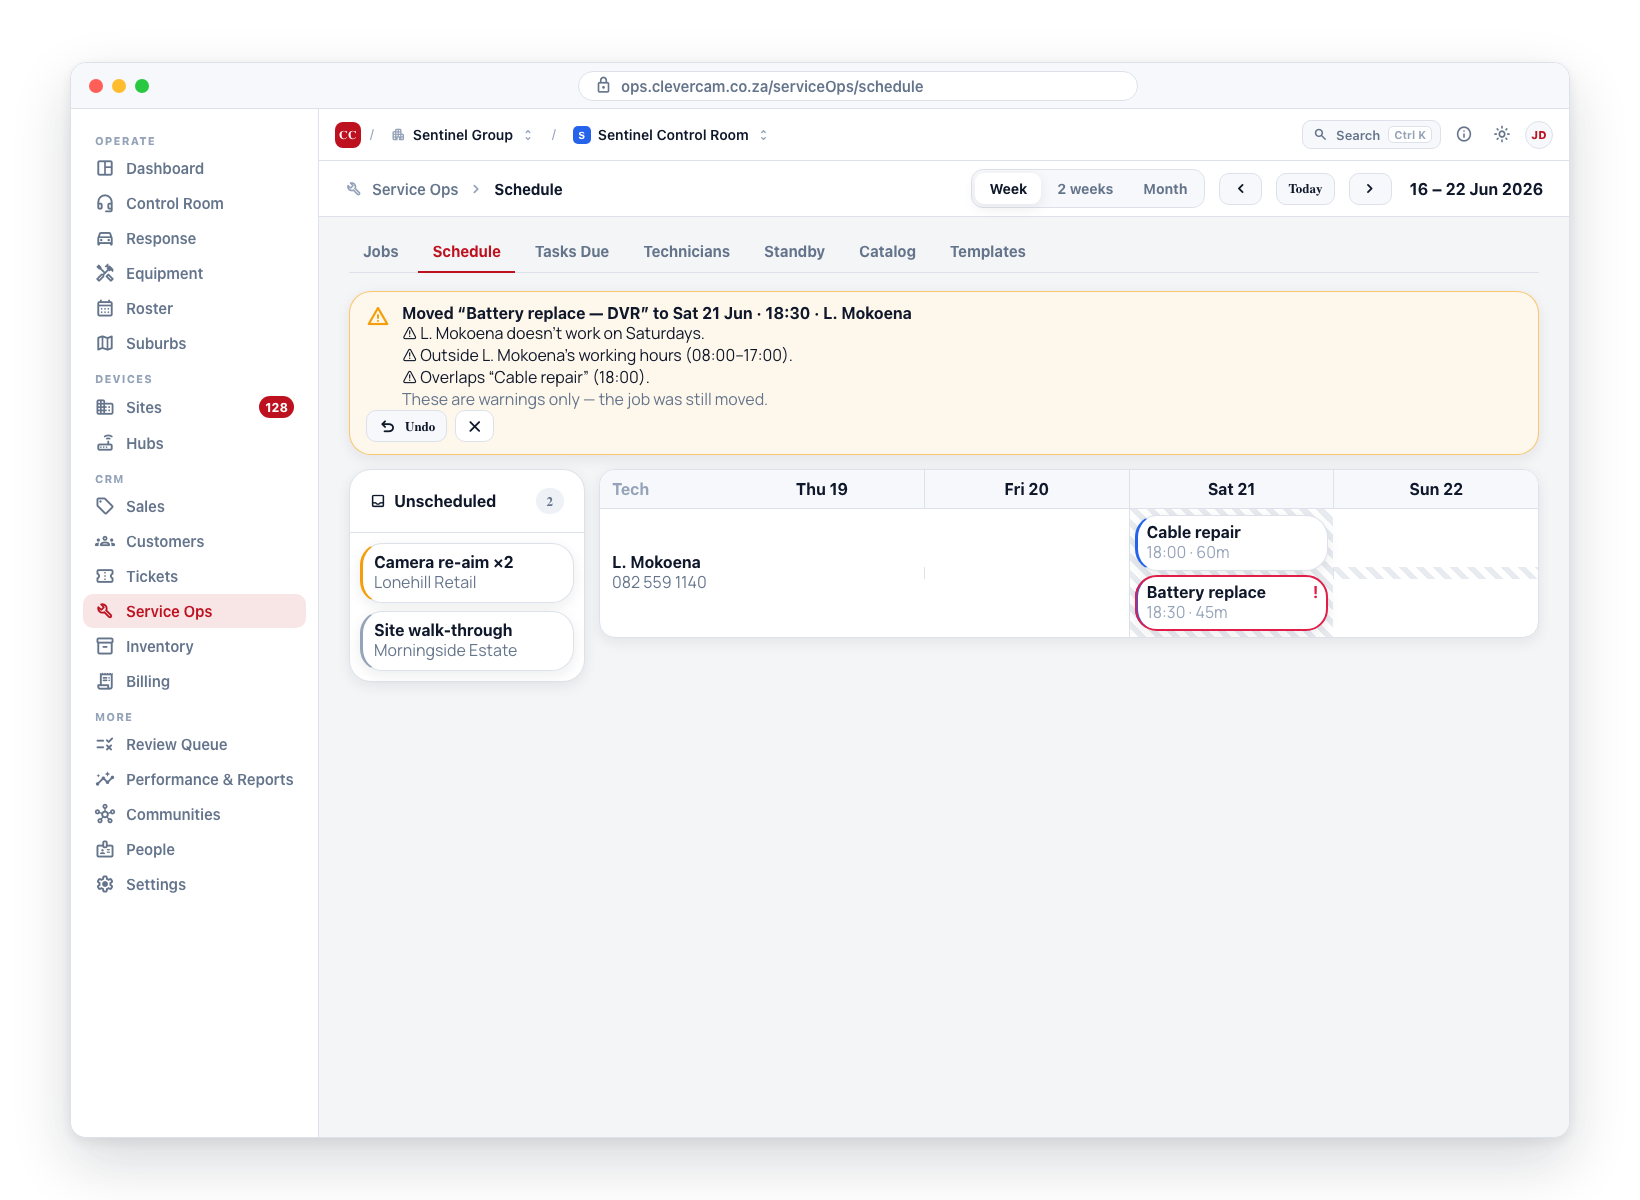
After every drop, a feedback banner appears above the grid confirming the move (for example, Moved "Panel swap" to Tue 10:00 · Alice). If any of the four conditions tripped, the warnings are listed inside the same banner. The job is not moved back — warnings are advisory, not blocking. Supervisors may deliberately schedule overtime; the board's job is to surface potential issues, not prevent them.
The banner stays on screen until you dismiss it with its close button or until your next drop replaces it — it no longer vanishes on a timer, so a warning can't slip past you. A matching toast also pops in the corner (a plain confirmation on a clean move, or a warning-toned one when conditions tripped). If the database update fails, you get an error toast and the board reloads to its last saved state.
Undo a reschedule
The feedback banner carries an Undo button that restores the job's previous technician and time in one click. Use it when you drop a card in the wrong slot — there's no need to find the original position by hand. Undo has its own pending state ("Undoing…") and confirms with its own toast; if the undo write fails you get an error toast and the board reloads.
Telling the customer
Moving a card changes a real appointment, so when a drop books or moves a time on a job with a customer or site, the banner says plainly: "The customer has NOT been told about this time yet", next to a Notify customer button.
Pressing it sends the same appointment notice as the Let the customer know? prompt in the job window — app push first, then WhatsApp/SMS as a fallback, and always email — and reports honestly: if nothing could be delivered (no billing email, no SMS opt-in, no connected app user), it tells you instead of claiming success.
It is a button rather than a pop-up on purpose: the board is built for laying out a whole week quickly, and a confirmation dialog on every drop would get in the way. Nothing is sent unless you press it, and the banner keeps saying they haven't been told until you do (or dismiss it). Dropping a job back into the Unscheduled backlog offers no notice — there's no new time to give the customer, so tell them yourself or cancel the job properly.
To change a technician's default working hours or days, open More → People, open the technician, and update the Working hours and Working days fields on their Field work tab. See People.
Time off
Time-off blocks (set up on the person's Field work tab on People) appear as striped overlays on the technician's row. You can still drop jobs onto them — you will see the "overlaps time off" warning, but the placement goes ahead.
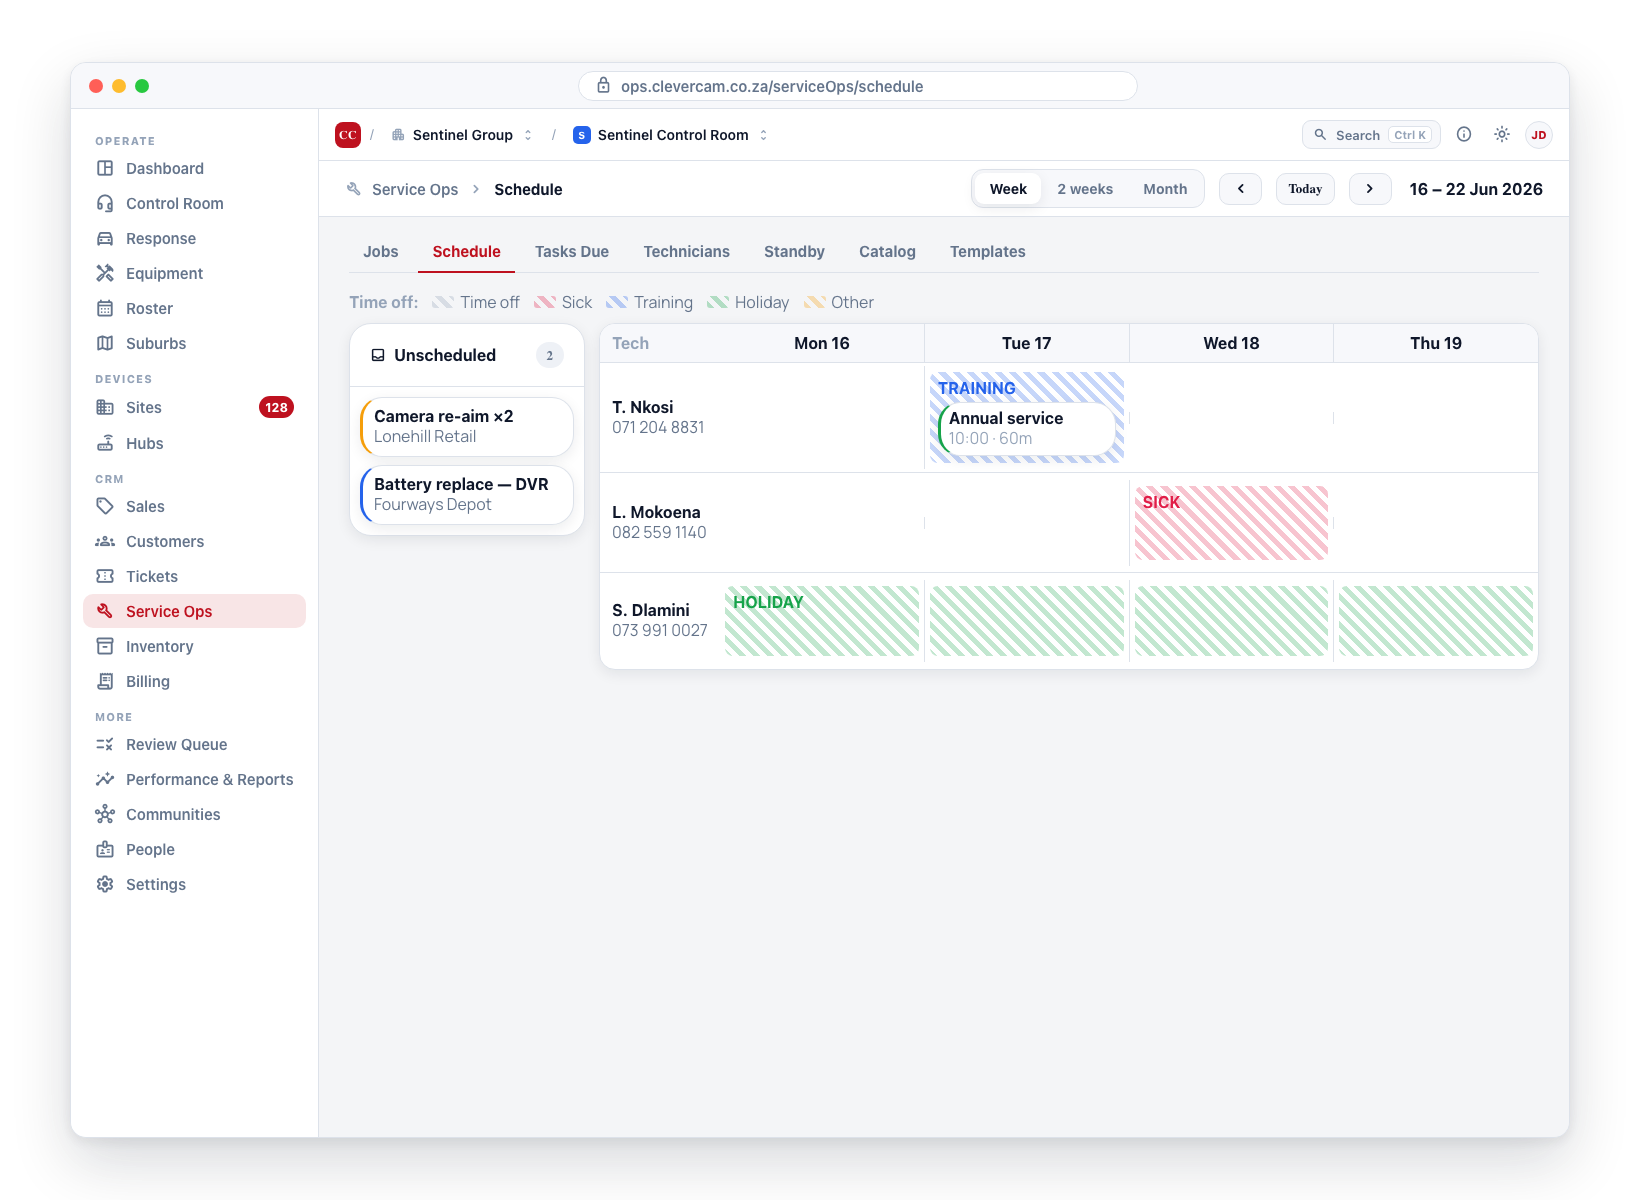
Types of time off: Time off, Sick, Training, Holiday, Other.
Print the schedule
Two print buttons sit in the header, to the right of the Today / Prev / Next controls:
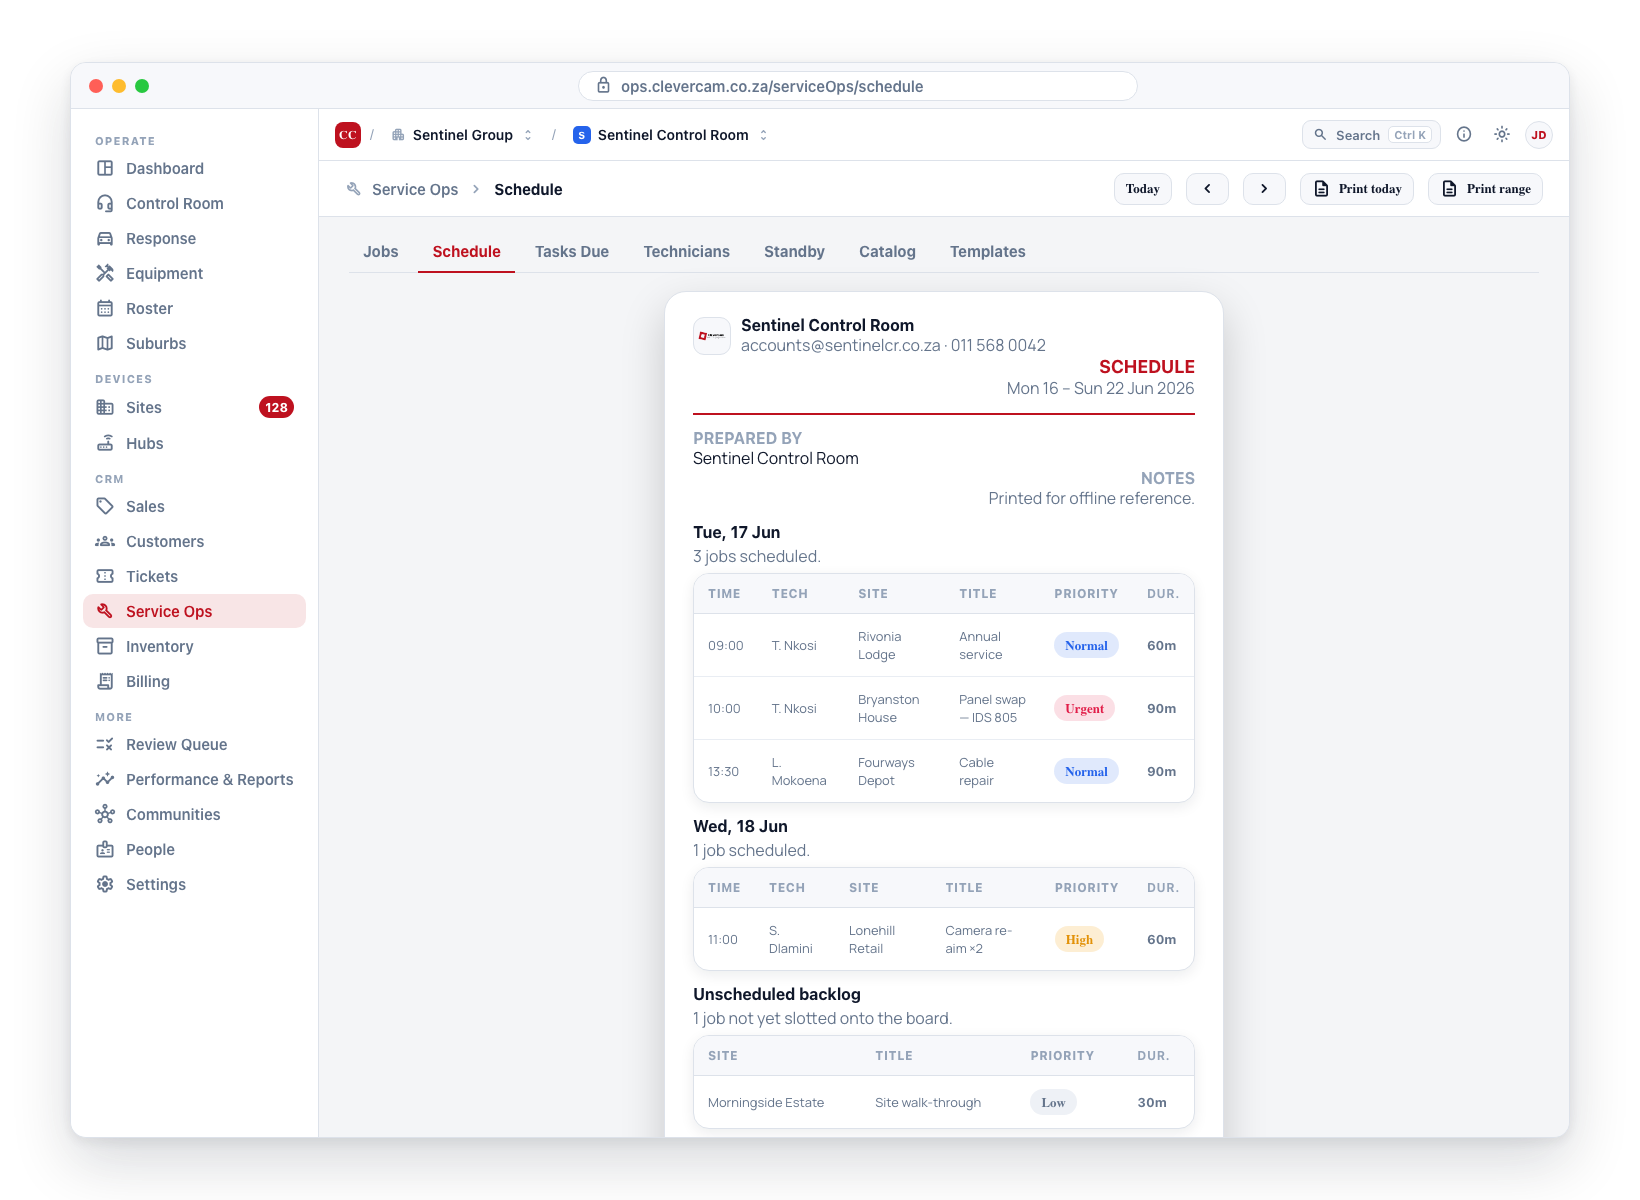
| Button | What it prints |
|---|---|
| Print today | A single-day PDF showing every scheduled job for today across all technicians, sorted by start time |
| Print range | A multi-day PDF covering the full visible window, grouped by day, plus an unscheduled jobs section at the bottom |
Both PDFs use the same branded template as invoices and quotes — with your company's details in the header and a per-day table listing Time · Technician · Site · Title · Priority · Duration for each job.
Use these when a technician heading out for the day without a phone needs a printed run sheet, or when a supervisor wants a weekly overview to pin on the office wall.
The PDF reflects the schedule at the moment you clicked Print. Changes made in the app afterwards are not reflected in a printed copy. For fast-moving schedules, print a fresh copy before the technician leaves.
Filtering the board
- Priority — filter to Urgent / High / Normal / Low.
- Status — hide completed or cancelled jobs.
- Area — restrict to a specific geographic area (useful for regional technicians).
- Show: — one button per technician, all on at first. Click a technician to hide or show their row. Unticking every technician shows no technicians at all rather than springing back to everyone; ticking them all again returns to showing everyone, including technicians added later.
Keyboard shortcuts
- ← / → — shift the visible range back or forward by one week.
- T — jump back to today.
Who can use it
The board is read-only for viewers (no dragging). Drag-and-drop and clicking to create jobs require service management access.