Onyyx hub setup
Onyyx is an IDS-family alarm communicator integrated into CleverCam. Once set up, it allows you to arm and disarm areas, manage zones, update settings, and view events — all from within CleverOps and CleverAlert. All communication with the Onyyx system is handled securely in the background; passwords are never exposed in the browser.
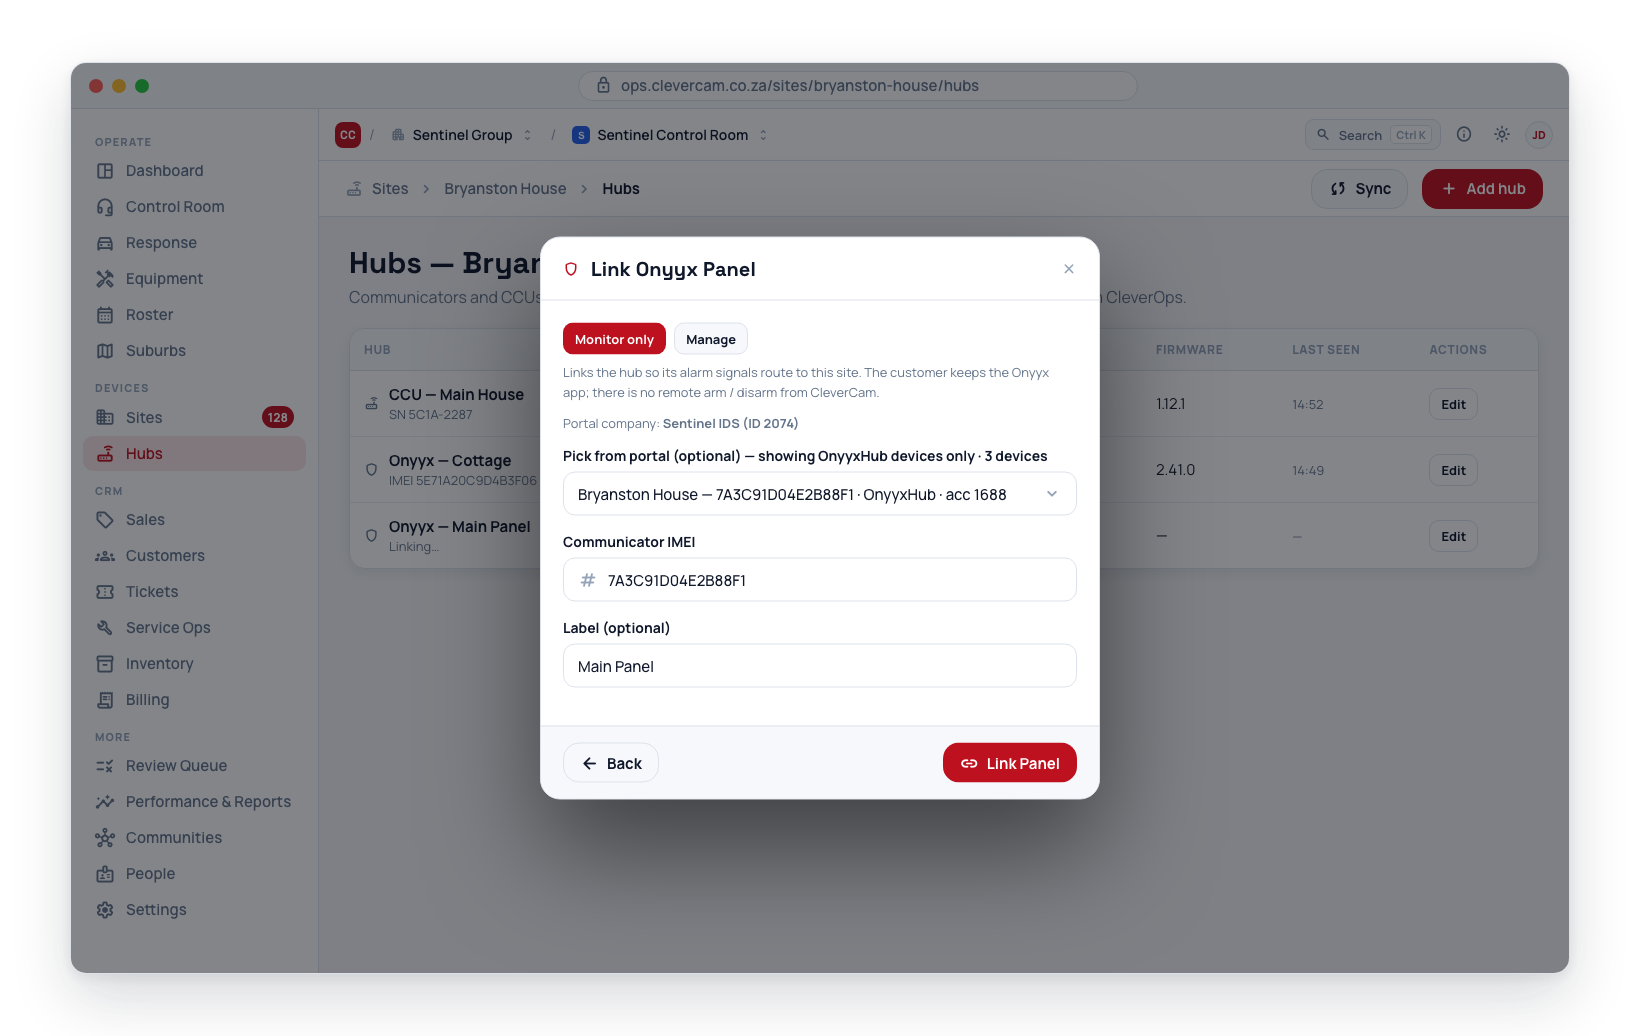
Monitor only or Manage
The Onyyx step opens on a small Monitor only / Manage switch, and Monitor only is selected by default — most control rooms link the radio first and take over control later, if at all. The line under the switch says what the selected mode does.
- Monitor only (default) — "Links the hub so its alarm signals route to this site. The customer keeps the Onyyx app; there is no remote arm / disarm from CleverCam." CleverCam receives alarm events only and never controls the panel; CleverOps shows read-only status. The step's title is Link Onyyx Panel and its button Link Panel.
- Manage — "Adds remote arm / disarm, zones and sensors: CleverCam claims the hub on its Onyyx account, or is added as a sub-user (pairing method below)." You get remote control of arm/disarm, zones, sensors, notifications, and firmware. On a takeover the customer cannot use the standard Onyyx mobile app on this hub while it is managed. The step's title becomes Activate Onyyx Communicator, the Pairing method choice appears, and the button reads Activate.
You can convert a monitor-only hub to managed later from the hub detail panel. Going the other direction requires IDS support to release the panel.
Onyyx and Hyyp panels on one IDS portal company report through the same base station. An Onyyx hub that has already reported sits under your Onyyx receiver — or under the Hyyp receiver if you have no Onyyx receiver yet, until you add one (see How a signal finds its receiver).
Adding a hub
- Open Sites → View Site → Hubs → Add hub.
- Pick Onyyx as the hub type.
- The TX number step opens for that line, asking for the panel's TX number (account code) or IMEI. CleverOps checks every receiver line on the control room for whatever you type, so a hub already reporting — on this line or another — comes up to pick, with its IMEI carried into the next step. Otherwise click Continue with <IMEI> (an IMEI-shaped value carries into the IMEI field below), or Continue / Continue without a TX number to enter the IMEI on the next step — a typed account code cannot carry over, because an Onyyx hub is added by its IMEI. See Adding an alarm panel by TX number.
- Leave the switch on Monitor only, or switch to Manage for remote control (see Monitor only or Manage).
- Choose the hub — pick it from the portal device list (see below) or type the IMEI (the hub's 16-character code, found on the device label). The panel's 4-digit account code is not an IMEI — the wizard warns as you type and refuses to continue on one, because a hub saved under an account code can never receive a signal.
- On Monitor only, press Link Panel — the hub is linked and its alarm signals route to the site. The remaining steps are for Manage.
- Pick the pairing method:
- Set up new device — CleverCam claims the hub as sole master. This fails if the hub is already linked to another account; in that case, fall back to Monitor only.
- Link as sub-user — The customer has already added the CleverCam account as a user in their own Onyyx app; Test connection checks that account can see the hub.
- Press Activate. The wizard sets up the connection and pulls in the areas and sensors from the Onyyx system. The wizard asks for no PIN — set the arm/disarm PIN (4–6 digits) afterwards in the hub detail panel's Mode header.
If the hub activates but cannot be attached to the site, the wizard stops on an error instead of reporting done. The usual cause is that the hub row is not visible to your account; ask a CleverCam admin to link it to the site.
The Onyyx receiver under Settings → Alarm Receivers must carry the IDS base's Receiver Serial (the same VBS serial as the company's Hyyp receiver). Without it the hub's signals are matched to the Hyyp receiver and appear there as an unlinked Hyyp panel, while the Onyyx hub on the site never receives anything.
Picking a hub from the portal
Pick from portal lists the devices under the receiver's verified IDS portal company, filtered to OnyyxHub devices only so you can't accidentally pick a Hyyp panel that would fail to provision here.
Each row leads with the device's portal site name, with its IMEI, device type, account code where the portal has one, and when it last communicated underneath. The search box matches on any of those. Devices already linked to a CleverCam hub stay listed but greyed out and unselectable, so it's clear why they can't be chosen.
If the hub you want isn't there, choose — None (type IMEI manually) — and enter the IMEI by hand.
The hub detail panel
Open a site, then click an Onyyx hub in the hub list. The panel has the following sections.
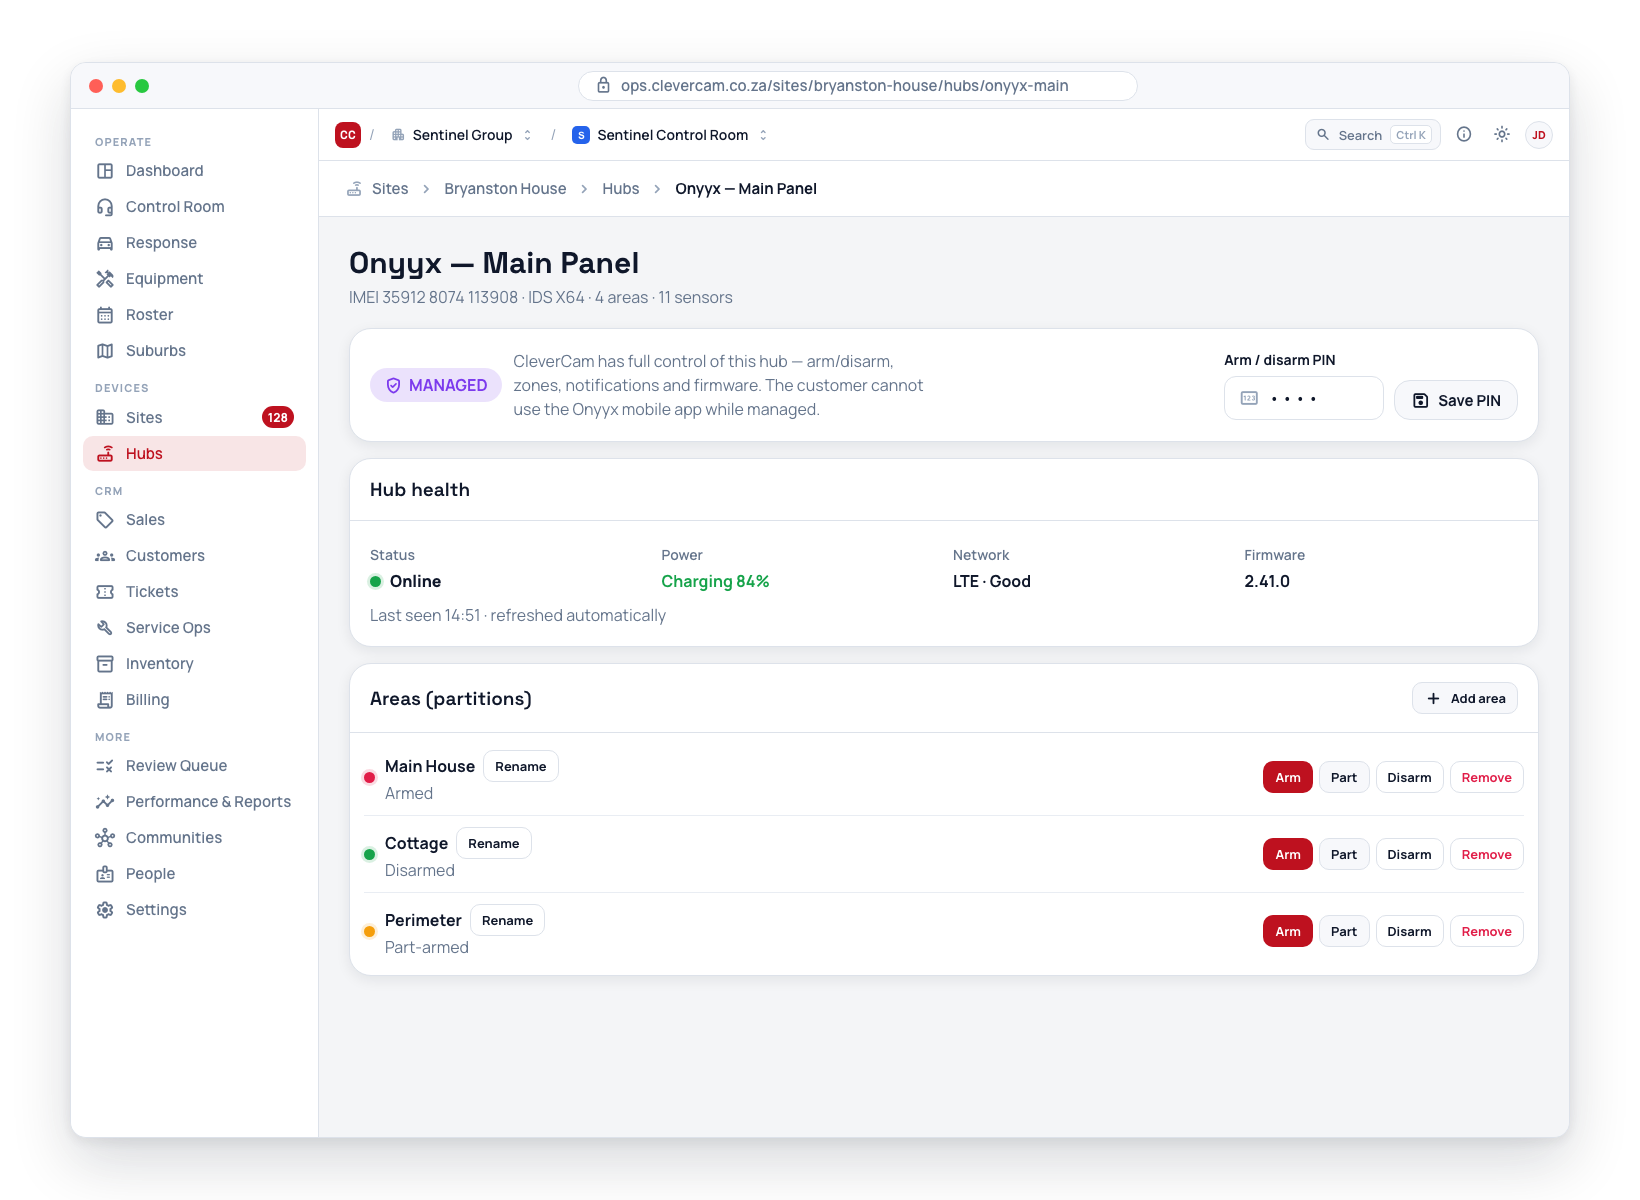
Mode header
- A MANAGED or MONITOR ONLY badge with a one-line explanation.
- A Convert to managed button (shown for monitor-only hubs only).
- A PIN field — enter 4–6 digits to set or update the arm/disarm PIN.
Hub health
Shows battery percentage, charger status, connection type (SIM A, SIM B, or Wi-Fi), firmware version, and when the hub was last seen. This information is refreshed automatically for managed hubs.
Areas (partitions)
Each area on the Onyyx hub appears as a section here. In managed mode:
- Arm / Part / Disarm buttons let you arm, partially arm, or disarm each area remotely.
- Rename beside the area's name renames it.
- Remove deletes an empty area (this will fail if sensors are still linked to it).
- Add area creates a new area on the hub.
In monitor-only mode, only the arm state is shown — no controls are available.
Sensors (zones)
A table of all sensors linked to the hub, showing battery percentage, signal strength, device status (Normal, Missing, or Offline), and when each sensor was last seen. A bypass toggle is also shown. In managed mode, each row has:
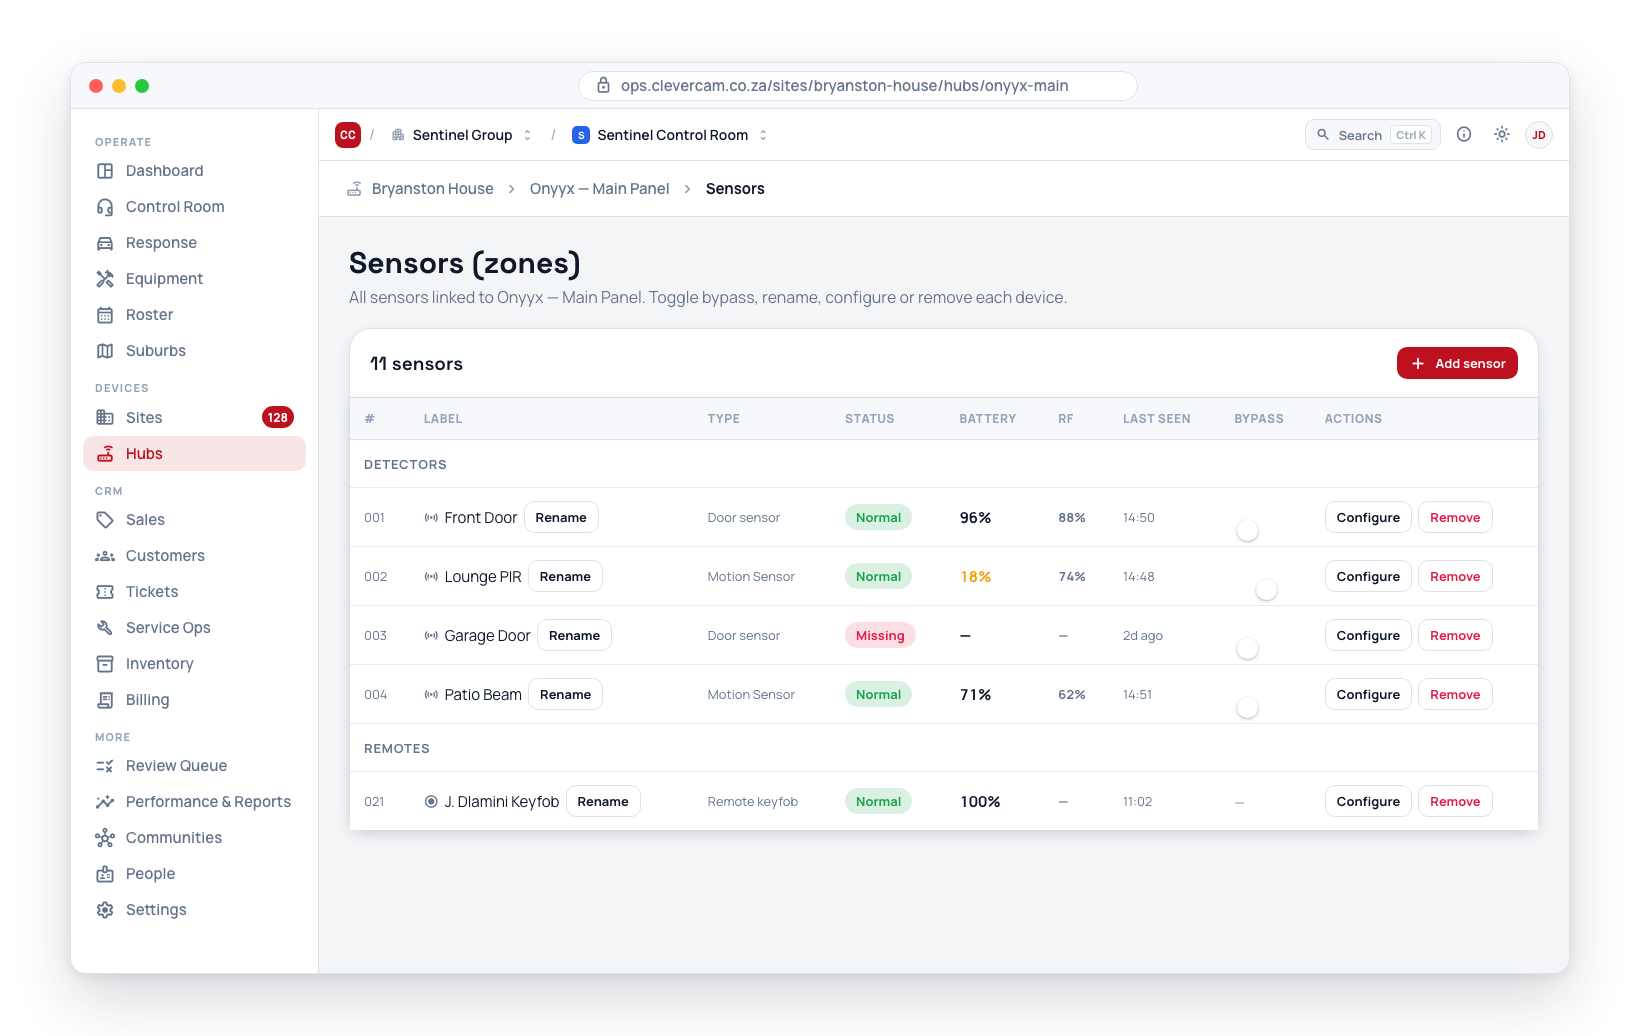
- Rename beside the sensor's name, to rename it.
- Configure, to open the sensor configuration options (chime, exit delay, silence timer, area assignment, and other behaviour settings).
- Remove, to remove the sensor from the hub.
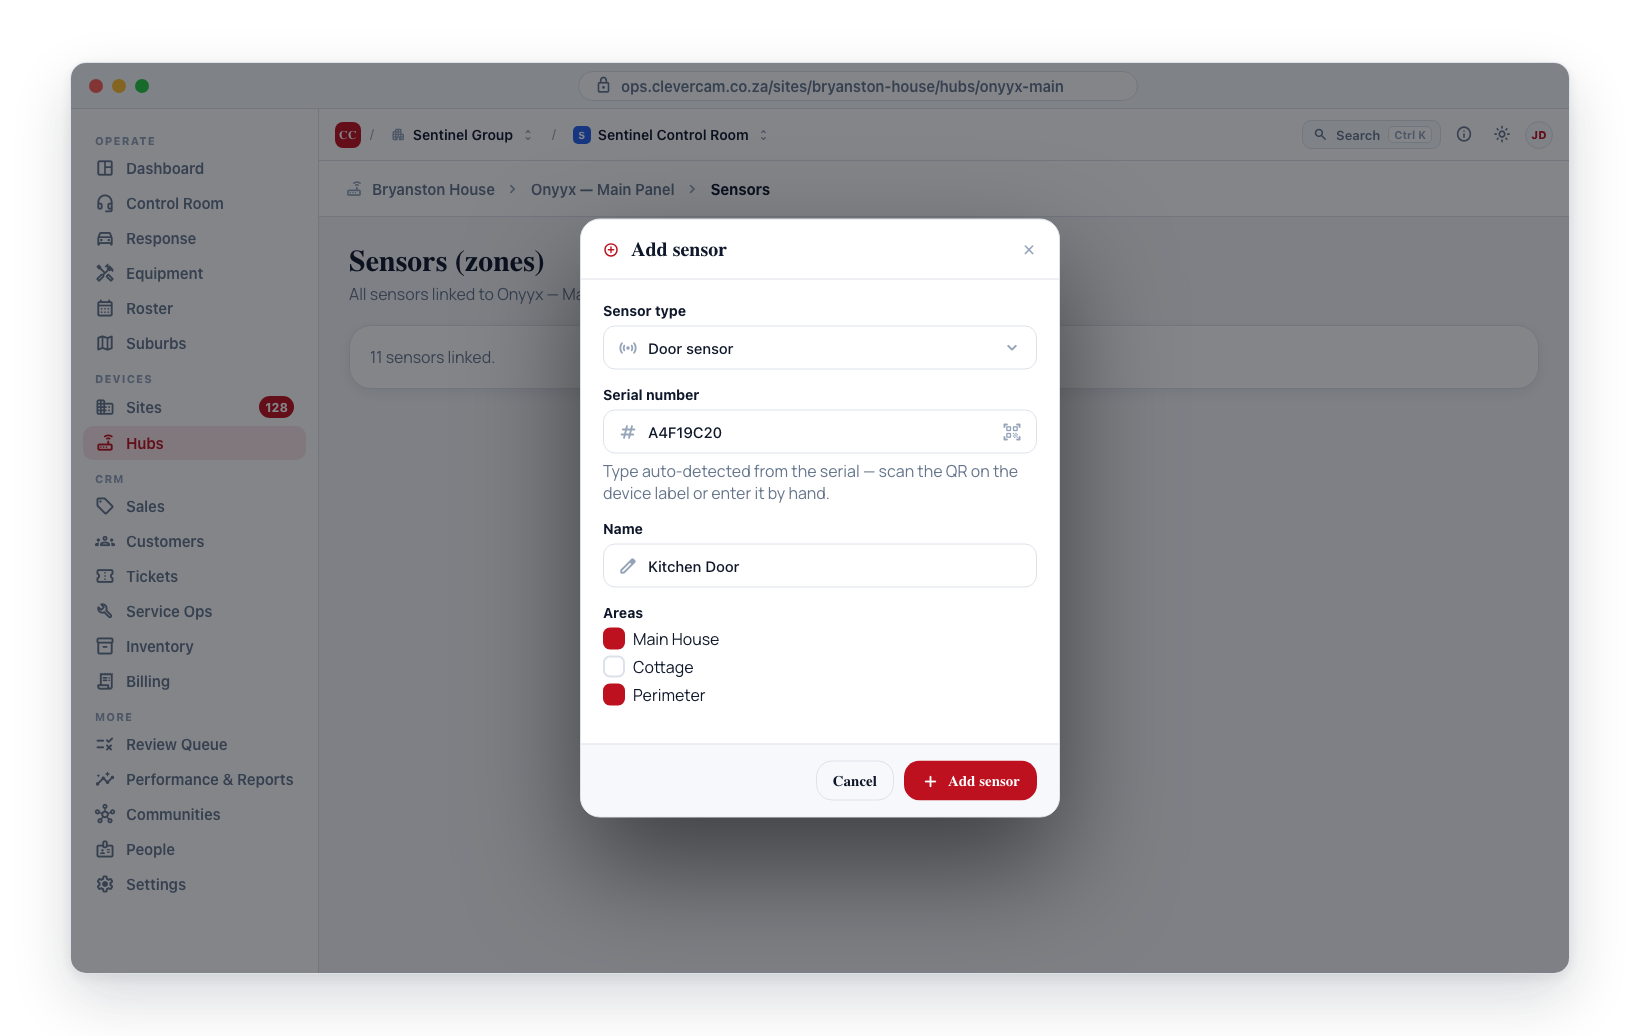
Add sensor opens a dialog where you enter the sensor type, serial number, name, and which areas it should belong to.
Events
Shows the 50 most recent events for this hub.
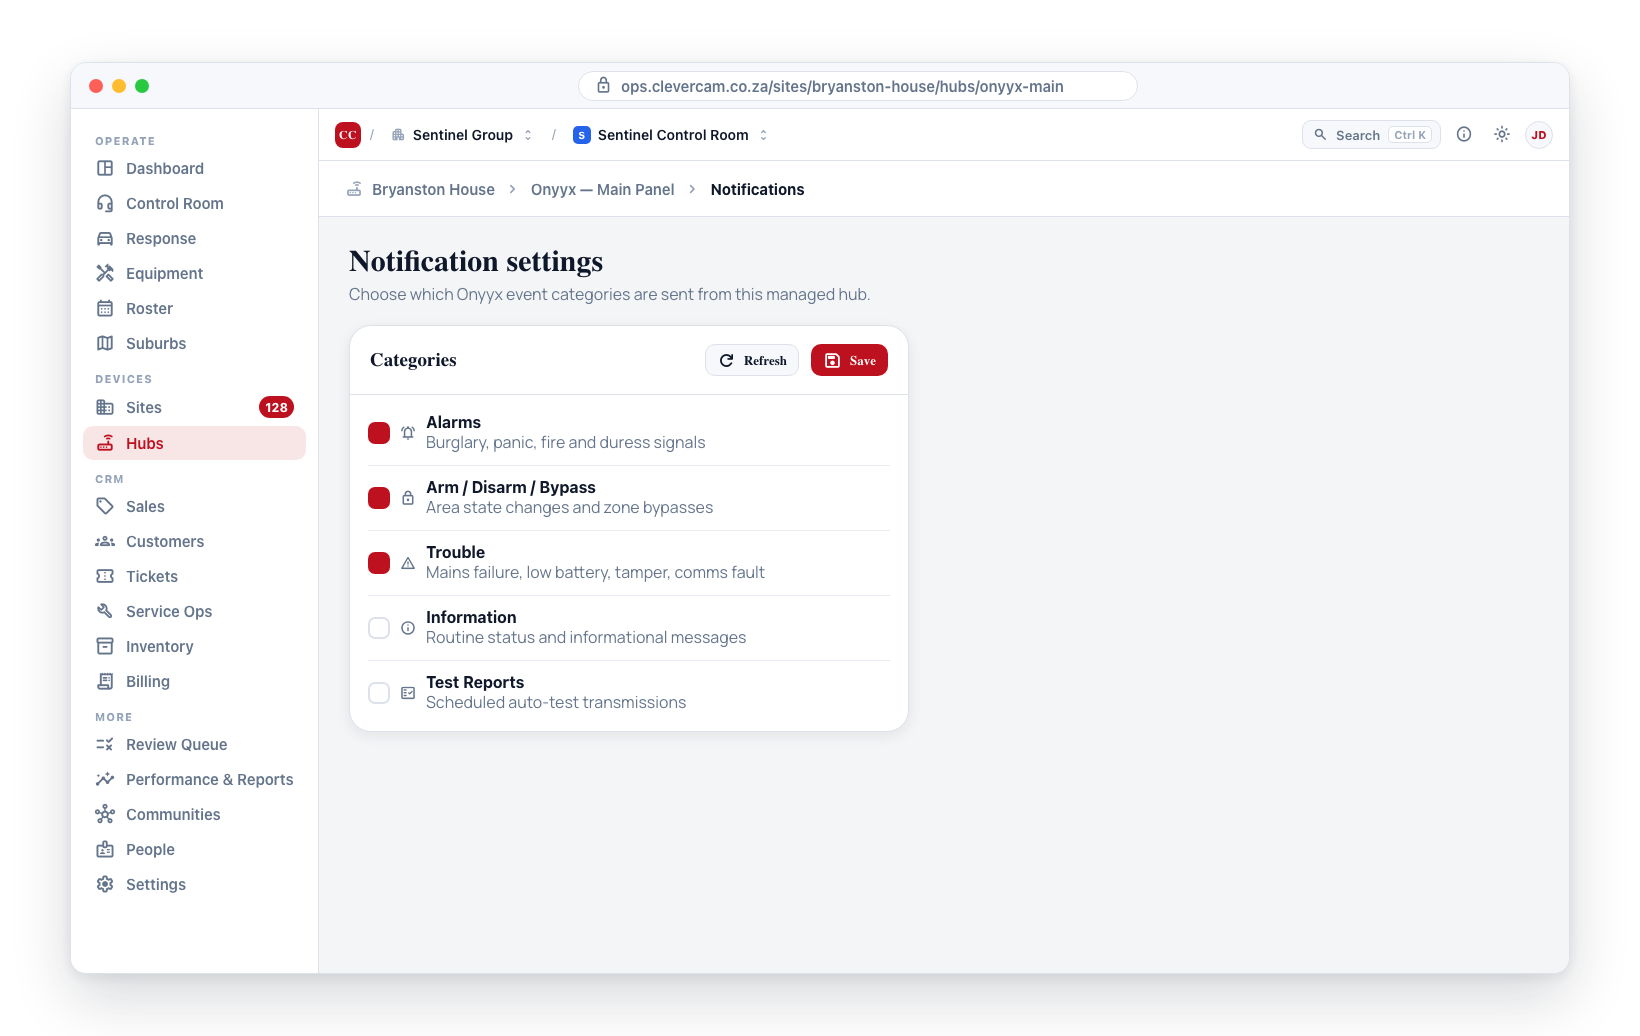
Notification settings (managed only)
Checkboxes for the five Onyyx notification categories: Alarms, Arm/Disarm/Bypass, Trouble, Information, and Test Reports. Turn these on or off to control which types of notifications are sent from this hub.
Site users (managed only)
Lists the users on the Onyyx site. The master user cannot be removed from here (Onyyx does not allow it). Other users can be removed.
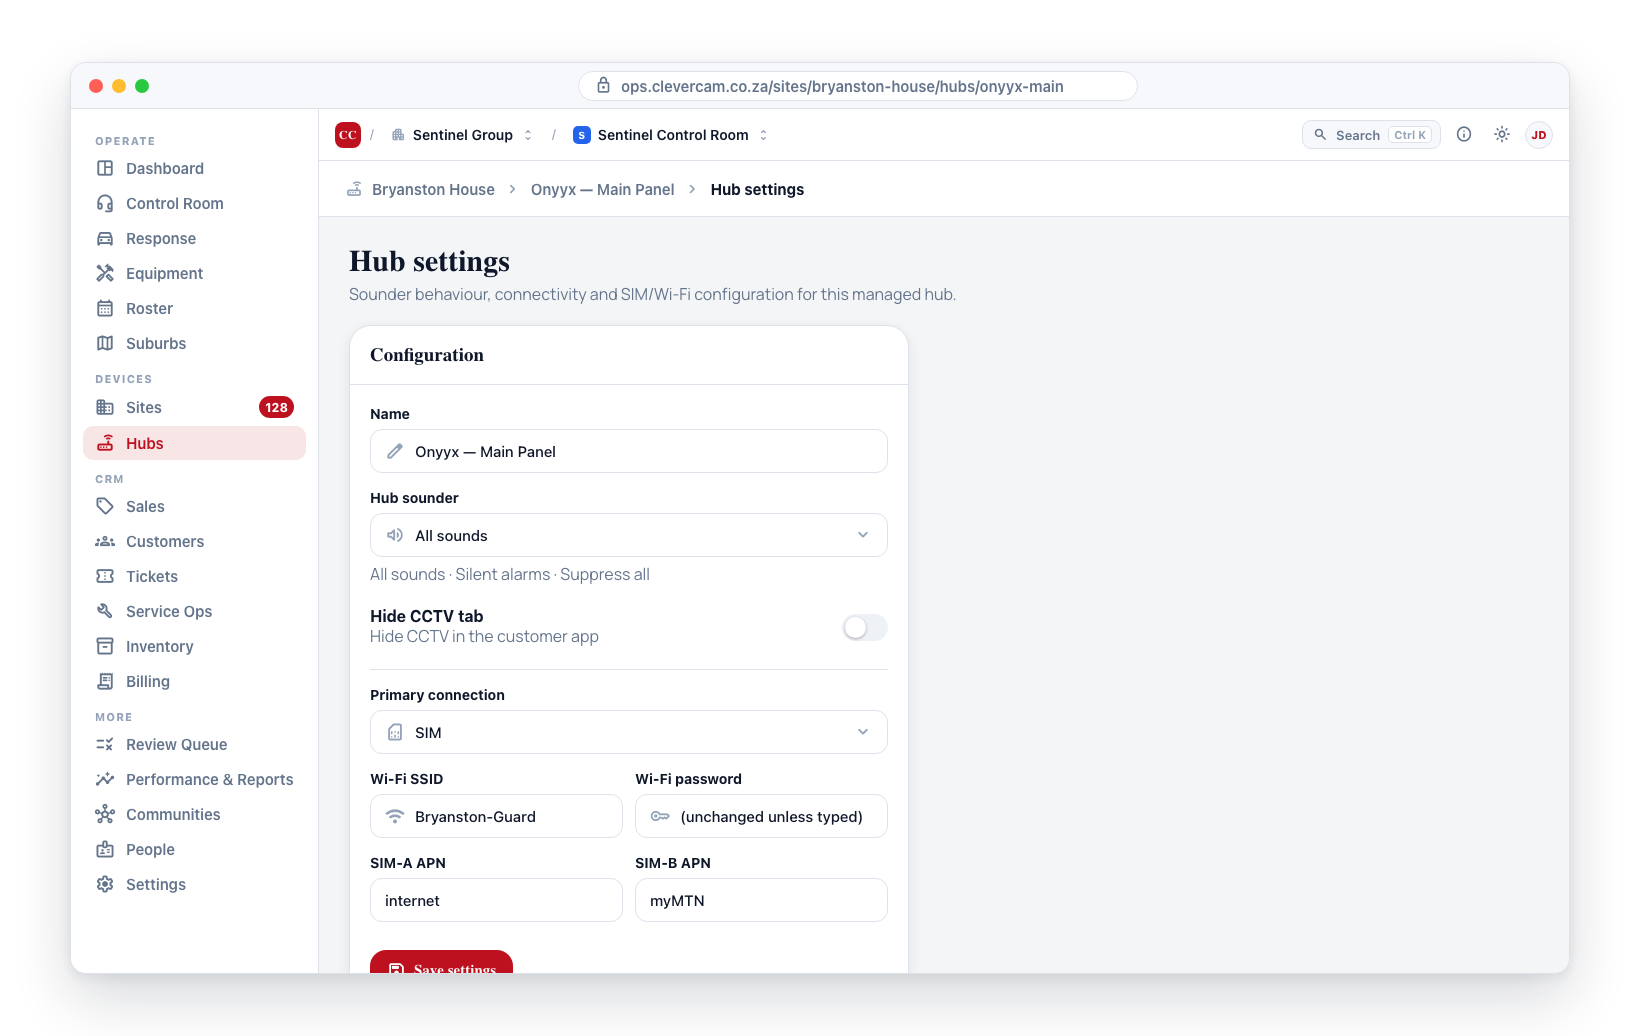
Hub settings (managed only)
Name, hub sounder behaviour (All sounds, Silent alarms, or Suppress all), whether to hide the CCTV tab, primary connection preference (SIM or Wi-Fi), Wi-Fi network name and password, and SIM access point names.
Actions bar
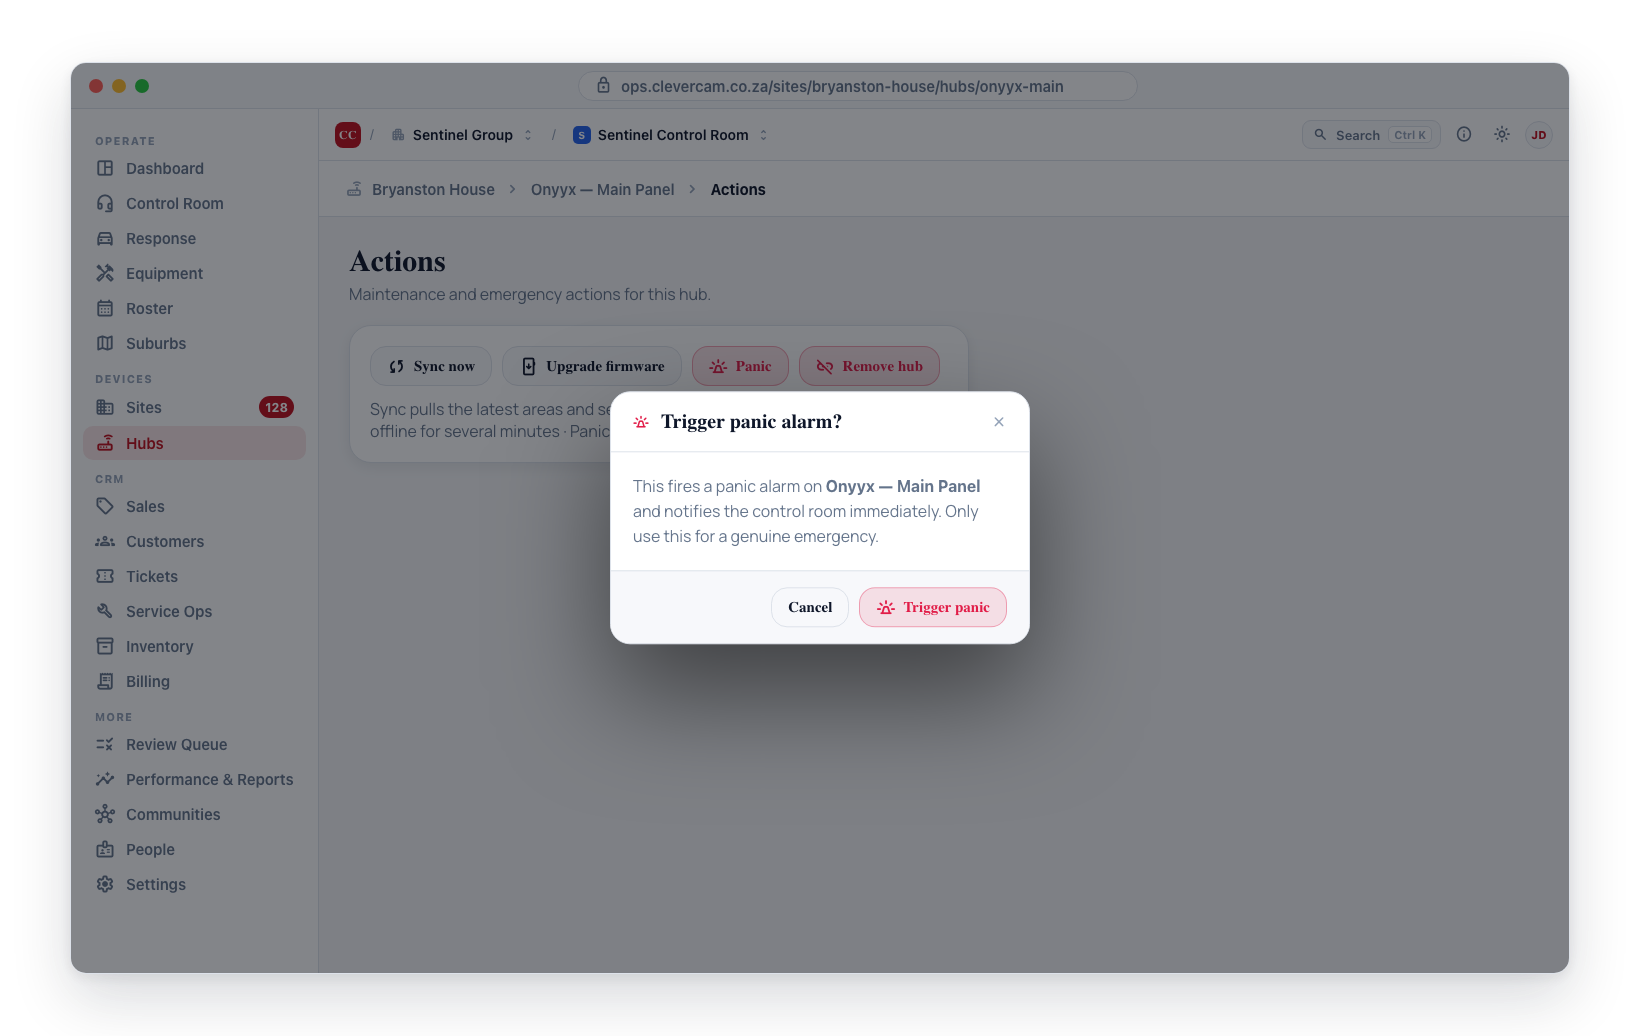
- Sync now — pulls the latest areas and sensors from the Onyyx system.
- Upgrade firmware — sends a firmware update to the hub. The hub goes offline for several minutes while it updates.
- Panic — triggers a panic alarm on the hub. A confirmation prompt is required.
- Remove hub — removes the site from CleverCam's Onyyx account, then deletes the local records (a config archive is saved first, and the panel's billing record goes with it). If the local delete cannot complete after the Onyyx side has been removed, the action reports exactly that instead of pretending it succeeded — use Remove from site in the site's panel editor to detach the leftover record. The physical hub can be re-activated afterwards.
Sensor types
| Type | Description |
|---|---|
| Motion Sensor | PIR or similar motion detector |
| Door sensor | Magnetic contact for doors or windows |
| Remote keyfob | Handheld remote for arm/disarm |
| Siren | Indoor or outdoor siren |
| Smoke detector | Smoke or fire detection |
| Output Device AC | AC-powered output relay |
| Outdoor Siren | Weatherproof siren |
| Output Device DC 2 Channel | DC-powered dual-output relay |
| Vibration sensor | Detects impacts or vibration |
| Wireless button | Single or multi-button panic or auxiliary button |
| Leak sensor | Water or flood detection |
| Remote Keyfob — Numbered buttons | Keyfob with individually numbered buttons |
Related pages
- Hyyp hub setup — the sibling IDS integration, and the Portal side of it
- Identity & Signals — how a panel's serial and account code resolve to a hub
- Test signals — proving the account routes before you hand it over
- Alarm Receivers — creating and pointing the receiver itself