QR Codes
Each Clever Hub has an associated QR code that simplifies the setup process for technicians in the field. Scanning the QR code links the hub to the correct account and site without requiring the technician to manually enter serial numbers or account details. CleverOps also provides a CleverMail creation option for setting up email-based alert distribution tied to a hub.
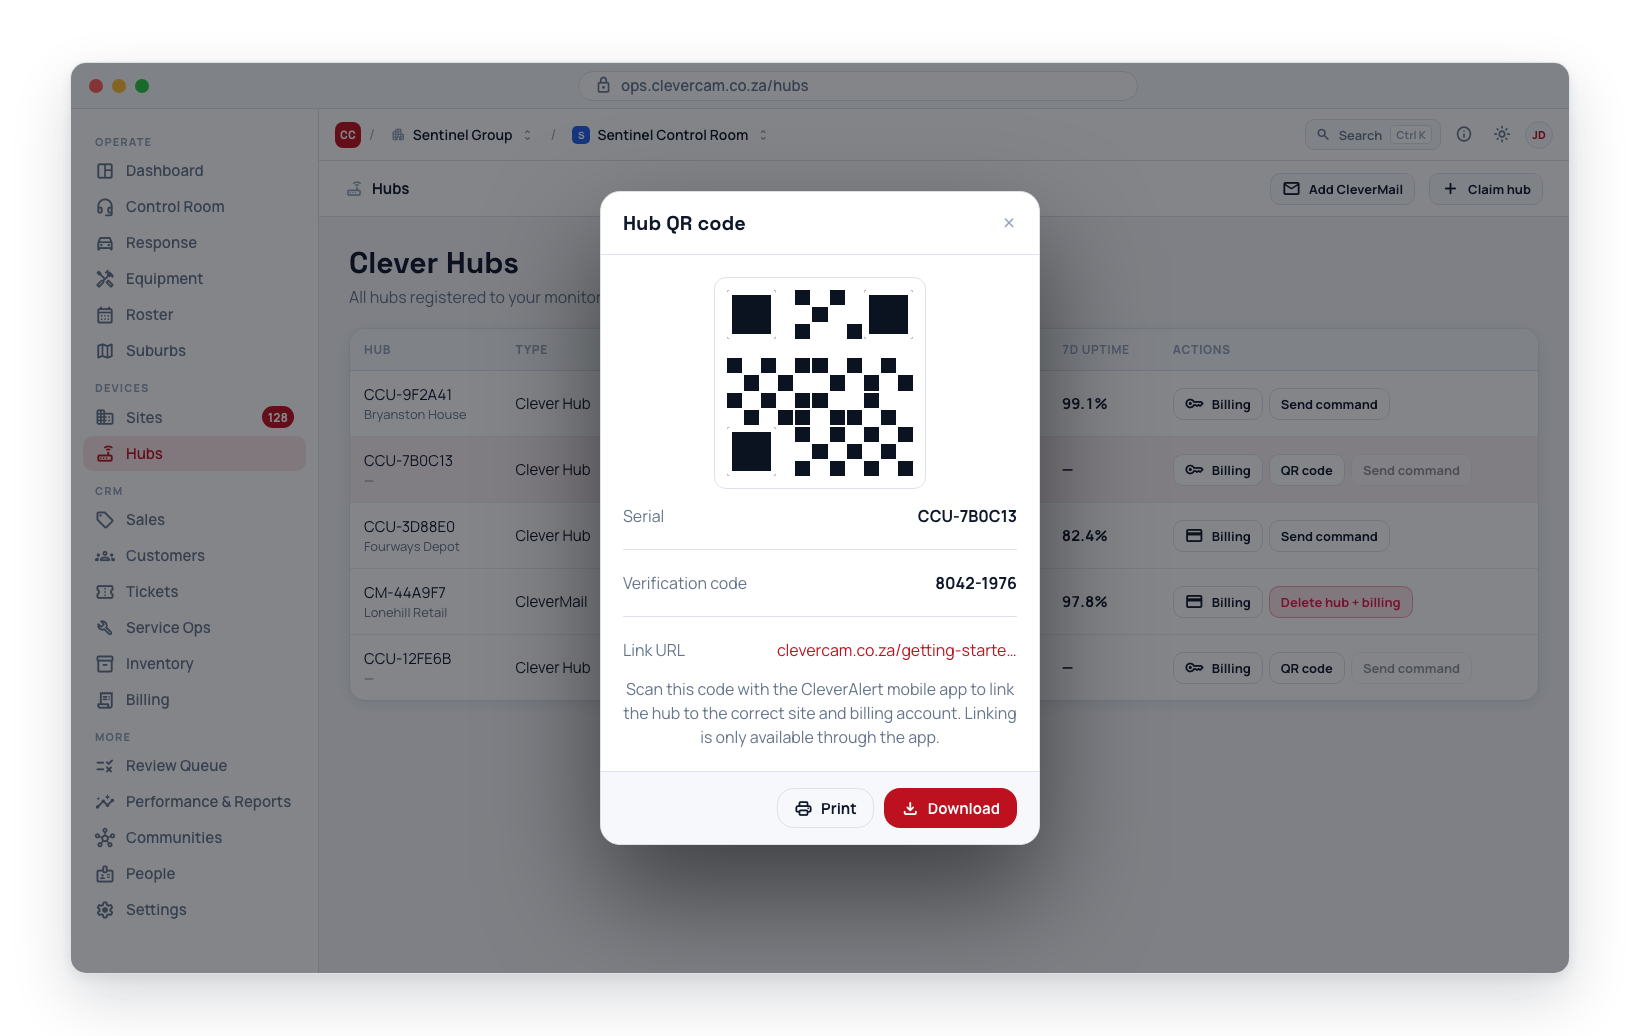
Hub QR Codes
What the QR Code Contains
The hub QR code contains the hub's unique identifier and setup information. When scanned by a technician's setup app, it automatically associates the hub with the correct billing account and monitoring centre, streamlining the installation process.
Viewing a Hub's QR Code
- Navigate to Hubs in the sidebar.
- Find an unlinked hub that has a serial and verification code.
- Click the QR code button in the Actions column for that hub.
- A dialog opens showing the link, QR code image, hub serial, and verification code.
The QR code button is only available for hubs that are not yet linked to a site. Once a hub is linked, the QR code button is no longer shown.
Using QR Codes During Installation
- The technician arrives at the site with the Clever Hub hardware.
- The technician opens the setup app on their mobile device.
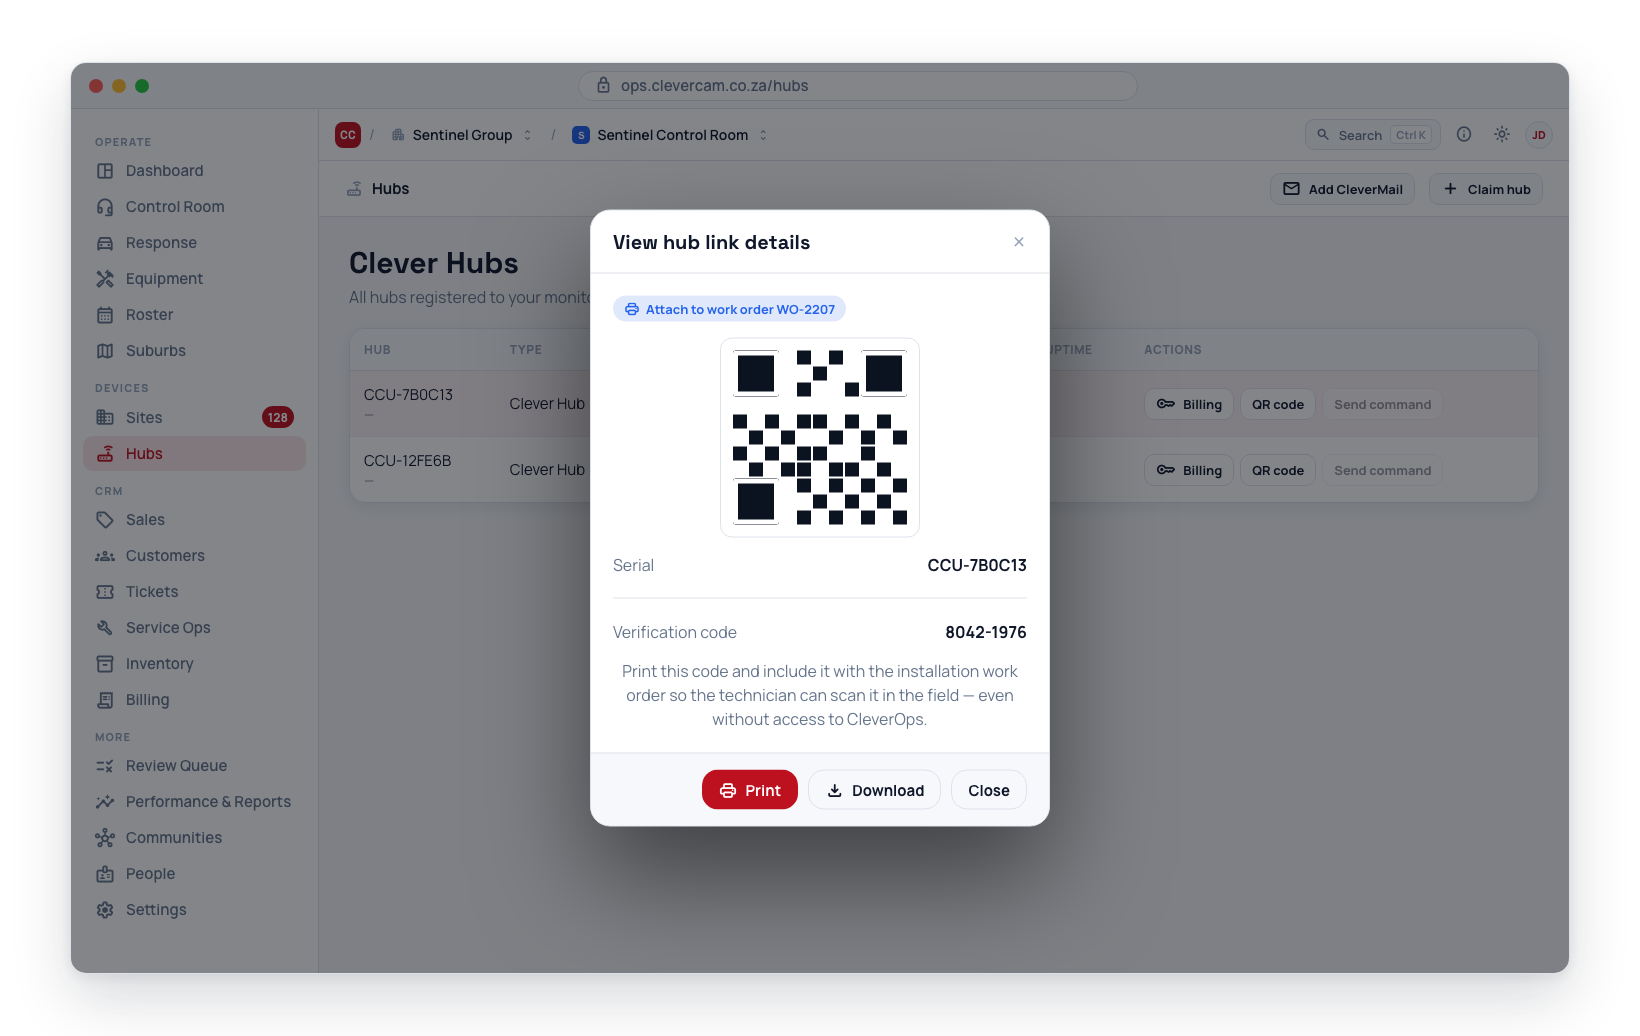
- They scan the QR code displayed in CleverOps (either from a printed copy or directly from the screen).
- The app reads the hub's setup data and automatically configures the connection.
- The hub links to the correct monitoring centre and billing account.
- The technician proceeds with physical installation (mounting, connecting cameras, connecting to the network).
Before a technician visit, print the hub's QR code and include it with the installation work order. This ensures the technician has everything they need even if they do not have access to CleverOps in the field.
CleverMail
CleverMail is a special hub type used for email-based alert distribution. Creating a CleverMail entry generates a new hub record with billing, which can then be linked to a site to enable email-based event notifications.
Creating a CleverMail Entry
- Navigate to Hubs in the sidebar.
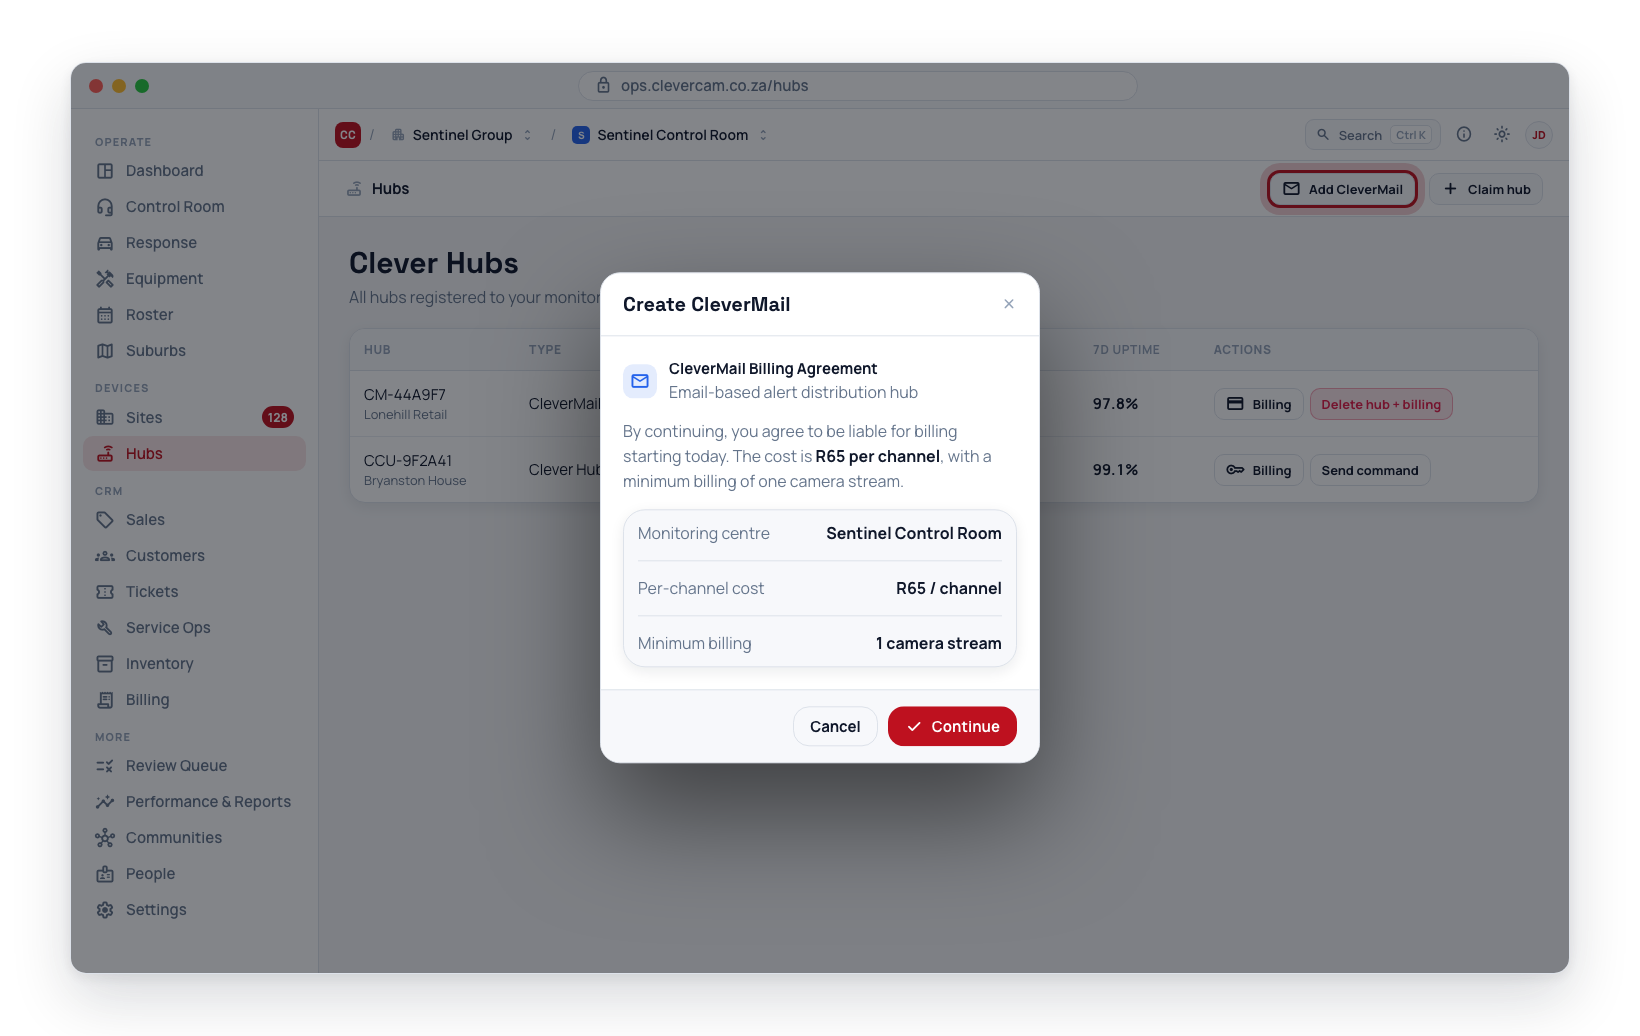
- Click the Add CleverMail button at the top of the page.
- The CleverMail billing agreement dialog opens, showing the per-channel cost (R65 per channel, minimum one camera stream).
- Click Continue to accept the billing agreement.
- A new hub is created and registered to your monitoring centre with billing activated.
- After creation, the hub's QR code dialog opens showing the serial and verification code for linking.
Linking a CleverMail hub (like any Clever Hub) is done through the CleverAlert mobile app. Share the QR code or serial and verification code with the technician performing the setup.