Olarm hub setup
Olarm is a communicator that fronts many panel brands (Paradox, DSC, IDS, Texecom) and electric-fence energisers (Nemtek/JVA). It speaks to CleverCam through two inbound feeds, and every Olarm receiver exposes both of them at once — you pick one as the default input, but both webhook URLs stay live on the same receiver.
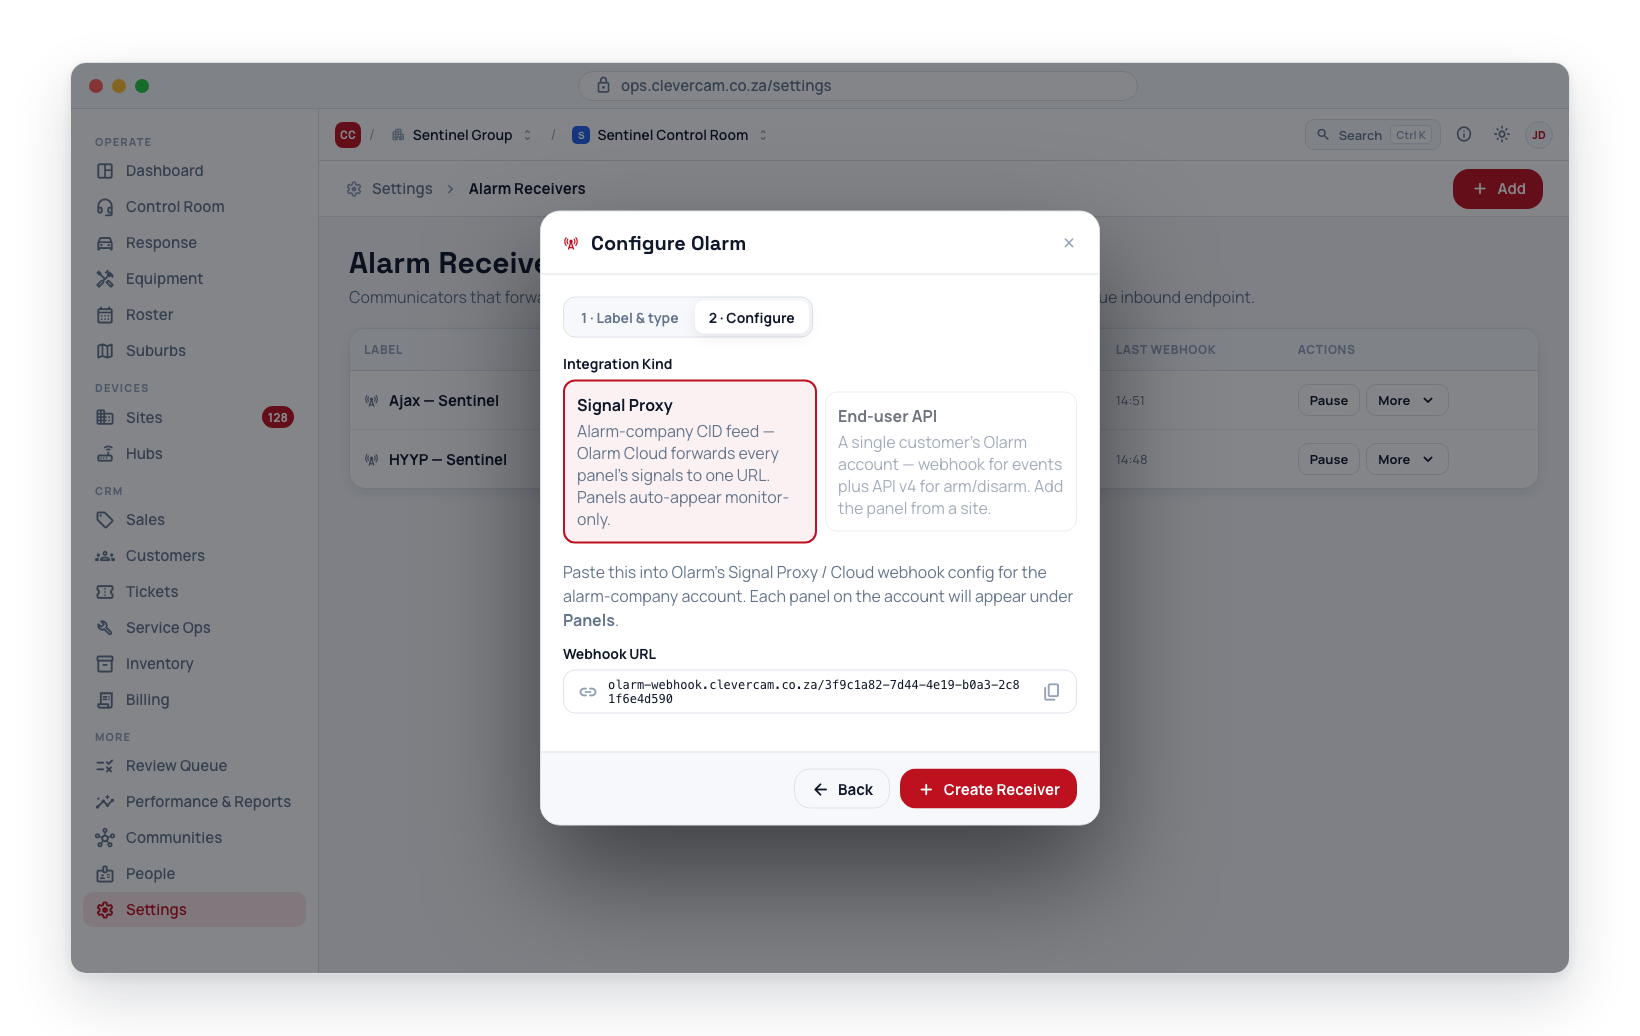
The two inputs
When you add an Olarm receiver (Settings → Alarm Receivers → Add, pick Olarm), you choose a Default input — but this is only what the Add-panel flow pre-selects; both feeds work on the receiver regardless, and you can change the default any time.
- Signal Proxy — for alarm / monitoring companies. Olarm Cloud forwards the Contact-ID signals of every panel on the company's Olarm account to the receiver's
/p/webhook URL. Each panel appears automatically in CleverOps as a monitor-only panel — you receive its events but cannot control it, until you enable control on a specific site. - End-user API — for end customers. Events arrive on the receiver's
/c/consumer webhook, and each customer's API key lets CleverAlert arm, disarm, and bypass the panel. Panels are added from Manage Panels by entering the device serial and API key — a Test connection step looks the device up on Olarm and resolves it for you.
Even on a Signal Proxy receiver, you can switch on app control for chosen sites. Control follows the Olarm API key on each individual panel — not the receiver kind. A panel with no key stays monitor-only; paste a key onto it and it becomes controllable. This means one panel does both jobs (live signal feed and app control) without ever creating a second hub.
Creating the receiver
- Go to Settings → Alarm Receivers and click Add.
- Enter a Label and pick Olarm, then Next.
- Choose the Default input (Signal Proxy or End-user API). You can change this later — both endpoints stay live either way, and the site's Add hub dialog always opens on Monitor only (the Signal-Proxy lane) regardless.
- The receiver shows both Webhook URLs. Use whichever the source needs (you can use both):
- Signal-Proxy URL (
…/p/…) → paste into Olarm's Signal-Proxy / Cloud webhook configuration for the alarm-company account. - Consumer URL (
…/c/…) → paste into the customer's Olarm portal (user.olarm.co → Webhooks).
- Signal-Proxy URL (
- Click Create Receiver.
Once Olarm starts sending, the receiver row shows a rising Webhooks count and a Last Webhook time.
Managing panels (Signal Proxy)
A Signal-Proxy receiver collects one panel per Olarm device automatically. To see and provision them, open the receiver and click Manage Panels (or More → Manage panels on the receiver row). The Olarm Panels window lists every panel with its device ID, online dot, linked site, and a control badge:
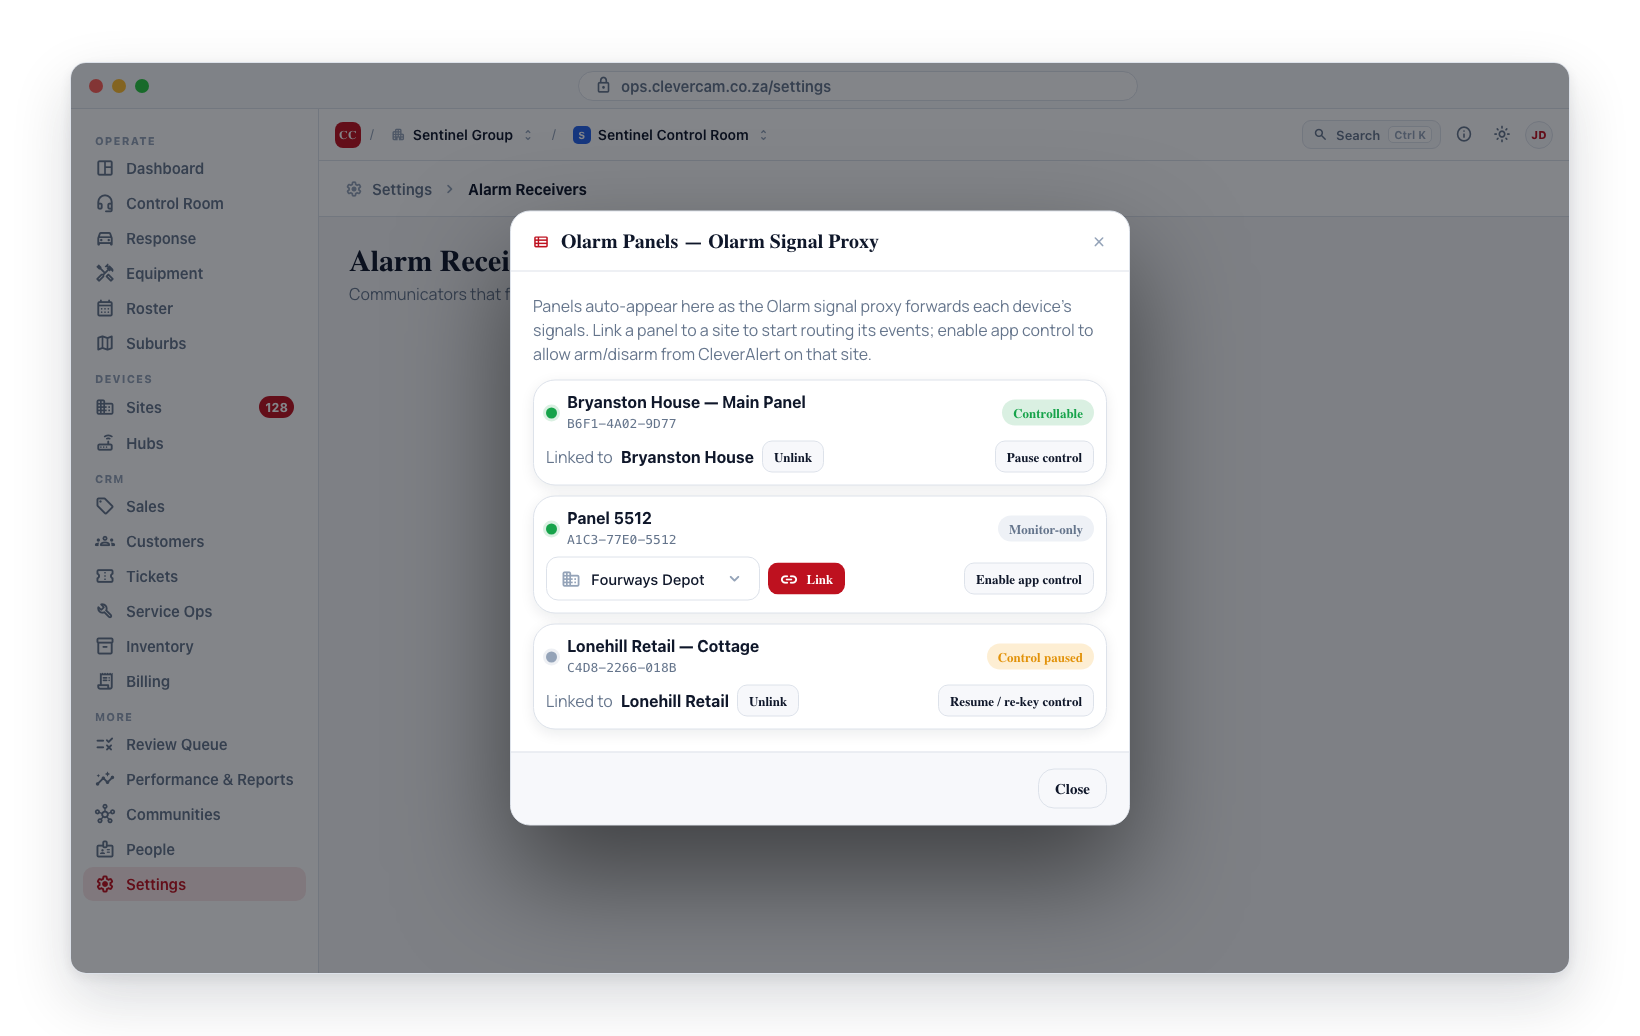
- Monitor-only — receiving events; no app control.
- Controllable — an API key is set and validated; CleverAlert can arm/disarm/bypass.
- Control paused — a key was set but control is currently switched off.
- 🔑 Key expired — Olarm has rejected this panel's key. Arm, disarm and sync are paused until it is renewed; the row shows a Renew key button. The customer also gets an "Alarm control paused" notification, and the panel raises a Trouble in the control room.
For each panel you can:
Link to a site
Pick a site from the dropdown and press Link. The panel's events now route to that site. Use Unlink to detach it again — the same soft removal as Remove from site in the site's panel editor: the panel's zones and partitions are archived and detached, its billing stops, and the panel stays in this list (and under Hubs as Unlinked) ready to be linked again.
You can also do this from the other direction — open the site, click Add hub, pick the Olarm receiver tile, go through the TX number step (below), and choose the panel from the Already reporting to this receiver list on the link step. That list holds the same auto-spawned panels, searchable and ordered by most recent signal. Use whichever direction suits: start from the receiver when you're working through a batch of new panels, start from the site when you're onboarding one customer.
Picking the Olarm tile first opens a TX number step for that line: enter the panel's account code and CleverOps checks every receiver line on the control room for it, so a panel already heard on another line shows up too. Picking a match jumps straight into that line's link step with the panel pre-filled; Continue with <code> opens the Olarm link step with its TX number field already filled; Continue without a TX number opens it blank so you can pick from the list. See Adding an alarm panel by TX number.
An Olarm panel's identity is its device UUID, which matches nothing on a job card. So each row in that list also shows the account code the panel transmits — the underlying alarm panel's Contact-ID account — and the list is searchable by it: type 9111 and the panel reporting on account 9111 comes up. Pick one and CleverOps repeats the account code under the picker before you link. Linking binds that account code to the site there and then, so the site's Hubs & cameras row reads Olarm · TX 9111 · Serial … and Edit hub shows the TX number as soon as the dialog closes — not only after the panel's next signal. The same applies in Replace communicator. A panel that has not yet sent a signal carrying an account code shows none — link it by serial as before.
Pre-register a panel that hasn't signalled yet
A panel that has never transmitted has no row to pick — its device UUID only becomes known when Olarm forwards its first signal. If the panel is already programmed with an account code, you don't have to wait for that: open the site, click Add hub → Olarm, enter the code on the TX number step and Continue with <code> — the link step opens with it in the Panel TX number (account code) field — then leave the switch at the top on Monitor only and skip the list. Link Panel registers the panel against the site immediately, by that code alone. Until its first signal it is waiting for first signal: the wizard's TX number step lists it as Registered — waiting for first signal, and its row on the site's Hardware tab carries a Waiting for first signal note next to its TX number. When the first signal arrives it is matched by that account code (leading zeros are ignored, so 0912 and 912 are the same code) and adopted — the signal routes straight to the site, the panel picks up its device UUID automatically, the site link stays, and no duplicate panel is created. The wizard's Done screen says as much: "Registered by TX number — it picks up its device automatically on the first signal and shows as Waiting for first signal until then."
- The code is checked against the receiver's TX number (account code) rule as you type. An Olarm line has no default rule, so this only applies once one has been set on the receiver; a code that breaks it is shown in red under the field with the reason, and Link Panel stays disabled.
- If the code you type is already transmitting to this receiver, CleverOps links that existing panel instead of creating a second one — the code you typed stays in the field.
- If the code is already linked to another site, nothing moves silently. An Already linked elsewhere box appears at the top of the step — "<code> is linked to <site>. Moving it here takes that site's panel away — its zones, partitions and signal routing come with it." — with Move panel to this site (red) and Keep it where it is. The check under the field reads Already linked to <site> — Add Panel will ask before moving it here.
- If the code is already attributed to a site on this receiver (for example it was bound to the panel's old communicator), the dialog warns you and points you at the merge path below instead of pre-registering a duplicate.
- An all-zero code (
0000) is refused: that is what a panel transmits when no account is programmed, so it can't identify one.
Record an account code on a panel that transmits none
A panel can appear in the Already reporting list with no account code shown — as a bare device ID that matches nothing on a job card (this happens, for example, when its code is still attributed to the panel's old communicator's record) — and then it can't be found by the number the installer knows it as. The Panel TX number (account code) field sits below the list at all times: picking a panel fills it with the panel's known code, and for a panel with none you type the code it's known by — Link Panel records it on the panel as it links, as the panel's secondary identity (its device UUID stays the primary one). Operators can then search and recognise it as that account everywhere account codes are shown. If another reporting panel already carries the code you typed, the field warns you before you link.
Enable app control (and renew a key)
Press Enable app control — or Renew key on a panel whose key has expired, or Replace key on a working one — paste the Olarm API key (the Bearer key from the customer's Olarm account), and press Save key. CleverOps checks the key against Olarm before storing anything:
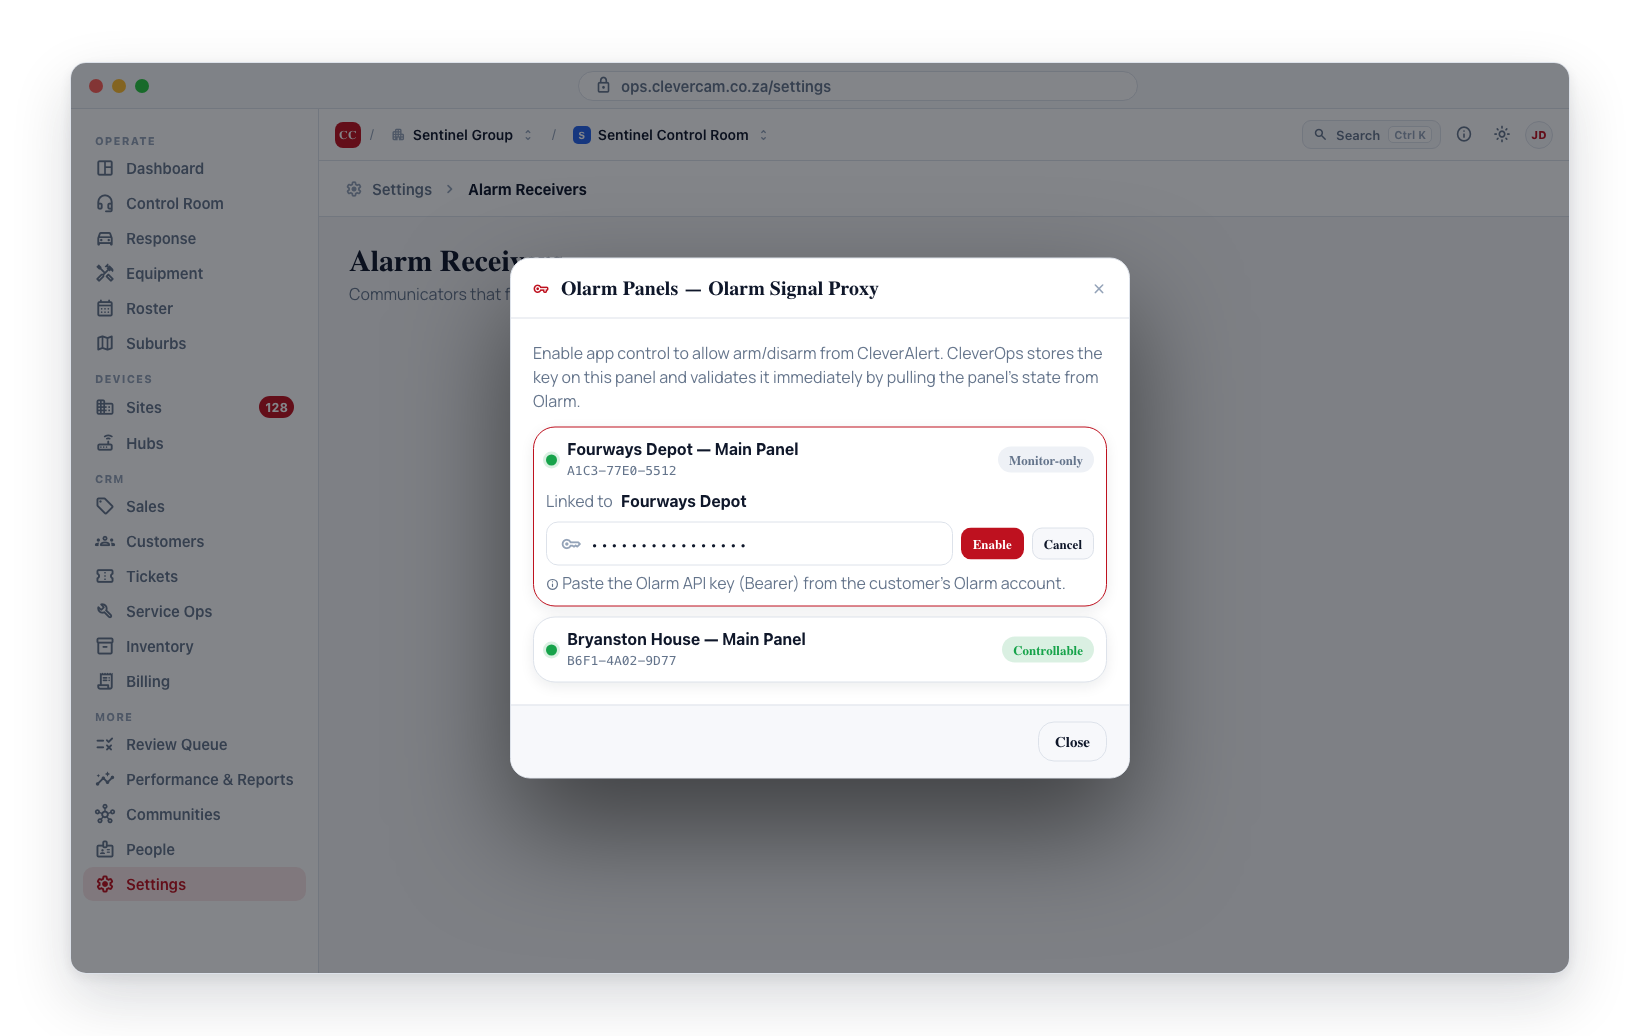
- If the key works, it is saved, the panel flips to Controllable, and its areas/zones sync in.
- If Olarm rejects the key, nothing is changed at all — no panel is left half-configured.
Use Pause control to return a controllable panel to monitor-only without removing it.
Choose the scope: the whole account, or just this panel
An Olarm API key is issued per Olarm account and covers every device on it — a customer with an alarm panel and an electric fence has two panels sharing one key. Whenever the key you are replacing is shared, CleverOps says so and offers a choice:
- Update all N panels on this account (recommended, and selected by default) — every panel still carrying the old key gets the new one in a single step.
- This panel only — leaves the other panels on their existing key. Useful when you are deliberately moving one panel onto a different Olarm account.
Any panel that was showing Key expired clears its Trouble automatically as soon as the new key is saved.
If the customer regenerates their key in the Olarm portal, the old key dies for all of that account's devices at once. Updating a single panel fixes only that panel — the others keep failing until they get the new key too. This is exactly what the Update all N panels option is for; only pick This panel only if you mean it.
End-user API panels
An End-user API endpoint is reusable across the whole VCR — you normally need only one. Every customer pastes the same webhook URL into their own Olarm portal (user.olarm.co → Webhooks); inbound events are told apart by the device, not by a per-customer URL.
You can add a customer's panel two ways — both use the same serial + API key + Test flow:
- From the site: open the site, Add hub → Olarm (the site is already chosen for you), or
- From the endpoint: Settings → Alarm Receivers → the Olarm endpoint → Manage Panels → + Add panel (pick the site in the form).
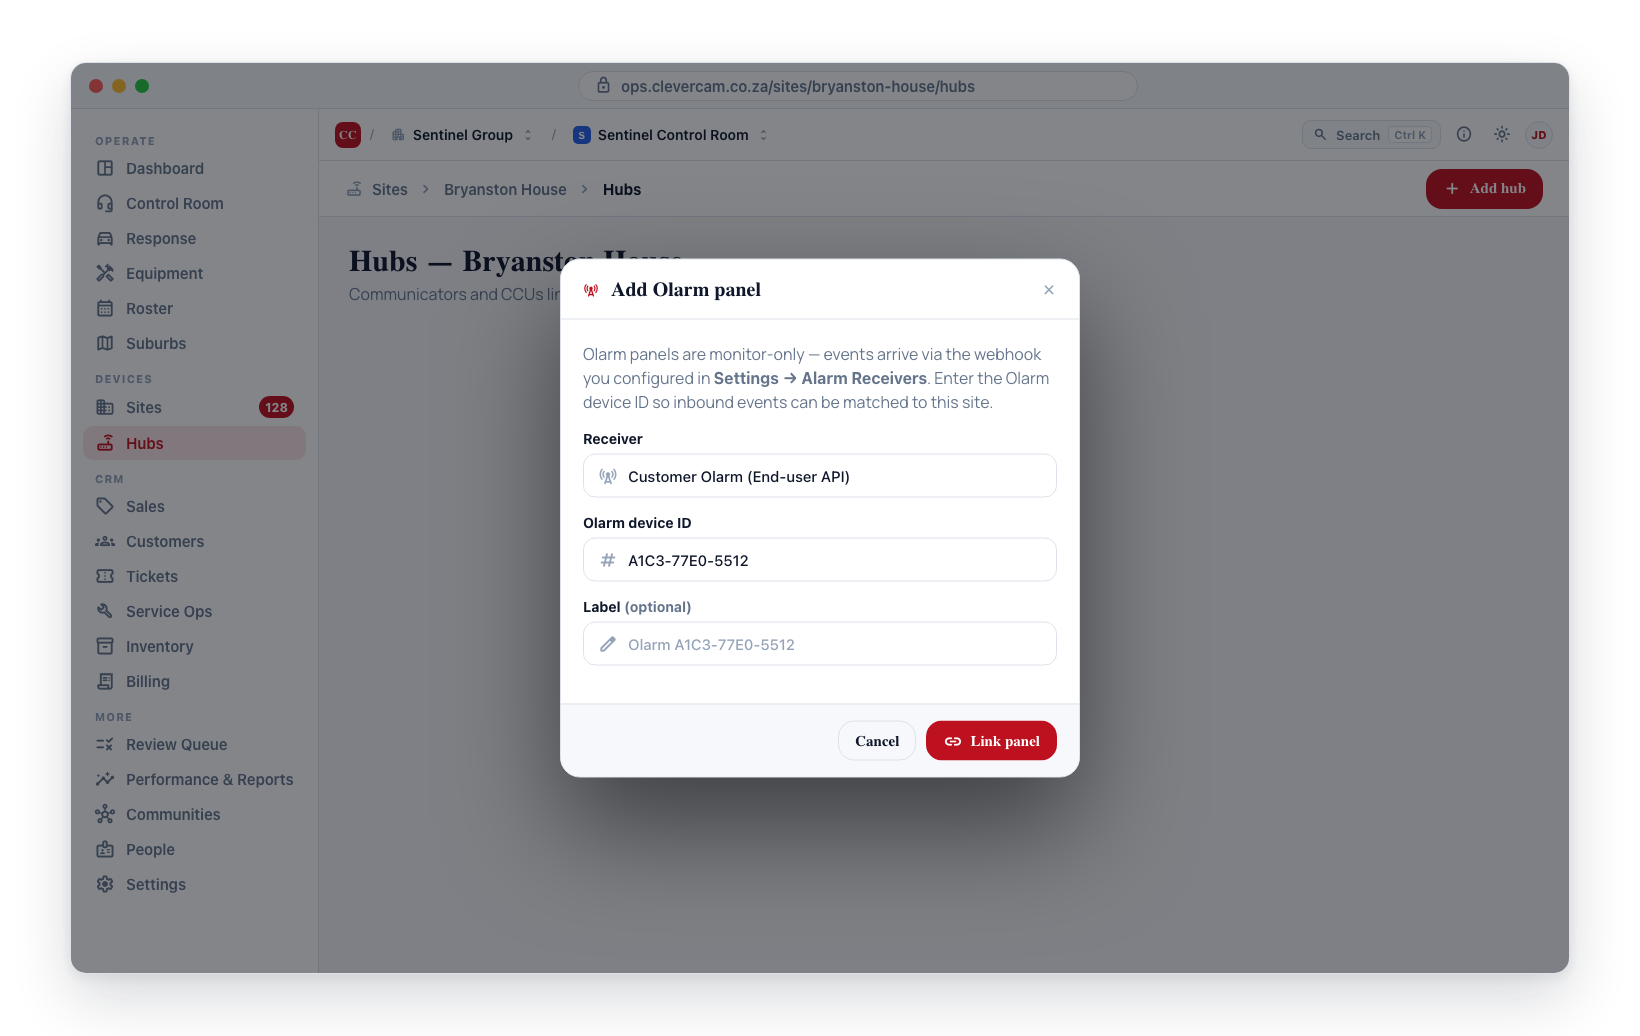
When you start from the site, the Link Olarm Panel dialog opens on Monitor only, with an Already reporting to this receiver list: every Olarm device this receiver has heard that isn't linked to a site yet — whichever feed it reports on — searchable, most-recent-signal first, each row showing when it last transmitted. Pick one and click Link Panel — no serial to re-key and no API key needed.
Linking that way is monitor-only. To add remote arm / disarm, switch to Manage and use the serial + API key form instead — it finds the panel that is already reporting by its device and links that one, so no second panel is created. (You can also paste a key onto the panel later from Manage Panels — see Enable app control.)
Then, from the site's Add hub wizard:
- Switch the Monitor only / Manage switch at the top to Manage — the dialog always opens on Monitor only. The line under the switch reads "Adds remote arm / disarm with the customer's Olarm API key…", and the webhook line shows the Consumer URL.
- Enter the Panel TX number (account code) — the Contact-ID account programmed into the alarm panel, the number on the job card. The helper text under the field explains why it is asked for here: "The end-user feed never carries it, so it is recorded here and nowhere else." It is required — Link Panel stays disabled until it is filled — and it is checked against the receiver's TX number (account code) rule as you type.
- Enter the Device serial exactly as it appears in user.olarm.co (e.g.
M68MD9FV). - Supply the customer's Olarm API key (the Bearer key from user.olarm.co → API). If a panel on the same Olarm login is already on this receiver, a Key already on file box appears above the field: press Use the key on file for <panel> (or pick it from the list when more than one key is on file) and the key is filled in for you, shown masked, with Paste a different key instead to go back to pasting. Olarm shows a key only when it is generated, and generating a new one stops every panel still on the old key — so reuse is the only safe way to add a second device on the same login. If Olarm rejects a key taken from file, the error names the panel still carrying it — that panel's app control is down as well; renew the key there (Manage Panels → Renew key) or paste the new key.
- Press Test connection. CleverOps calls Olarm to confirm the key works and to resolve the serial to its device — the brand (Paradox, Nemtek, …), online status, and internal device ID all appear.
- If the serial doesn't match exactly, every device on the account is listed so you can pick the right one.
- Press Link Panel. The panel is linked to the site, control is enabled, and its areas/zones sync in immediately.
From the endpoint's Manage Panels → + Add panel form the flow is the serial + key + Test steps without the TX number field: pick the Site the panel belongs to, enter the Device serial and Olarm API key (the same Key already on file box offers any key the listed panels carry), press Test connection, then Save panel.
The long internal device identifier that inbound events carry is not something you read off the portal — Test connection discovers it from the API key for you. You only ever type the human-readable serial.
If a customer has more than one device on a single Olarm login (e.g. a Paradox panel and a Nemtek fence), add each as its own panel under the same endpoint with the same API key — Test connection resolves each serial to the correct device. You do not need the key text again: once the first panel is on file, the add forms offer its key under Key already on file. Do not generate a new key on user.olarm.co for the second device — that invalidates the key the first panel is using.
What events arrive
Both inputs raise the usual arming, disarming and alarm events. The End-user API feed also reports the panel's own health, so an Olarm site surfaces these without any extra setup:
| What happened | Shows up as |
|---|---|
| Mains power failed or came back | AC power loss / AC power restore, against the hub |
| Hub's standby battery failed or recovered | Low system battery / Battery restore |
| The Olarm communicator dropped off or came back | Communication lost / Communication restore |
| A hub or wireless-node lid was opened | Tamper alarm, then Tamper restore when closed |
| A wireless sensor's battery went low | RF low battery, named for the sensor (e.g. Gate QXI) |
| A wireless sensor stopped reporting | RF supervision fail, then restore when it returns |
| A zone with Zone Watch switched on in Olarm was triggered | Zone activity — see below |
Zone activity (Zone Watch). Olarm lets a customer flag individual zones with "tell me whenever this one trips", armed or not. Those arrive as Zone activity events. They are deliberately routine: they appear on the site timeline and in the app's system notifications, but they never raise an alarm, never dispatch, and never wake the control room — a watched driveway beam can trip all day without creating work.
Olarm identifies a wireless node by name only, so a node event reads "RF low battery — Safe door" rather than a zone number. The name comes from the customer's Olarm setup and is not clickable — there is no zone row behind it to open.
Electric fence
Olarm PRO energisers (Nemtek/JVA) connect through the same Olarm integration. A fence appears as a set of zones plus an "Electric Fence" partition. Most installations are monitor-only — the fence is armed from its own keypad and the Olarm link reports status, voltage, and breaches but does not arm/disarm the energiser.