Vehicles
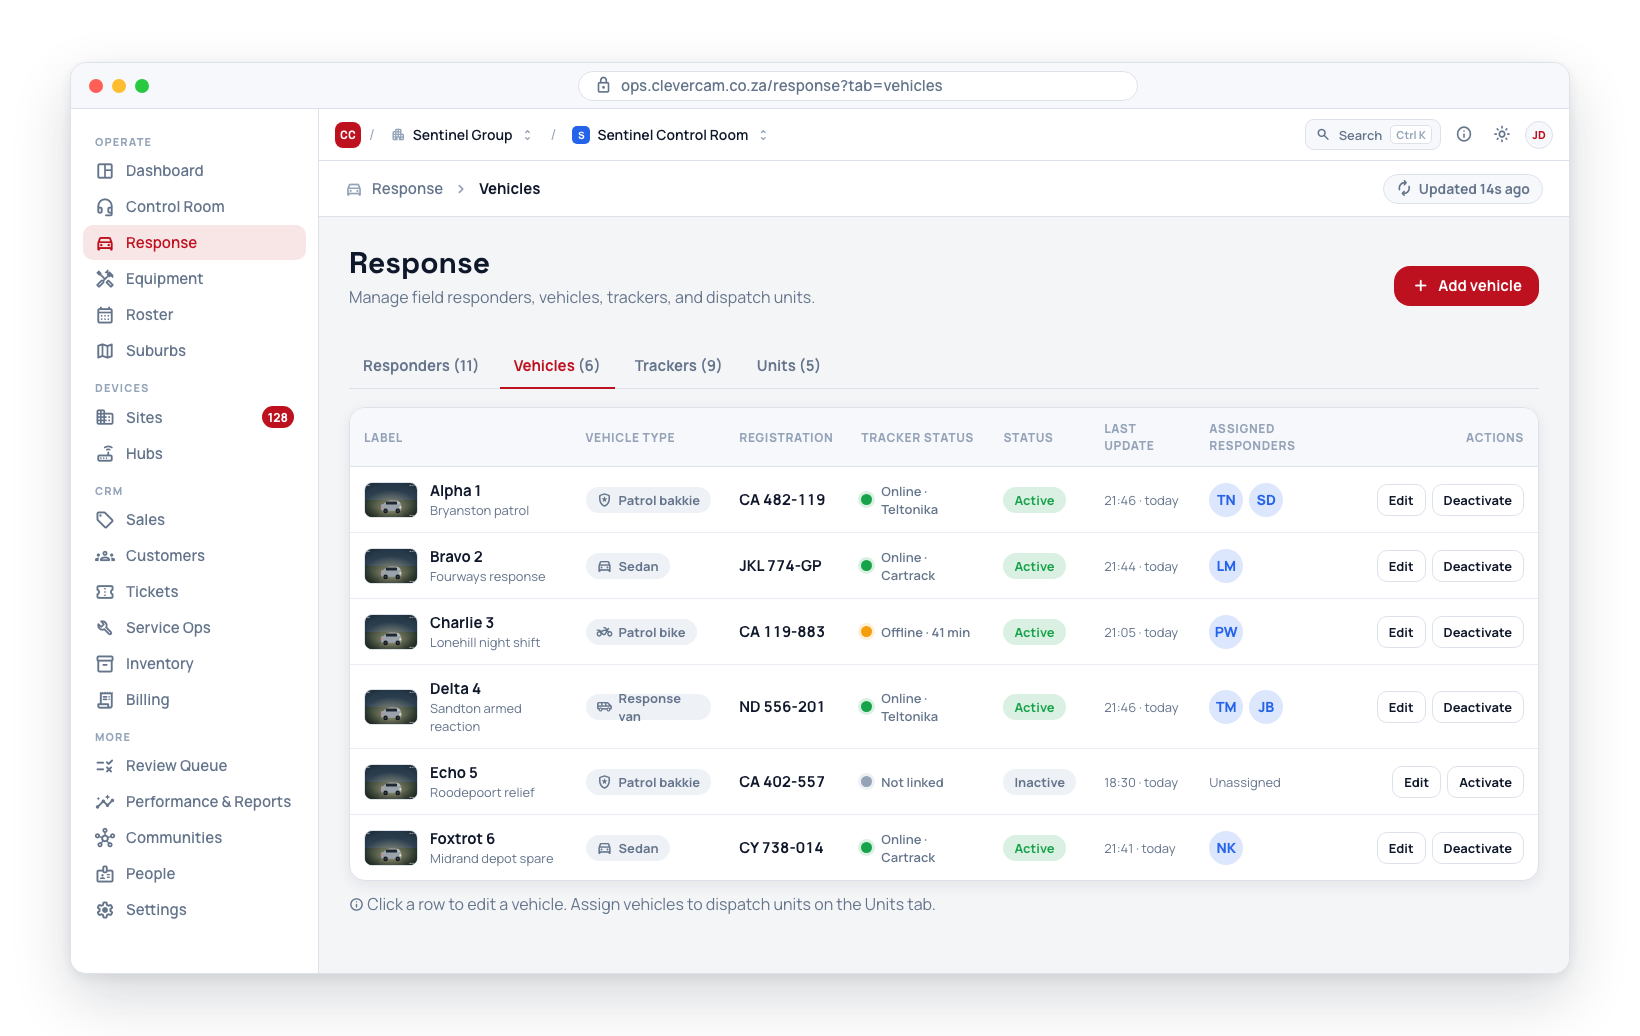
The Vehicles page provides an inventory of all response vehicles registered under your company. Vehicles are the cars, bikes, or patrol vehicles that responders use when dispatched to incidents. Keeping your vehicle fleet up to date in CleverOps ensures that you always know what resources are available, which vehicles are active, and when each vehicle last reported its position.
Viewing Vehicles
-
Navigate to Equipment in the sidebar — Vehicles is its home tab.
-
The Vehicles tab's views are selected by the row of buttons under the tab strip:
- Board — what the fleet is doing right now: a map with a card per vehicle beside it. This is where you land. See Board. Like the Live map, it only appears once at least one vehicle has a tracker that has reported a position; without one you land on List instead.
- Day — what the whole fleet did on one day: a row per vehicle with its trips drawn along a shared 24-hour axis. See Day. It appears under the same condition as the Board.
- List — the fleet register (below).
- Live map — the same positions without the cards. See Live map.
- Checks — the vehicle inspections and the checklist behind them. See Needs attention, Recent checks and Vehicle check list.
- Drivers — who drove the fleet's vehicles, one row per person. See Drivers.
- Cases — case files that gather a matter's evidence in one place, with a record of who handled it. See Cases.
-
The bar above the fleet filters it, and the same filters apply to every fleet view — Board, Day, List and Live map always describe the same set of vehicles. (Checks, Drivers and Cases are not views of the vehicle list, so they have no bar.)
- When vehicle tags exist, a Tag filter narrows the fleet to one tag. A filter set from a column heading narrows it too, and stays in the bar as a chip in every view.
- List and Live map show only active vehicles by default; the Active / All toggle includes deactivated ones (their history is kept — see Deactivating vs. deleting). Board and Day only ever show active vehicles, so the toggle is not offered there.
- The count — 12 of 36, how many vehicles match of every vehicle on your control room — plus Columns ▾ and Export CSV belong to the table, so they appear in List view only.
-
The list is a table with one line per vehicle. Every column it can show is listed below; Columns ▾ decides which ones you see. Click a row to open the vehicle.
The columns you start with:
- Vehicle -- The vehicle's name, plus a chip showing the unit it is assigned to (if any) and a chip naming who has it right now — Out: Alpha 1 for a sign-out, Alpha 1's for a permanent driver. An amber Idle 5w chip appears when the vehicle has gone quiet — see Stale assignment signal below. A Hidden in Command chip appears when the vehicle is not offered when building units, Off live map when it is kept off the control-room map, and Technician vehicle when it is plotted on the Service Ops map — all three come from the vehicle's tags, see Controlling what the control room sees. The vehicle's tag strip sits at the end of the same line. This column is always shown.
- Registration -- The vehicle's licence plate or registration number
- Tracker -- The IMEI of the GPS tracker linked to this vehicle, or Not linked
- Tracker status -- Online or Offline for the linked tracker (hover for when it was last heard from); a dash when no tracker is linked
- Status -- Active or Inactive badge
- Actions -- Edit (registration and tracker) and Deactivate / Activate. Only shown to people who can manage the fleet, and always shown to them.
The columns that start switched off:
- Unit -- The response unit the vehicle is assigned to, on its own rather than as a chip; Not in a unit otherwise
- Driver -- Who has the vehicle right now, and on what basis — signed out or permanent; Nobody otherwise
- Control room -- The vehicle's visibility to the control room in words: Hidden in Command, Off live map, Technician vehicle, or Offered · on live map when none of those apply
- Last check -- The date a vehicle check was last started on it (hover for the time); Never if none
- Last activity -- The most recent check, trip or fuel log on the vehicle — the same signal the Idle chip reads
- Tracker last seen -- When the linked tracker last reported, as 5m ago / 2h ago / a date
- Added -- When the vehicle was registered
- Vehicle ID -- The vehicle's record number, for support queries
Choosing your columns
The list does not show all of those at once. Columns ▾, at the right of the bar above the table, is where you decide which ones it shows — tick a column to bring it in, untick it to hide it. The button says how many are currently hidden, so a column somebody switched off is never a mystery. Vehicle (and, for fleet managers, Actions) is listed too, ticked and greyed with always beside it: it cannot go, and the list says so rather than leaving it out.
Put them in the order you read them. The ↑ and ↓ beside each column in Columns ▾ move it one place; a column heading's own menu (the small ▾ that appears when you hover a heading) has Move left and Move right for the same thing. Locked columns stay where the list put them, but other columns may move past them.
Your choice is yours alone and it follows you. Columns, their order and the sort are saved against your login, not the browser, so the list looks the same on the control-room machine and on your laptop, and changing it does not touch what your colleagues see. Reset to default view puts everything back.
Sorting the list
Click a column heading to sort by it; click it again to reverse. An arrow marks the column the list is sorted on. The heading's ▾ menu offers the two directions by name — A → Z / Z → A for text, Newest first / Oldest first for dates, Online first / Offline first and the like for states — so you never have to click twice to get the one you meant.
These headings sort: Vehicle (the default, by name), Registration, Tracker (linked first / unlinked first), Tracker status (online first / offline first — vehicles with no tracker sit at the bottom either way), Status (active first / inactive first), Unit, Driver, Last check, Last activity, Tracker last seen, Added and Vehicle ID.
The whole fleet is loaded on this page, so a sort orders every vehicle that matches your filters, not just the ones on screen. A vehicle with nothing to sort on — no check yet, no unit, no tracker — always sits at the bottom, whichever direction you pick. Like your columns, the sort is saved against your login.
Control room and Actions are not sortable; their menu says so.
Filtering from a column
A column's ▾ menu is also where its filter lives, so the answer to "how do I narrow the list by this" is the same for every column. Pick a value and the list (and the Live map) is filtered; the heading's ▾ turns solid while a filter is set, and a chip naming the filter appears in the bar — even if you later hide the column — with × to clear it.
- Tracker status -- Online, Offline or No tracker linked
- Unit -- In a unit or Not in a unit
- Driver -- Signed out right now, Has a permanent driver or Nobody has it
The Vehicle column reaches the same Tag filter as the dropdown in the bar, and the Status column reaches the Active / All toggle (Active only / All, including inactive) — both from their heading. Column filters are session-scoped — they clear when you leave the page.
When nothing matches, the list says No vehicles match rather than No active vehicles, so an over-tight filter is never mistaken for an empty fleet.
Exporting the list
Export CSV, beside Columns ▾, downloads the vehicles that match your filters, in the order the list is sorted, with the columns you have showing — in your order, with Vehicle always first and Actions never included. A view built for a tracker audit downloads as a tracker audit. Dates are written as 2026-09-11 14:05 so a spreadsheet reads them as dates, and the Vehicle column exports as two — the name and its tags. The file is named vehicles-<date>.csv (vehicles-all-<date>.csv when the All toggle is on).
Adding a New Vehicle
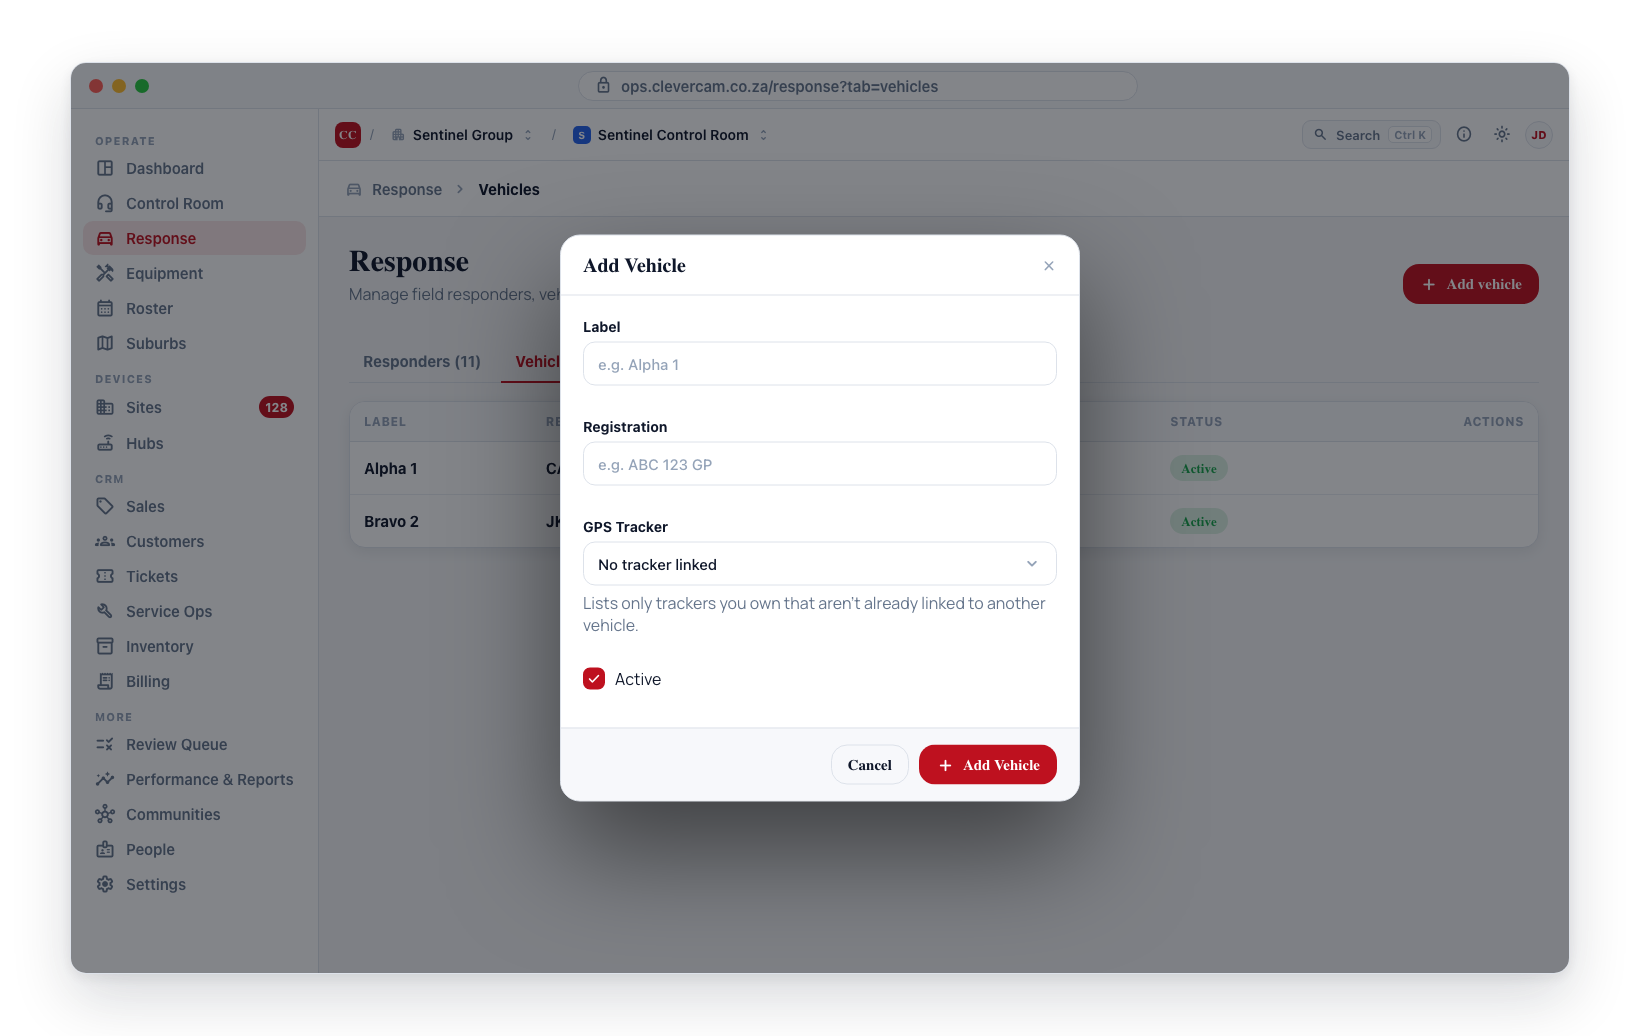
- Click the Add vehicle button at the top of the page. (An empty fleet shows the same Add vehicle button in its empty state.)
- In the form, enter the vehicle details:
- Label -- A descriptive name (e.g., "Alpha 1")
- Registration -- The licence plate or fleet number (e.g., "ABC 123 GP")
- GPS Tracker -- Select an available tracker from the dropdown to link it to this vehicle. The dropdown only lists trackers you own — your VCR's own fleet trackers plus trackers on sites you monitor — and excludes any tracker already linked to another vehicle.
- Active -- Toggle whether the vehicle is active.
- Click Add Vehicle to save.
What the control room may do with the vehicle is not set here — it comes from the vehicle's tags. See Controlling what the control room sees.
Editing Vehicle Details
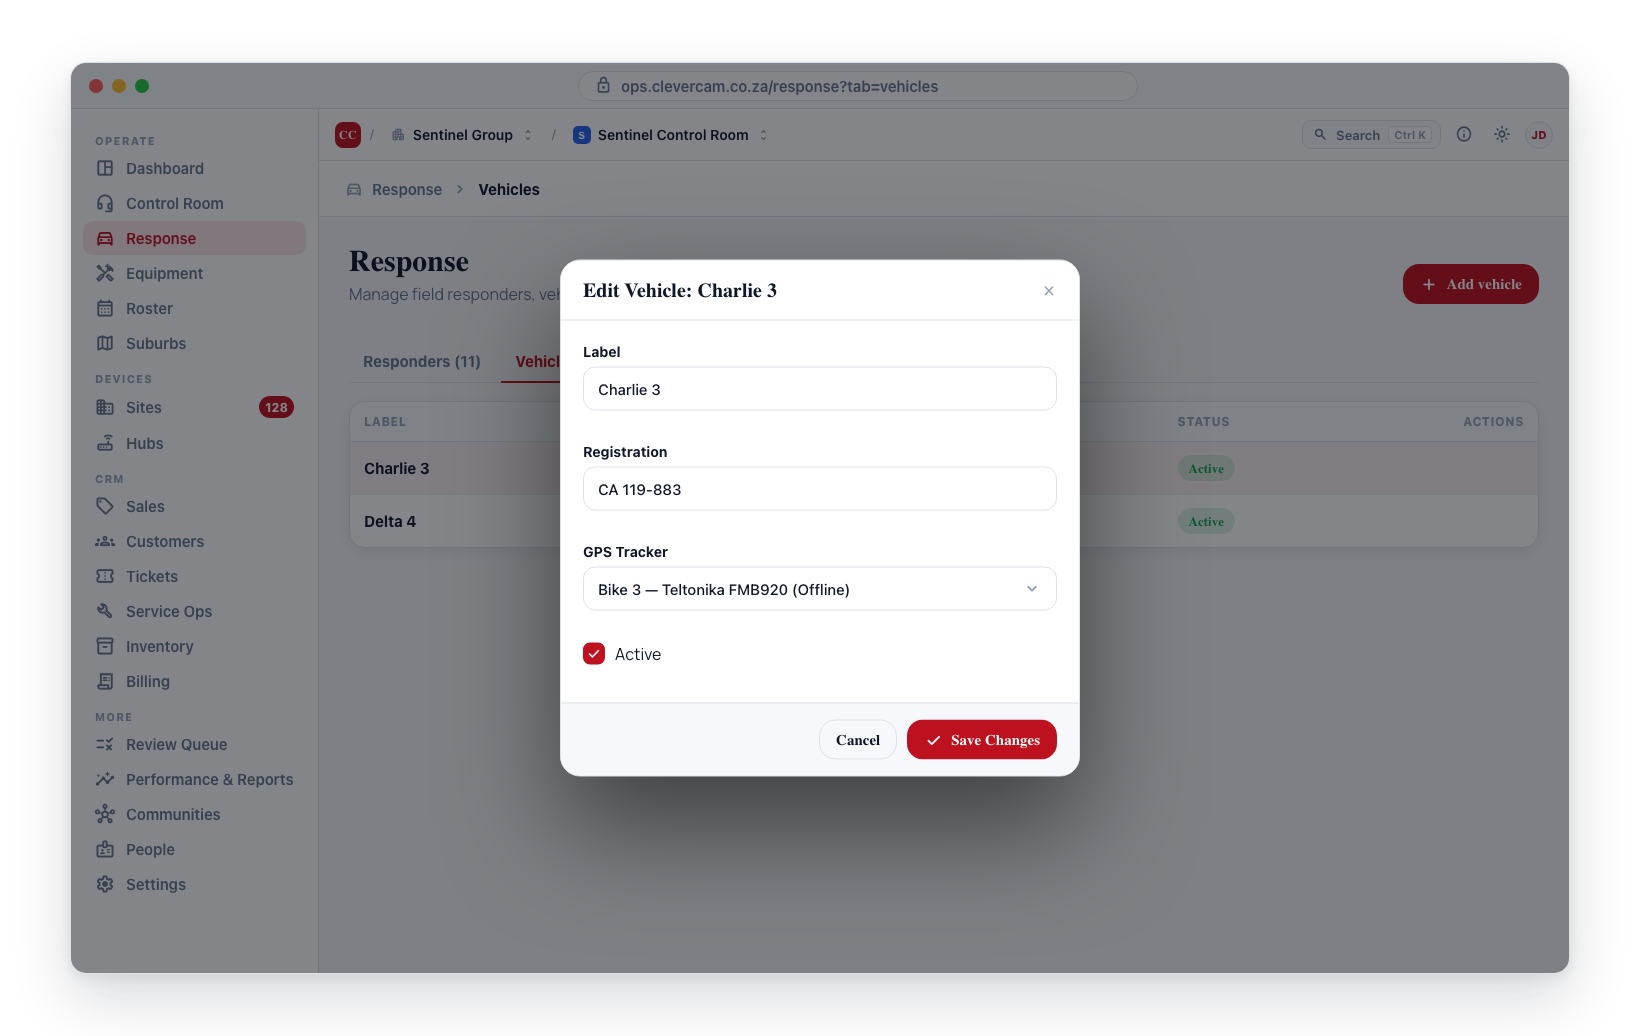
- Click on a vehicle row in the list.
- The edit form opens with the vehicle's current details pre-filled.
- Make your changes and click Save Changes.
Reading the licence disc
The licence disc carries the whole identity of a vehicle and the date it falls due, so one scan settles both. Open the vehicle in the fleet view, go to its Compliance tab, and click Scan disc.
The barcode can come from a handheld scanner (it types into the box like a keyboard), the camera, or a photo taken earlier.
The handheld scanner is the reliable route — it reads the barcode exactly, every time. Reading a photograph is much harder: tested against ten real photographs of real discs, CleverOps read three. The ones it read were close, flat, evenly-lit pictures of the barcode. Pictures of a whole licence document, or of a disc still behind the windscreen, mostly did not read. If a photo will not read, take a closer square-on one rather than re-cropping the same picture.
What it fills
| From the disc | Goes to |
|---|---|
| Registration number, make, model, colour | The vehicle's Details |
| VIN, engine number, NaTIS register number | The vehicle's Details |
| Licence number and expiry date | A Licence disc record on the Compliance tab |
The expiry lands as a compliance record rather than as a field on the vehicle, which is what puts it into the weekly renewal reminder without any further setup.
Nothing is written until you confirm it
A scan opens a review screen showing every field beside what is already on file, each with its own tick:
- Fields that are blank on file are ticked.
- Fields that disagree with what is on file are left unticked and marked differs.
- A later expiry than the one on file is ticked — that is a renewal, and the ordinary reason to scan.
- An earlier expiry is not, and is called out: it usually means last year's disc is still on the windscreen.
There is no published specification for the disc's barcode and the layout has moved between disc generations, so CleverOps anchors on the VIN — the one field with a fixed shape — and reads outwards from it. If it cannot place make, model and colour with confidence it says so rather than guessing, and lists everything the disc contained at the bottom of the review screen so you can check those three yourself.
Vehicle Tags
Like responder tags, vehicles carry a small managed catalog of coloured tags for filtering and grouping — for example Reaction, Technical, Shift change, or Management. Managing tags requires the Fleet & vehicles capability (VCR settings also qualifies).
- On the Vehicles tab, click Manage tags to build the catalog: label, optional category, and a chip colour. Renaming or recolouring a tag updates it everywhere it is pinned.
- On each vehicle row, use the + Tag picker at the end of the Vehicle cell to pin a tag; click the × on a chip to remove it.
- Use the Tag filter above the list to narrow the fleet to one tag — the dropdown shows how many vehicles carry each. The same filter is offered from the Vehicle column heading's ▾ menu.
Besides filtering, a vehicle tag also decides what the control room may do with the vehicles carrying it, and who may drive them — see below.
Controlling What the Control Room Sees
Not every vehicle in the registry is a response vehicle — management cars, technical/installer vans, trailers, and shift-change transport belong in the fleet (servicing, trips, documents) but have no business on a dispatch board.
This is set on the tag, not on each vehicle, because it is a property of the kind of vehicle. Tag your management cars Management once, switch that tag off, and every current and future management car follows automatically.
In Manage tags, each vehicle tag carries three switches, one per line under its colour:
- Offer as a response vehicle in CleverCommand (on by default) — off means vehicles with this tag are never offered when a unit is built. They disappear from CleverCommand's Unassigned vehicle pool on the Manage board, so they cannot be dragged onto a unit; from the Vehicle list in CleverOps' own Add / Edit unit dialog; and from the vehicle a crew can confirm at their shift-start check in CleverResponder. A vehicle already assigned to a unit stays on that unit until removed — switching this off only stops it being offered again.
- Plot on the control-room live map (on by default) — off means vehicles with this tag are not plotted on the control room's live map, and neither is a unit crewed with one. Useful when a director's car is tracked for fleet purposes but should not be on the operator's screen.
- Show on the Service Ops map as a technician vehicle (off by default) — the opposite kind of switch. On means vehicles with this tag belong to the technicians: they are plotted on the Service Ops map even when nobody has signed them out, so a bakkie parked at the yard still shows. Tag your installer vans Technical once, switch this on, and every current and future van follows. Vans that are a stock location count as technician vehicles automatically, with or without the switch.
A vehicle is hidden from the control room if any tag it carries hides it, so an untagged vehicle is always fully visible; it is a technician vehicle if any tag it carries says so, so an untagged vehicle never is. The vehicle's row shows a Hidden in Command, Off live map or Technician vehicle chip to explain why.
Who May Drive What
Driving a vehicle can be sensitive: a marketing car is not the reaction crew's to take, and a reaction bakkie is not marketing's. CleverOps decides this with the same tags. A people tag (the ones under Response → Responders → Manage tags) can be granted one or more vehicle tags; people carrying the one may drive vehicles carrying the other.
For a marketing department:
- Under Vehicles → Manage tags, add a vehicle tag Marketing and pin it on the marketing cars.
- Under Responders → Manage tags, add a people tag Marketing (or use the one you already have) and tick Marketing under May drive. The same grant is shown on the vehicle tag's row as Who may drive, and can be ticked from either side.
- Pin the people tag on the marketing people.
From then on, in CleverResponder, marketing's people see the marketing cars in Drive, in Fleet (if they hold the Fleet role), and as a vehicle they may confirm at a shift-start check or log fuel on — and nobody else does. Taking one is refused on the server as well, not merely hidden.
The rule, in full:
- A vehicle tag nobody is named on is open: anyone may drive its vehicles. Naming the first people tag is what restricts it. So a fleet that has never set this up behaves exactly as before.
- A vehicle is drivable when none of its tags is restricted, or the person holds a grant to at least one of the restricted ones.
- Fleet managers — anyone with the Fleet & vehicles capability (or VCR settings) — may drive anything, and see the whole fleet.
- A vehicle already in a person's hands stays theirs whatever the tags say: the vehicle of the unit they are crewing, the vehicle they confirmed for the shift, and any vehicle they have signed out. Changing a grant mid-shift never strands a crew in a bakkie the app will not name.
This decides what a person may take. What the control room may dispatch is still the Offer as a response vehicle switch above — the two are independent.
Nothing changes in CleverOps itself: the vehicle stays in the Vehicles list, appears on the Live map, keeps its history, and still gets renewal reminders.
This used to be a Show in CleverCommand (unit options) checkbox on each vehicle. Existing hidden vehicles were migrated automatically into a Registry only tag with Units switched off, so nothing changed for them — you can rename that tag, split it up, or re-tag those vehicles however suits your fleet.
Board
The Board answers what is my fleet doing right now — the question an operations room actually asks. The List answers a different one (compare these vehicles) and is unchanged.
The map fills the left; on the right, one card per vehicle, most active first. Each card carries:
- the registration, and a status pill — Moving (with its speed), Idle, Parked, Offline (with how long ago it last reported), or No tracker;
- the vehicle's name, make and model, and who has it when a driver is signed out;
- the last event worth mentioning — an overspeed, a power cut, a device going silent — with its time. Ignition on and off are deliberately left out: every vehicle's most recent event is an ignition one, so showing it would print the same line on every card;
- the data left on the vehicle's SIM, amber under 1 GB and red at zero;
- the camera's last picture, where the vehicle has a dashcam, with the time it was taken beside it. A dashcam that has not sent one yet shows Camera fitted, no picture yet. A vehicle without a dashcam has no picture space on its card.
Nothing takes a snapshot on a schedule — a picture costs the vehicle's own mobile data. So a card shows whatever the camera last sent, labelled with its time. An hours-old picture with an honest timestamp is useful; the same picture presented as current would not be.
The filters above are All, With a camera, and Needs attention — the last gathers vehicles that are offline, low or out of data, or whose camera is not connected. With a camera is offered only when at least one vehicle on the board has a dashcam. The filters split whatever the Tag filter and any column filter in the bar leave, so with a tag picked, All 12 means the twelve vehicles carrying it. The legend on the map counts what is currently shown, so it always describes the pins in front of you.
Clicking a card (or its map pin) opens that vehicle's fleet view. The button on a card goes straight to the vehicle's Day strip at the current time instead. It reads Camera & tracking on a vehicle with a dashcam and Tracking on one with only a tracker, and a vehicle with no tracker has no button. The board refreshes every 20 seconds, and again whenever you return to the tab.
Day
The Day view answers what did the whole fleet do on one day. Every other view on this page looks at one vehicle at a time. Here each active vehicle gets one row, and every row shares the same 24-hour axis, so the page reads down as well as across: the row that does not look like the others is usually the vehicle worth opening.
Seeing it needs the Fleet & vehicles capability (VCR settings also qualifies). Without it the tab is still there, but the view says The fleet's day could not be loaded.
Reading a row
- Vehicle — its name (or its registration or fleet number when it has no name), the registration beneath it when that differs, and a camera icon when the vehicle has a dashcam: green while the camera is online, grey when it is not.
- km — how far it drove that day, or a dash if it did not drive.
- The rail — the day from midnight to midnight, labelled every three hours.
- Trips are blue bars. Hover one for its start and end times, distance, peak speed and how it ended. A trip still running fades out at its right-hand end rather than showing a finish time it does not have.
- Events are small ticks, coloured by how serious they are. Hover one for what it was and when. Ignition on and off are left off, because they only mark the ends of the bars already drawn.
- On today, the hours still to come are hatched and a line marks now.
- Idle % — the share of the vehicle's engine time spent standing with the engine running, with a small meter and the idle time itself beside it. It turns amber at 35 % and red at 40 %.
Moving the pointer along any rail draws a cursor at that time down every row, so you can compare what each vehicle was doing at the same moment.
A row with nothing to draw is dimmed and says why, because the three reasons mean very different things:
- no tracker — the vehicle has no tracker fitted;
- offline (in amber) — it has a tracker, but nothing was heard from it all day;
- quiet — its tracker reported, but the vehicle never went anywhere.
The toolbar and the totals
- The arrows either side of the date step back and forward one day. The date reads Today on the current day, where the forward arrow is disabled. On any other day a Today button brings you back.
- Reload (the circular arrow) fetches the day again. The view does not reload on its own.
- Sort orders the rows by Idle %, km, Trips or Name. Click the active one again to reverse it. Each starts with the order most worth seeing: the biggest idler, the furthest, the most trips, or names A → Z. The view opens sorted by Idle %. A vehicle whose engine never ran has no idle figure and stays at the bottom whichever way the sort points, because it was not measured, which is not the same as not idling.
Above the rows, one line sums up the fleet's day, e.g. 14 of 18 out, 612 km, 143 trips, 31 % idle and 3 events. Pills follow when they apply: … heard nothing all day for offline vehicles and … stood still for quiet ones. The fleet's idle figure is the whole fleet's idle time over its whole engine time, not an average of the rows, so a vehicle that ran for twenty minutes does not count as much as one that ran all shift.
Filters
The Tag filter and any column filter narrow the rows. When they do, a pill in the totals line such as 12 of 18 · filtered says so, and the totals describe only the rows shown. If the filters leave nothing, the view says No vehicles match. The Day view only ever shows active vehicles, so the Active / All toggle is not offered here.
Opening a vehicle
Clicking anywhere on a vehicle's rail opens that vehicle's fleet view straight on Tracking → Day (the tab is Camera & tracking on a vehicle with a dashcam), at the moment you clicked. The strip opens on the same day, with a 30-minute window around that time and the cursor on it, so the map marks where the vehicle was. On a vehicle with a dashcam, a clip covering that moment starts playing too. A trip bar and the bare rail beside it behave the same: the time under the pointer is what counts.
- The hours still to come on today's rail open at now, because nothing has happened later than that yet.
- The vehicle's name, or Enter / Space on a focused rail, has no pointer to take a time from, so it opens at the start of that day's first trip. A trip that began before midnight opens at midnight, so you stay on the day you were looking at.
- A vehicle that did not drive still opens on the day you were looking at, with the cursor at midnight. On today it opens the way the Day strip always does: the window around the current time, and no cursor placed.
From there the strip works as usual: step days, zoom and move the cursor freely. Switching to another tab, or to Trips, and back returns the strip to the moment you opened it at. Every other way into a vehicle (the list, the Board, the map and the checks cards) still opens it on its Dashboard.
Idle is recorded as one total per trip, with no times attached, so there is no honest place along the axis to draw it. That is why it has its own column. The note under the rows says the same.
Data note: a trip that runs over midnight counts in full (distance, idle and driving time) on each day it overlaps. A vehicle's own Day strip counts it the same way, so the two never disagree about a trip. The view holds at most 60 vehicles, tracked vehicles first. A larger fleet shows a showing 60 of … pill. A single rail draws at most 120 trips and 50 events, but the trip and event counts include the rest.
Live Map
The Live map view plots one marker per vehicle, positioned by the tracker fitted to it and labelled with the vehicle's name — so you read "Alpha 1", not an IMEI. A green marker reported in the last 5 minutes; a red one has not. Click a marker to open that vehicle's fleet view.
- The tab only appears once at least one vehicle has a tracker that has reported a position.
- The Active / All toggle and the Tag filter apply here too.
- Vehicles with no tracker fitted cannot be plotted; the line under the map says how many, so the map never quietly under-reports the fleet.
- The line under the map also summarises how many tracked vehicles are currently reporting.
This is the vehicle-centric read of the same telemetry behind the Trackers tab's map, which plots devices rather than vehicles.
Who was driving
Tracker trips carry a driver wherever one is known. It comes from a driver session — a record of who had a vehicle and when — which opens two ways:
- a responder's shift-start vehicle check signs the vehicle out to them automatically, and their end-of-shift closing odometer signs it back in; or
- anyone signs it out explicitly from Drive in CleverResponder — including staff who are not crew at all.
A trip is attributed to whoever held the vehicle when the trip started, so a handover partway through a drive can't retroactively reassign it. A trip with no covering session keeps no driver rather than being pinned on whoever drove last — nothing is guessed.
On a phone
The same fleet — list, live map, per-vehicle trips and trip sheets — is available to owners and fleet managers inside CleverResponder, under Fleet. It is read-only: the record itself, tracker fitting, and trip-sheet corrections stay here in CleverOps. Access is a separate tick on the person's record and is off by default; anyone holding Manage fleet & vehicles already has it.
Drivers
The Drivers view answers the question the tracker data alone never could: who drove, not just where. Pick a range (7 / 30 / 90 days) and you get one row per person.
Coverage comes first
Above the table sits a single figure — what share of the range's driving actually has a driver on it — with the trip and distance counts behind it. It's there on purpose. A league table of three people reads like the whole fleet right up until you notice most of the month's kilometres were driven with nobody signed out. The bar is green above 80%, amber above 40%, red below.
Un-attributed driving isn't an error. It's a crew that skipped its shift-start check, or somebody who took a vehicle without signing it out in Drive. Those trips are still recorded in full — they just have no name attached, and the system will not guess one.
The table
| Column | What it is |
|---|---|
| Drives | How many times they signed a vehicle out, and how many of those came from a shift-start check |
| Logged | Distance from the odometer readings they entered |
| Tracker | Distance the vehicle itself recorded while they had it, and the trip count |
| Driving | Moving time, with idle time alongside |
| Top speed / Harsh | The vehicle's own figures for that period |
Logged and Tracker are never combined. One is what a person wrote down, the other is what the vehicle measured — a gap between them is information, not something to average away. A dash under Tracker means the vehicle has no tracker fitted, or it did not move.
Someone with a vehicle out right now carries an out now pill. Drives on any row opens their individual drives: each vehicle, when it was opened and closed, the purpose, both odometer readings, and whether the drive came from a shift check or an explicit sign-out. A drive whose pre-drive check was never completed is flagged there, because the opening reading on it was never confirmed.
Export CSV takes every drive in the range — driver, vehicle, times, both distances, top speed — for payroll or a dispute file.
Signing a vehicle out to someone
You can sign a vehicle out from the desk: Sign out a vehicle at the top of this view, or Sign out for a drive / Assign permanently on the vehicle's own Dashboard under Who has it. Pick the person, and whether it is:
- A drive — theirs until it is handed back from CleverResponder (with a closing reading) or released here. A vehicle has one of these at a time; if somebody already has it out, you're told who.
- Permanent — it is their vehicle. There is nothing to hand back, it never closes on its own, and every trip the tracker records is theirs. Anyone can still sign it out for a drive on top of that — the drive gets the trips while it lasts, then they go back to the assignee. Assigning the vehicle to somebody else ends the previous assignment.
The person does not need a login or the Responder role: the drive is recorded against their team-member row, which is what the trip sheet reads. Signing out for others needs the Fleet & vehicles capability (or VCR settings).
Any open drive — from the desk, from the phone, or from a shift check — can be released from the desk. Releasing records no closing odometer; if the person is still driving, ask them to hand it back from the phone instead so the reading is captured. On the vehicles list a vehicle that is out carries an Out: chip, and one that is somebody's carries their name.
Drives that close themselves
A drive that was started and abandoned no longer holds the vehicle for ever. Every half hour CleverOps closes:
- a sign-out from CleverResponder whose pre-drive check was never sent and whose vehicle never moved, after four hours — nobody took it;
- a hand-back that was started and never sent, with no driving since, after twelve hours — they meant it;
- a shift drive whose shift has since ended.
A permanent assignment is never closed automatically. Every drive shows how it ended in the driver's drives — closed automatically, not taken, released, reassigned — so a gap in the record is never silent.
On a vehicle
The vehicle's own Tracking tab (Camera & tracking on a vehicle with a dashcam) shows, under Trips, the driver on every trip and adds an Any driver filter, including No driver recorded as a choice of its own. The driver also appears in the printable trip report, with a footnote making clear that "no driver recorded" means nobody was signed out — it is not a claim about who was behind the wheel.
Cases
A case file gathers the fleet evidence that belongs to one matter (repeated speeding in the first week of September, say) and keeps a permanent record of everyone who handled it. An evidence card is gone once you close it. A case is where you keep the events that matter, together with what was found and who touched it.
Working with case files needs the Fleet & vehicles capability (VCR settings also qualifies). Without it the view cannot load them.
The list
Cases are listed most recently handled first, not by the date they were opened, so a fortnight-old case somebody added to this morning sits at the top. Simply opening a case counts as handling it, so the case you just read moves up.
- All, Open, In review and Closed filter by status, each with its count.
- The search box matches titles, findings, the vehicle's name and registration, and the person a case is about.
- Each row shows the title. Under it: the vehicle (or the person, or No subject named) and the date the case was opened. Beside that: how many events, clips, trips and notes it holds, the last thing done to it with who did it and how long ago, and its status. Click a row to open the case.
The list loads the 200 most recently handled cases. When a control room has more, a line above the list says Showing the 200 most recently handled of … cases. The status counts and the search only cover these 200. Neither can find a case outside them.
Opening a case
- Click New case (or Open the first case when there are none yet).
- Fill in What is this about?. This is the title, and the only required field.
- Optionally pick a Vehicle, or leave it on Not about one vehicle.
- Optionally name a Person. This is free text on purpose: the commonest matter is about whoever was driving, and a case should not have to wait until somebody works out who that was.
- Optionally write Findings so far. They can also be written later.
- Click Open the case. The new case opens straight away.
Adding evidence
Evidence is added from the place you found it, with Add to case. All three places are on a vehicle's Tracking tab (Camera & tracking on a vehicle with a dashcam), in the Day view:
- An event, from its evidence card, which opens when you click an event pin on the day strip.
- A trip, from the trip strip below the map. The button adds the trip the strip is showing: the one under the cursor, or else the trip you last clicked. When the strip shows no trip, there is no button.
- A clip or a snapshot, from the top of the video pane, beside Close, while it is showing there. Only a vehicle with a dashcam has a video pane.
- Click Add to case. It lists the control room's Open and In review cases. Closed cases are not offered, because a closed case accepts nothing new.
- Click a case to add the item to it. If it is already on that case, you are told so and nothing is added twice.
- Or click New case…, keep or change the suggested title, and click Open case. The title is suggested from the item: the event and its time, the trip's date and times, or the clip's date and time. The new case is about that vehicle and already holds the item.
Afterwards the button reads On a case. On the trip strip and the video pane it forgets this as soon as a different trip or clip takes its place. Clicking it again on something already added just tells you so. Nothing is copied: the case points at the original record, so it shows the same event, trip or file the vehicle sent. A case holds up to 200 items.
Notes are not added from anywhere else. They are written inside the case with Add a note (see below).
Inside a case
All cases takes you back to the list. The top of the case shows its status, who opened it and when, the title, and what it is about: the vehicle and its registration, the person, or No subject named on this case.
-
Status. Click Open, In review or Closed, optionally type a reason, then click Move to …. The move and its reason go on the custody trail. Nothing can be added to or removed from a closed case. Move it back to Open or In review first, so the reopening is recorded before whatever changes after it.
-
Findings. Write the findings (or Edit once some exist) lets you change the title and the findings text. Click Save. The text that was there before is kept, word for word, on the custody trail.
-
Evidence. Each item is a card:
- An event shows when it happened, the speed read from the tracker's positions either side of that moment, and where it happened.
- A trip shows its times, day, distance, top speed, driver (Nobody signed out when nobody was), moving time and how it ended.
- A clip or picture shows its camera channel, length and size. It only loads when you click Play the clip or Show the picture.
Each card says who added it and when, and has Remove unless the case is closed. Removing takes the item off the case, but the trail still records that it was there. An item whose original record has since been deleted says No longer on record. An item from a tracker you are not allowed to see says Evidence you are not cleared to see. Both kinds still count towards the case's total.
-
Notes. Click Add a note beside the evidence count, type the note, then click Add note. The note appears among the evidence as a card showing its text. A note cannot be edited once added. Remove takes it off the case, but its words stay on the custody trail. Add a note is not offered on a closed case.
-
Custody. Down the side, marked Append-only, is every handling of the case in order: opened, evidence and notes added and removed (with a note's words), looked at, status moves and their reasons, and findings rewritten, with the previous text. Nobody can edit or delete an entry. If the same person looks at a case more than once within five minutes, it is recorded once.
A shareable PDF pack is not built yet. The case says so under Handing this over.
Deactivating vs. Deleting a Vehicle
Removing a vehicle should almost always mean deactivating it, not deleting it. Deactivating keeps every record the vehicle has built up — inspection checks, trip sheets, fuel logs, and documents — while taking it out of day-to-day lists.
- Deactivate (the normal "remove"). Click Deactivate in the Actions column. The vehicle's status becomes Inactive, it drops out of the default Active list (switch the list to All to see it again), and it stops appearing in renewal reminders. All of its history is preserved. On an inactive vehicle the same button reads Activate and brings it back.
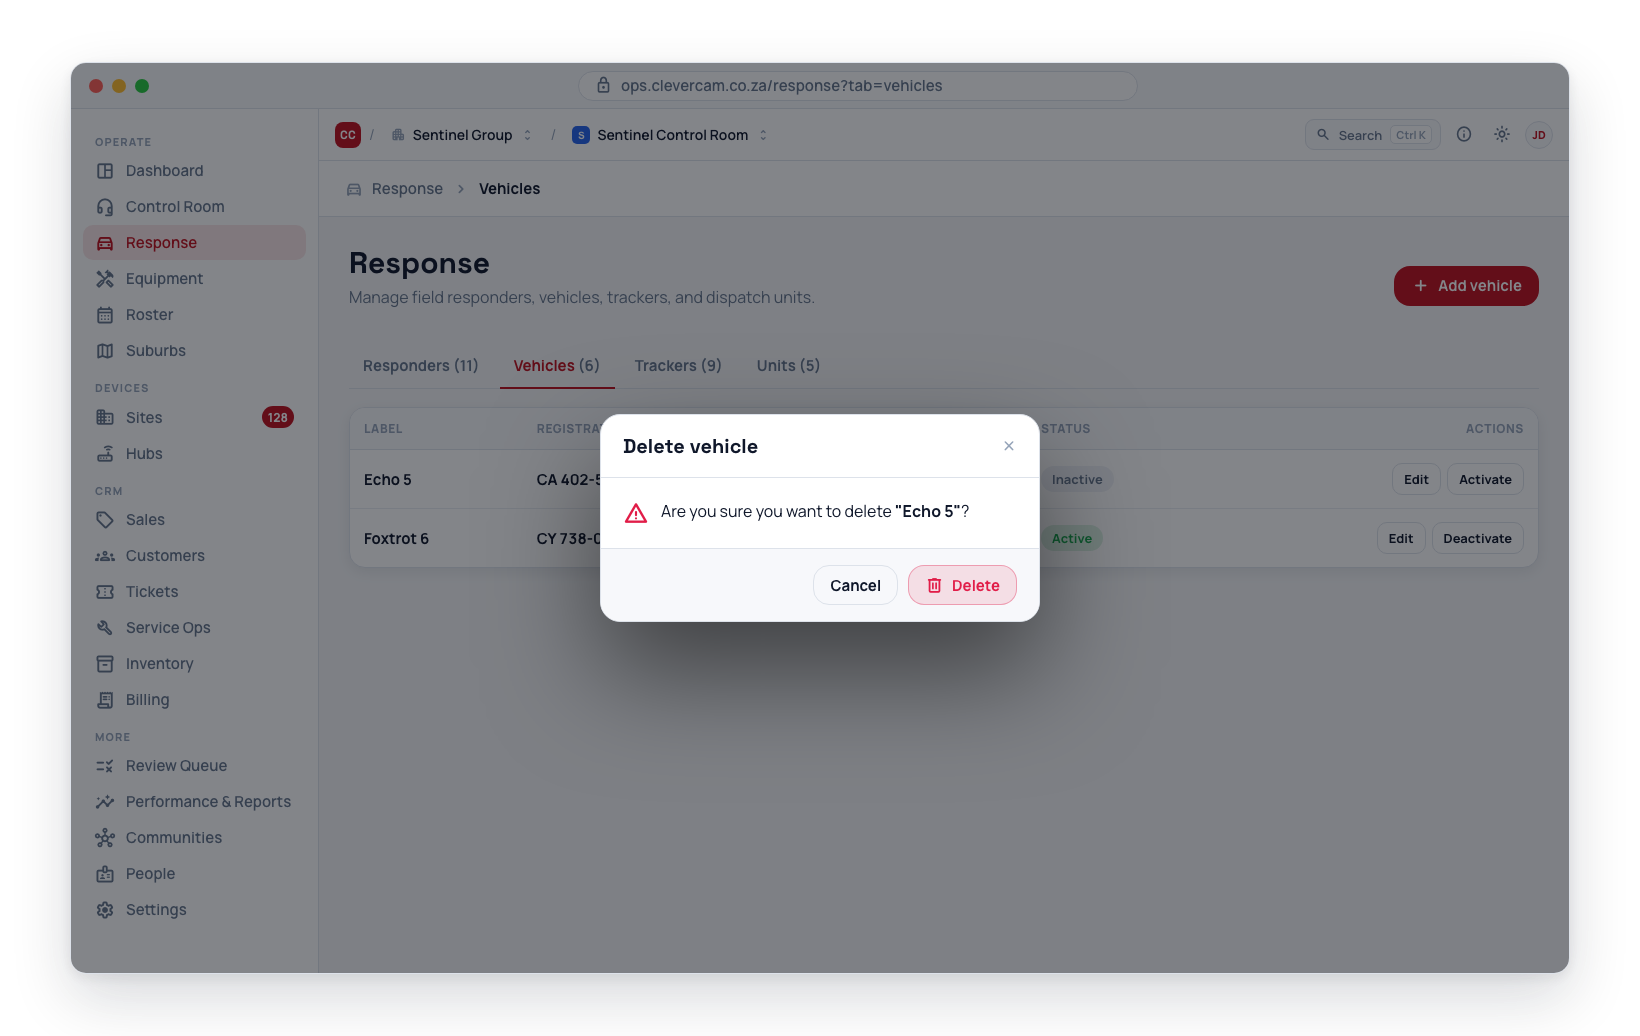
- Delete (permanent). Click Edit on the vehicle's row, then Delete vehicle in the Danger zone at the bottom of the dialog. It permanently removes the vehicle. To protect fleet records, a delete is only allowed when the vehicle has no history at all — no checks, trips, fuel logs, or documents. This is meant for vehicles added by mistake.
- If the vehicle has any history, CleverOps will not delete it. It tells you what would be lost and offers to Deactivate it instead.
- If the vehicle is currently assigned to a unit, unassign it on Response's Units tab first.
- Permanently deleting a vehicle also cleans up its stored files (documents and any check photos). Deactivating never touches stored files.
Needs attention
The Checks view (under Vehicles) opens with anything a check has produced that is waiting on a person. When there is nothing outstanding it simply says so.
Bypass requests. If the shift-start inspection is mandatory and a responder genuinely cannot complete it, they can request a bypass from the app — and they stay stuck at the vehicle until somebody answers. Each request shows the unit, who asked, their reason, and how long they have been waiting.
- Approve lets that responder start their shift without the check.
- Deny asks for a reason first, because the responder is told why. Click Deny, type the reason, then click Deny again to confirm.
A control-room operator can decide the same requests in CleverCommand. Whoever gets there first wins — if someone else has already answered, CleverOps tells you and the request disappears.
Checks that reported a fault. Any inspection submitted in the last 14 days that came back flagged — body damage, an accident report, a failed item. Each row shows the vehicle, who submitted it, and how long ago. Open the vehicle on the List view to see the full inspection and its photos.
These are listed for awareness rather than sign-off: there is no "reviewed" tick, so the list simply ages out after two weeks. Only bypass requests count towards the Equipment badge in the sidebar, because those are the ones you can actually clear.
Recent checks
Below Needs attention, the Recent checks card lists every vehicle inspection across the fleet, newest first — not just the ones that went wrong. This is the "did the morning checks actually happen?" read; previously you could only answer it one vehicle at a time.
Each row shows the vehicle, a Submitted or Flagged badge, which kind of check it was — Shift-start check, Pre-drive check or Hand-back check (a vehicle signed out or handed back in Drive), or Ad-hoc with its reason — who submitted it, how long ago, and the odometer and fuel level captured.
- Click a row to expand it and see how each checklist item was answered.
- Click Open vehicle to jump to that vehicle's fleet view, where the Activity tab holds the full history including photos.
- Show more loads a further 15 checks.
Vehicle Check List
The Checks view (under Vehicles on the Equipment page) defines the inspection items your responders complete on the CleverResponder app at shift-start — and on ad-hoc checks, and on the pre-drive and hand-back checks when somebody signs a vehicle out in Drive. Every company starts with a sensible default list (tyres, lights, body condition, a vehicle photo, firearm & equipment, licence disc, and so on) that you can tailor.
- Navigate to Equipment, stay on the Vehicles tab, and click Checks. The check list sits below Needs attention and Recent checks.
- Click Add check item (or Edit on an existing row) to open the item editor.
- Configure the item:
- Text -- what the responder must check (e.g., "Tyres -- tread & pressure OK").
- Response type -- how the responder answers: a simple tick, single or multiple choice, free text, a photo, a QR scan, or a licence scan (see Reading a licence during the check).
- Required -- required items show a prompt if left blank. Whether that also blocks the responder from going on shift depends on the Mandatory shift-start inspection switch above the list -- see below.
- Category -- an optional grouping (Exterior, Lights, Fluids, Equipment, Cabin) shown as a pill.
- Active -- whether the item appears on new checks. Untick it to park an item without deleting it.
- Click Add item / Save changes. A new item lands at the bottom of the list.
- To change the order, drag the ⠿ handle at the left of a row up or down and drop it. The list reads top to bottom exactly as the responder sees it in the app, and the order saves the moment you drop -- there is no number to type.
Odometer and fuel level are captured on every check automatically -- you don't need to add them as items. An item that asks for them anyway is recorded only as that item's answer: it does not move the vehicle's odometer, its trip sheets or its Dashboard. Only the reading at the top of the check does that. Editing the list requires the Fleet & vehicles capability, or VCR settings (the same pair that gates all fleet management).
Reading a licence during the check
Two response types read a document instead of asking a question, using the same barcode decoding as Reading the licence disc above:
- Scan the licence disc — the responder scans the disc on the vehicle they are about to take out.
- Scan the driver's licence — the responder scans the back of their own licence card.
A shift-start inspection is the one moment when both documents are within reach of the same phone, so the answer to the checklist item and the update to the record are the same action. Scanning happens on the device, so it works with no signal — the reading queues with the rest of the check and is applied when the phone reconnects.
Because nobody reviews these at the time, they are applied more cautiously than a scan done at a desk:
- A field that is blank on the record is filled.
- A field the document disagrees with is never overwritten. It is recorded against the inspection as differs, for somebody in the office to look at.
- An expiry earlier than the one already on file is refused — that is last year's disc still on the windscreen, not a renewal.
The result shows on the vehicle's inspection history, with anything that differed listed beside it.
These two types appear in the Response type list only once a CleverResponder release that understands them is out in the field. An older app shows an item type it does not recognise as a row with no answer button — and if that item were required on a mandatory check, the responder could not finish it and could not go on shift. So they stay hidden until the app is ready.
Mandatory shift-start inspection
Above the check-item list is a Mandatory shift-start inspection switch (Fleet & vehicles or VCR settings capability required to change it). It is off by default, which keeps the original advisory behavior: required items show a prompt if left blank, but nothing stops a responder from going on shift with the check skipped.
Switching it on makes the shift-start check block in CleverResponder:
- After the responder starts their shift, the vehicle check page opens in blocking mode -- there is no Skip button and no way to navigate back out of it. Submit is disabled until every required item has an answer.
- Odometer-mismatch warnings stay advisory even in blocking mode -- they prompt the responder but don't gate Submit.
- Ad-hoc checks (the "report an issue" flow, used any time to log damage or a missed item) are never blocked, regardless of this switch.
- One check per unit, per shift. If a crew mate has already submitted the shift-start check for the same unit, the rest of the crew is not blocked -- one completed check covers everyone riding in that unit.
- A live dispatch always wins. If a dispatch arrives while the blocking check is open, a red strip appears offering Go to dispatch so the responder can act immediately; the check can be finished afterwards.
- Restart-safe. If the app is closed or crashes with the check still outstanding, the dashboard re-opens the blocking check automatically -- once per shift, and never over an active dispatch.
- Works offline. The check itself is unchanged and fully offline-capable: a check captured in a dead zone queues locally and counts as done, satisfying the mandatory gate without waiting for signal.
Bypass requests ("Can't finish?")
A responder stuck on the blocking check page (e.g. the vehicle is genuinely unavailable to inspect) can tap Can't finish? in the top-right, type a reason (up to 500 characters), and send a bypass request to the control room. The page then shows "Bypass requested -- waiting for control room to approve" and polls for a decision roughly every 15 seconds.
The request is handled in CleverCommand, not CleverOps -- see Vehicle check bypass requests for how operators approve or deny it. Once approved, the responder's app unlocks immediately for that shift; a denial shows the operator's note (if any) back to the responder, who can then complete the check or send another request.
A shift that goes on with an approved bypass simply has no submitted shift-start check -- the vehicle's inspection history on the Activity tab is unaffected by this feature; it only ever shows checks that were actually submitted.
Renewal & Compliance Reminders
A weekly reminder (Monday morning) covers everything coming up in the next few weeks -- and anything already overdue:
- Vehicle renewals -- licence disc, roadworthy, insurance, and next service (by date).
- Service by mileage -- vehicles within 1 000 km of (or past) their next service reading. See Mileage-based servicing.
- Firearms -- firearm licence renewals and cleaning schedules from the Firearms register.
- Staff compliance -- PSIRA registrations, firearm competency, driver's licences and anything else dated on each responder's profile.
Each renewal appears once, whether or not a certificate has been attached to it — the expiry and its document are the same record.
Reminder setup lives on Settings -> Reminders, together with every other reminder CleverOps sends. That page is also where you build the recipient list -- each person subscribes only to the sections they handle, so your fleet manager isn't reading PSIRA expiries. There is no single "fleet contact email" any more.
The Coming up list on the Settings -> Reminders page shows exactly what the next email will contain, so you can see everything due any time without waiting for Monday. Set each vehicle's renewal dates on its Details tab in the fleet view.
Getting told when a check reports damage
A vehicle check that records body damage, or that was raised after an accident, can send an email straight away. Set this up under Settings -> Reminders -> Vehicle check actions.
Without a rule there, a reported damage only shows as a Flagged badge on that vehicle's inspection history -- so nobody finds out unless they go looking.
Mileage-Based Servicing
Response fleets usually service on mileage (every 10 000 or 15 000 km), not on a calendar. CleverOps tracks this against the vehicle's canonical odometer, which updates automatically from shift checks and trips:
- On the vehicle's Details tab, set a Service interval (km) -- e.g. 10 000.
- When the vehicle is serviced, open its Dashboard tab and click Log service. Enter the service date and the odometer reading at the service.
- CleverOps records the service and rolls Next service (km) forward automatically (service odometer + interval). The reading also feeds the canonical odometer.
The Dashboard's renewals card shows a Next service (km) chip that turns amber when the vehicle is within 1 000 km of the due reading and red once it is overdue, alongside the date-based renewal chips. The same vehicles appear under Service by mileage in the weekly reminder email. If you don't set an interval, Log service still records the service date and reading -- the next due-km stays whatever you set by hand.
Stale Assignment Signal
A unit's assigned vehicle (vehicle_id) is whatever the control room last set, and it drifts out of date — a vehicle is swapped, retired, or moved to another unit without the assignment being corrected. To catch this, CleverOps watches each assigned vehicle's fleet activity: its vehicle checks, trip sheets, and fuel logs.
When a vehicle has produced no check, trip, or fuel log for 3 weeks or more, an amber Idle 5w chip appears next to it:
- On the Vehicles tab, in the vehicle's Label cell.
- On the Units tab, on the assigned unit's card, next to the vehicle.
The chip means "this vehicle used to report fleet activity and has now gone quiet — confirm the unit is still using it, or update the assignment." Hovering the chip shows how long it has been idle.
Only vehicles that went quiet are flagged. A vehicle that has never recorded any activity is deliberately not flagged: while vehicle checks are still rolling out, most vehicles have no activity yet, so badging them would bury the real signal. As adoption grows, the badge only ever highlights the genuine anomaly — a once-active vehicle that stopped reporting.
The weekly fleet reminder email (above) also lists these under Vehicle assignments to review for anyone subscribed to the Idle assignments topic, and the Assignments to review list on Settings -> Reminders mirrors it, so the same signal reaches whoever manages the fleet even if they rarely open Response → Units.
Vehicle Detail (Fleet View)
Click a vehicle row to open the fleet vehicle view -- a tabbed window (like the site view) covering everything about that vehicle:
-
Dashboard -- Who has it at the top (who has the vehicle out right now, and whose vehicle it is, with Sign out / Release for fleet managers — see Drivers), then key numbers at a glance: current odometer, distance tracked, checks in the last 30 days, flagged checks, top driver, next service, and fuel spend / average economy. An odometer trend chart plots the vehicle's mileage over time, and renewal alerts show how many days remain on the licence disc, roadworthy, insurance, and next service by date (green / amber / red as they approach) plus a Next service (km) chip driven by the odometer and a Log service button (see Mileage-based servicing).
-
Tracking -- what the vehicle actually did, from its GPS tracker (only useful once a tracker is fitted). On a vehicle with a dashcam the tab is called Camera & tracking and adds the camera to it. Deliberately separate from Trip sheets: trip sheets are what a person wrote down, this is what the hardware measured. It has two sub-views, Day and Trips.
Day is one day of the vehicle on a single strip, with the map locked to it, and the video too when the vehicle has a dashcam. Along the top, the whole day; a red brush on it picks the window below, and you drag the brush to pan or its handles to widen it. The window can also be set with the 5 min / 30 min / 2 h / 6 h / 24 h buttons, and ‹ › step between days — or click the date itself to pick a day off a calendar. Opening a past day lands the window on that day's activity rather than on an empty midnight. A vehicle opened from the fleet Day view is the exception: it lands on the moment you clicked.
Under the window sit the lanes: Speed (the peak in each slice — an average would hide the moment that matters), Trips and Events, and on a vehicle with a dashcam On the card and Clips & requests as well. Moving the pointer along them moves a cursor, and everything else follows it: the map puts a marker where the vehicle was at that instant and reads out its speed, heading, ignition state and how close the nearest fix was, and the video pane plays whatever clip covers that moment. Clicking a trip bar frames that trip; clicking an amber core inside one frames the standing time it marks; clicking an event pin opens its evidence card. Where events cluster too tightly to label, the lane shows them as plain dots and says so — zoom in for their names.
A vehicle with only a tracker gets a tracker's screen, not a camera screen with the camera missing. The strip has the three lanes, and the map takes the full width because there is no video pane. Where a dashcam vehicle's toolbar shows its Live button, a tracker's shows Now, which moves the cursor to the current time. There are no camera buttons, no footage requests and no camera health panel. The next three paragraphs apply only to a vehicle with a dashcam.
On the card is what the camera still has on its own memory card. It is empty until you press What is on the card, which asks the camera; the answer is stamped with the time it was given, because a card wraps and yesterday's answer is not today's. Card times are the camera's own clock, and where that differs from ours the band says it has been lined up. On a camera with more than one lens the band shows only the recordings of the lens you have selected.
Getting footage. Every way in opens the same Get footage panel:
- Get footage in the toolbar at the top of the tab, beside Live. It picks 15 seconds starting 5 seconds before the cursor — or the 15 seconds just recorded on today, or the middle of the window on another day — and you set the real range in the panel.
- Drag across the Clips & requests lane over the minutes you want. The end under the pointer follows it; past 60 seconds the start is pulled along behind, so the range is always the last minute you dragged over. A plain click on the lane picks 15 seconds starting 5 seconds before that moment. An empty lane says Drag across the minutes you want, or click a moment, to get footage.
- With the cursor on a moment that has no clip, Get footage from here in the video pane.
The range is drawn on the lane in red. Drag either edge to change the start or the end, or drag the band itself to slide it earlier or later. A range too narrow to grab — anything under about 50 px, which is a minute at the 30 min zoom — zooms the window in to 5 minutes around it when you let go.
The panel shows the range as three boxes you can type in: Date, From and To, to the second. Changing the Date moves the whole tab to that day and keeps the time; changing From keeps the length; changing To sets the length. A range typed outside the window moves the window to 5 minutes around it and puts the cursor on its start, so the map shows where the vehicle was. So to spot-check what happened at 02:00 last night: press Get footage, set the date, type 02:00:00 in From, pick a length, and request it. The boxes refuse what the camera cannot send, and say why under them: a start that has not been recorded yet, an end before the start, or more than 60 seconds (One request can cover at most 60 seconds — end by 02:01:00, then ask for the next part once it arrives). An end that reads earlier than the start, such as 23:59:40 to 00:00:20, is taken as crossing midnight. Under the boxes, 5/10/15/30/60 s snap the length.
The panel offers road or cabin. It says The card has a recording covering this when the camera's last card listing covers the range. Otherwise, while the camera is connected, it offers Check the card around this time, which is the same question as What is on the card, asked for the window on screen — useful at night, because a camera only records while it has power. Before you confirm, the panel says what the clip will cost: about 15 MB of this vehicle's 1.8 GB left. That figure is real: the camera sends its full-quality recording at roughly 30 MB a minute off the vehicle's own SIM. A single request may cover at most 60 seconds.
When footage cannot be fetched at all — no memory card, or a SIM with no data — the Clips & requests lane says so in place of its hint, the pointer over it shows it cannot be used, and Get footage is greyed out with the same reason.
The request then appears on the strip, at the time it covers, and shows its state there: queued, the camera sending, ready, or No answer from the camera with a try again. A clip that has arrived is a green mark you click to play; a snapshot is a small tick. While the clip plays, the time burned into the corner is the real time of the frame on screen, and 15 s before / 15 s after fetch the minutes either side. A clip plays with the sound the camera recorded, where the browser allows it to start with sound; otherwise it starts muted and the player's speaker button turns the sound on. Clips fetched before 23 September 2026 have no sound — the camera was only ever asked for the picture.
No memory card. If the camera said it had no memory card within the last day, the On the card lane, the Get footage panel, Mark moment in live view and the evidence card all say so, with when the camera was checked (checked 2 hours ago), and do not offer the request. A "no card" more than a day old is not trusted and blocks nothing: the camera is asked again by itself every few hours, and a card fitted since only shows once it has been — see Camera health.
Trips is the older date-range trip list — a from/to range with day steppers, quick chips (Today, Yesterday, 7/30/90 days), an ending filter for trips that closed abnormally, a stat strip for the range, a speed-coloured route, Points, Export CSV and Print report. It remains the right tool for what did this vehicle do over the last month; the Day strip answers what happened at 10:32.
Picking a moment on a route. Click anywhere on a drawn route — the line itself, a point when Points is on, or a trip's start, end or amber stop marker — and a bar at the bottom of the map names that moment (07:50:50 · On the route · 41 km/h). Open in Day view switches to the Day strip with the cursor on it. On a vehicle with a dashcam the bar also offers Get footage from here, which opens a Get footage window: road or cabin; the range as Date, From and To boxes you can type in, starting 5 seconds before the moment; 5 s earlier / 5 s later to move it; the length (5 to 60 seconds); and what it will cost off the vehicle's SIM. The boxes follow the same rules as the Day strip's panel. The footage is asked of the camera that recorded that trip. The clip arrives on the Day strip and in the tracker's Footage list, usually within a minute. Before anything is picked, a line on the map says the route can be clicked.
Picking a trip zooms the map to it — picking the same one again, or coming back to it after unticking everything, zooms back to it. Every recorded point of a trip is loaded, however long the trip. If some of a trip's points could not be loaded (a dropped connection, or a trip of more than 20 000 points), the map says so in a yellow badge and Print report adds an Incomplete route note — the route then ends where loading stopped, not where the vehicle did. Selecting the trip again retries it.
-
Details -- identity (fleet number, make, model, year, colour, VIN) and admin (registration, status) plus the next service date and the service interval (km), all editable in place (renewal dates live on the Compliance tab, with their documents) (Fleet & vehicles or VCR settings capability). A second block, Ownership & fixed cost, records the owner or financier, the monthly instalment, the monthly insurance premium, the insured value, and the insurer's name and contact. Registration and GPS-tracker linking still use the vehicle edit form (the row's Edit button). A Reset odometer… button here sets the vehicle's current odometer directly — see Resetting the odometer baseline for when to use it.
-
Activity -- the full inspection history: every vehicle check — shift-start, ad-hoc, and the pre-drive and hand-back checks of a Drive sign-out — newest first, each with who submitted it, expandable to each item's recorded answer and photos. Flagged checks (damage / accident reports) are highlighted. With the Manage VCR capability each submitted check carries an Edit reading action to correct a mistyped odometer or fuel level, and a Move action to reassign it to the right vehicle — see Correcting a check reading and Correcting a mis-attribution.
-
Trip sheets -- a mileage log. A trip opens at each shift-start check (its start odometer) and closes when the responder enters a closing odometer at end of shift -- or, if they don't, at the next shift-start check. A mid-shift vehicle handover (the crew changes vehicles from the app) also closes the trip on the vehicle being left and opens a fresh one on the vehicle taken over. Auto trips reflow automatically if the underlying check's reading is later corrected. Trips can also be added or corrected by hand, with distance computed from the odometer readings — note that editing an auto (shift) trip converts it to a manual one that no longer updates from the checks.
-
Fuel -- every fill logged by responders (with a slip photo) or noted by the control room, showing litres, cost, station, source, and fill-to-fill economy (km/L). Each fill records whether the tank was filled to full; economy is computed only between full-tank fills, so a partial fill carries its litres into the next full-to-full span instead of skewing the km/L. Use Note a fill to add one from CleverOps (with a Filled to full tank checkbox), attaching the slip if you have it. A slip opens through a short-lived secure link generated when you click View — the picture itself is never public, and a link that was copied or forwarded stops working within minutes.
-
Costs -- everything else spent on keeping the vehicle on the road: parts, tyres, labour, consumables, licences, fines, towing. See Running costs below.
-
Compliance -- the vehicle's renewals and papers, as one record each: licence disc, roadworthy, insurance, registration. An entry holds the expiry date and the document together, and either half may be left empty — capture the disc's expiry now and attach the scan when you have it, or file a registration document that never expires. Dated entries drive the renewal alerts on the Dashboard and the weekly reminder email, and adding the same kind again keeps the old one under Show previous as history. Files are private and opened via a short-lived secure link.
Running costs
The Costs tab on the vehicle view is a line-item ledger of what the vehicle costs to run. Fuel stays on its own tab — it has litres and economy to reason about — so Costs covers everything else.
Three figures sit at the top: total spend, spend in the last 12 months, and cost per km. Below them, a chip per category shows the split (Maintenance, Tyre, Consumable, and so on); click a chip to filter the ledger to that category, and click it again to clear.
Adding a cost
Click + Add a cost (Fleet & vehicles or VCR settings capability) and record:
- Date, Category, and Supplier. The category list is your control room's own — seeded with a standard set the first time you open the tab, and editable afterwards. Typing a supplier that isn't in the list yet adds it, so the next capture picks it from the dropdown.
- Description — what was actually bought ("Brake pads front"). Previous descriptions on the vehicle are offered as suggestions so the same part is spelled the same way each time.
- Qty, unit price, discount, and VAT %. The net, VAT and total are worked out for you and shown before you save; VAT defaults to your control room's rate.
- Odometer — optional, but it is what makes cost per km and the mileage history work. Capture it when you know it.
- Document, status (Pending / Validated / Paid / Overdue / Cancelled) and a reference for the invoice or GL code.
The two views
- Ledger — every line, newest first: date, category, description, supplier, quantity, total, odometer and status.
- By part — the same spend grouped by what was bought, most-repeated first, with the dates and mileages of every occurrence. This is the view that answers "when did this last get brake pads, and at what mileage".
Data note: cost per km is measured only across the odometer readings captured on the cost lines themselves — the distance between the lowest and highest reading — so the distance always covers the same period as the spend beside it. It shows a dash until at least two lines carry a reading, rather than quoting a figure the data can't support. Money is recorded in the control room's currency (set in Settings -> Profile). Setting a line to Cancelled keeps it on the record but excludes it from every total — prefer that to deleting when a document is voided.
Correcting a check reading
If a responder mistyped an odometer or fuel level, open the Activity tab, find the check, and click Edit reading (Manage VCR capability). Correcting a shift-start check's odometer automatically re-flows its trip — the trip that opened at that reading and the one it closed — and recalculates the vehicle's odometer. An ad-hoc check correction recalculates the odometer only (ad-hoc checks don't create trips). This is one of the cases where the odometer may move down (see the data note below).
Correcting a mis-attribution
If a check, fuel entry, or trip was recorded against the wrong vehicle, click Move on that row (in Activity, Fuel, or Trip sheets) to reassign it to the correct vehicle. Both vehicles' odometer totals are recalculated automatically — and when you move a check, the trip that was segmented from it moves with it to the correct vehicle, and the old vehicle's trip chain is healed.
Resetting the odometer baseline
The odometer is normally forward-only (see the data note below), which is a problem after an instrument-cluster replacement: the new cluster reads lower — often from 0 — and an ordinary check could never record it. On the vehicle's Details tab, Reset odometer… (Manage VCR capability) lets you enter the true current reading and set it directly. It is the sanctioned way — alongside the automatic recalculation after a correction — for the odometer to move down, and it changes only the canonical current reading, not any past checks or trips.
Data note: odometer readings are always in kilometres and only ever move forward on their own -- a routine reading lower than the vehicle's last known odometer never lowers the recorded total, so mileage trends and distances stay clean. It moves down only by a deliberate Reset odometer baseline or the automatic recalculation after a reading correction or a mis-attribution move. Fuel is recorded in litres with cost in the control room's currency (set in Settings -> Profile, default South African Rand), kept consistent so spend and economy stay comparable. Fill-to-fill economy is measured only between full-tank fills -- a partial fill is flagged and its litres roll into the next full-to-full span rather than skewing the km/L, because the figure is only meaningful when the tank both starts and ends full.
Mapping Vehicles to Response Units
Vehicles are assigned to response units to become part of the dispatch system:
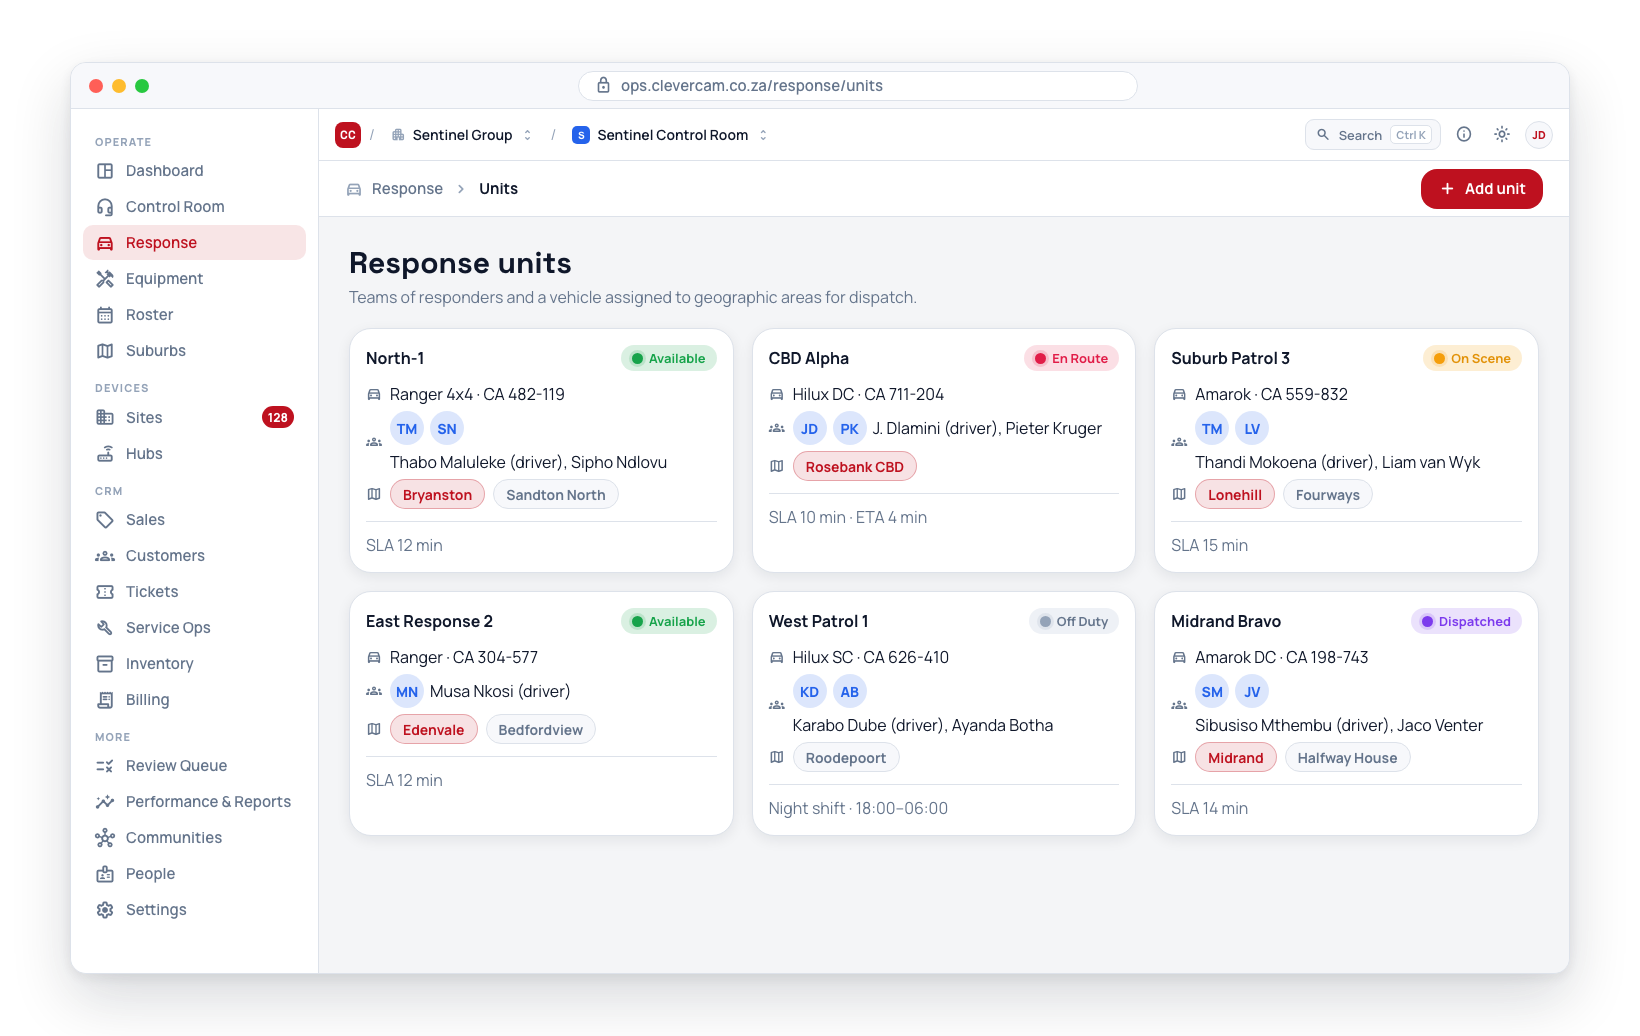
- A vehicle on its own is simply an inventory record.
- When assigned to a Response Unit, the vehicle becomes part of the dispatch chain.
To assign a vehicle to a unit, go to Response's Units tab and edit the unit configuration.
Standing time
A stop is a pause of three minutes or more with the engine still running — the vehicle is there, but it is not going anywhere. Because a stop can only happen during a trip, it is not given a lane of its own: it is drawn inside the trip, as an amber core in the trip's blue bar with a rim of trip showing above and below. The question a stop answers is how much of this bar was actually moving, and that only reads when the two share an edge.
- Stops appear in both places a trip does: the whole-day rail along the top, and the Trips lane in the window below.
- Click one. It selects the trip the stop belongs to, frames the standing, and puts the cursor at the moment the vehicle stopped moving — so the map marker, the readout beside it and the video pane all follow it there.
- Hovering names it: Standing 6 min 20 s · 14:02 – 14:08.
- The badge on the right of the Trips lane gives the count and the total — 2 stops · 12 min 30 s standing.
- The trip strip under the lanes repeats it for the selected trip — 6 min 20 s standing · 1 stop — with every stop's start time and length in its tooltip. With no trip selected it gives the whole day instead: 26 min 53 s standing across 4 stops today.
The Trips lane badge is scoped to the window on screen, and counted by overlap — zoom into one hour and it tells you how long the vehicle stood in that hour, and a stop straddling the edge of the window contributes only the part inside it. The whole-day figure is the one on the trip strip with no trip selected.
What the route matcher could place
With a trip selected, the trip strip ends with what the route matcher could place: how much of that trip's distance it managed to tie to a dispatch or a patrol area recorded for that day. It reads 133 m of 4.6 km matched to a dispatch, with a small blue meter showing the share. Where it tied nothing, it says No dispatch matched in plain grey.
The remainder is distance nothing was found for — not unexplained driving, and not time anyone needs to account for. Across the fleet the matcher currently places only about 2% of distance, and its patrol half does not fire at all — a known fault, under separate investigation. No dispatch matched is the ordinary reading today. It is not a finding about the vehicle, the driver, or how the time was spent, and there is nothing on this line to act on.
That is why the line is drawn as quietly as it is. The unmatched remainder gets no colour, no icon and no headline; a trip with nothing matched says one grey line and stops. The wording on screen is the wording to use — hovering the figure gives it in full:
Route matching tries to tie a trip's distance to the dispatches and patrol areas recorded for that day. Distance it cannot tie to one is distance nothing was found for — across the fleet that is most of it, so it says nothing about how the vehicle was driven.
The line is left out entirely for a trip the matcher never wrote anything for.
Picking a day
The date in the Day toolbar — 11 Sept 2026 ⌄ — is a button. It opens a four-week picker, so finding the day something happened on no longer means opening a fortnight of blank strips one at a time. It is laid out as real weeks, Monday to Sunday, because an operator remembers a weekday rather than an offset: it was the Saturday is a column.
- Click the date. Four aligned weeks appear, with the range they cover named across the top.
- Each day carries up to three marks: a bar whose length is how far the vehicle drove that day, an amber dot if events were raised, and, on a vehicle with a dashcam, a green dot if there is footage. A vehicle with only a tracker never has footage, so its picker's key leaves the green dot out.
- A day with nothing recorded is flat and pale — visibly blank, so it can be skipped at a glance.
- Hovering gives the numbers: 11 Sept 2026 · 1 trip · 12.4 km · 6 clips. A blank day says nothing recorded; a future day says not yet.
- The ‹ and › arrows page four weeks at a time. Days in the future are disabled, and you cannot page past the current week.
- Click a day to open it. The ‹ › steppers beside the date and the Today button still work as they did.
Data note: bar length is relative to the busiest day on screen, not an absolute scale — a response bakkie and a workshop van share nothing worth comparing, so the bars answer which day was the big one rather than how many kilometres. Days are the control room's local days, matching the Day strip itself: a trip that starts at 00:11 is filed under the day it started on locally, not the previous day it would fall on in UTC.
Two things it will tell you rather than guess at. A vehicle with no tracker says This vehicle has no tracker, so there is no day history to step through. If the summary itself fails to load, it says so and adds the arrows still work — a picker that cannot load must not take the day with it. Until the counts arrive the grid is drawn as unknown rather than empty, because a grid of blank cells is a claim an operator might act on.
Choosing the lens
A dashcam with more than one lens — a JC270 carries two, 1 road and 2 cabin — shows a Road / Cabin switch in the video pane's button row. One choice serves the whole tab, so everything you ask the camera agrees on which lens it means.
- The switch sets the lens for Snapshot, What is on the card, Live view, and the Get footage panel. The panel's own road / cabin buttons are the same choice, not a separate one — picking the cabin there leaves the whole tab on the cabin.
- The On the card band shows only the selected lens's recordings. Asking the road lens says nothing about what the cabin still holds: the two keep their own recordings, and merging them into one band would promise cabin footage for a minute only the road lens has.
- It defaults to whichever channel the camera reports as forward-facing — not to channel 1 by number, so a unit that numbers its rear lens 1 does not open on the tailgate.
- A single-lens camera draws no switch. A one-button choice is furniture, not a decision.
Two actions deliberately ignore the switch, because they are about a picture you are already looking at: 15 s before and 15 s after fetch more of the clip playing, on that clip's lens; and try again on a failed request re-asks the lens the original request named.
Data note: a lens the camera does not offer falls back rather than sticking — select the cabin on a two-lens unit, then open a single-lens vehicle in the same session, and it returns to the road lens instead of asking for a channel that is not there. A card answer recorded before the gateway stored a channel against it is shown whichever lens is selected, because it is the only index that answer gave us.
Live view
Live view opens from the Day strip, or from a vehicle's card on the Board. It opens on the lens selected on the tab — the road camera unless you chose otherwise — with the other lens available beside it or as an inset, and a swap button to exchange them.
Everything on the panel is stated honestly, because a picture that is not live must never look live:
- the pane names what it is doing — Queued, Waiting for the camera to pick up the request, Connecting, Live, Paused — nothing from the camera for 6 s, Camera link stalled, or Stream ended — and never shows a bit rate for a channel that has no frames in it;
- Behind live is a floor rather than a measurement, and says so — at least 4 s. It adds how long ago the camera's last frame reached us to the three seconds of buffer the player holds deliberately: a smaller buffer emptied on every hiccup of the mobile link and the picture froze and caught up. The trip on from there to the screen is not measured, so the real lag is larger, and on a poor link noticeably so;
- Session counts down the limit the server enforces (three minutes), with Extend to ask for another;
- Data shows what this session has spent and what the SIM has left. A live channel is about 6.5 MB a minute, and the cabin camera doubles it — the panel says so beside the tick that turns it on.
Live view has sound — what the camera's microphone hears in the cab. It plays from the main picture only: both lenses carry the same microphone, so the second picture stays silent rather than echo it, and swapping the pictures moves the sound with them. The Sound on / Sound off button in the corner of the main picture switches it. If the browser will not start sound by itself the button starts at Sound off; one click turns it on.
Two actions save something: Snapshot asks for a still (about four seconds), and Mark moment saves the thirty seconds just gone off the camera's card. Just gone, not the next thirty — the camera can only send what it has already recorded, and the clip lands on the Day strip when it arrives.
Live view streams over the vehicle's own SIM for as long as it runs, so it closes itself after the session limit, and within a few seconds of nobody watching. Switching to another browser tab stops it too, unless you tick Keep streaming in the background.
Event evidence
Clicking an event pin on the Day strip — a harsh brake, an overspeed, a panic — opens the evidence card: everything needed to argue about that moment in one place.
- Speed either side of it, from the tracker. A braking event reads 68 → 12; one held at a steady speed reads the single figure.
- Driver, taken from the trip the event happened on. An event carries no driver of its own, and a trip with nobody signed out says so rather than naming whoever drove last.
- Where, Trip, Vehicle, and which sources contributed.
- Add to case keeps the event in a case file, where it stays after the card closes, along with a record of who added it.
- The clip, if there is one, with a mark on the scrubber at the exact instant of the event. Where there is none, the card offers to fetch thirty seconds around it from the camera's card — and while that is on its way, the card says so and keeps polling. The map and the speed trace are there from the start either way: they come from the tracker, not the camera.
- Copy the summary puts the facts on the clipboard as plain text for a report or a message.
On a vehicle with only a tracker, the card has no picture column. The route and the speed trace sit side by side across its width, Sources reads Tracker, and nothing on the card waits for footage that cannot come. The evidence pack lists only what a tracker supplies: the map, the speed trace and the driver on the trip. A dashcam adds the road clip and the camera's identity, and a camera with two lenses adds the second camera.
The card lists what such a pack would carry and ticks what is already on record. Exporting it as a single shareable document is not implemented.
When a map doesn't appear
Three views on this page draw a map: the Board, the Live map, and the route on the Tracking (or Camera & tracking) tab of a vehicle's fleet view. Both need WebGL — the browser feature that draws hardware-accelerated graphics — and both need to reach Mapbox. When either is missing the map area names the reason instead of sitting empty:
| What you see | What it means | What to do |
|---|---|---|
| This browser can't draw the map | The browser isn't providing WebGL. Most often hardware acceleration is switched off, or the session is running over remote desktop. | Turn hardware acceleration on in the browser's settings and reload. |
| Couldn't reach the map service | The map data didn't download. | Check the connection and reload. On a locked-down machine, ask IT whether api.mapbox.com is blocked. |
| The map service rejected this request | Mapbox turned the request down — the map key needs renewing, or the account is over its monthly limit. | Report it; this one is for CleverCam to fix. |
| Map unavailable | No map key is configured for this environment. | Report it; this one is for CleverCam to fix. |
What still works without a map:
- Live map — the List view shows every vehicle, the tracker fitted to it, and when that tracker last reported. The Active/All toggle and the tag filter are unaffected.
- Board — the List view shows the same fleet as a table.
- Tracking (or Camera & tracking) — the whole Day strip still works: the lanes, the cursor, and, with a dashcam, the clips and asking for footage. Only the map beside it is missing, so the readout that names the speed and ignition at the cursor still answers, while the route is not drawn. Under Trips, the trip list still shows every trip with its times, distance, driver, stops and how it ended, and the date range, driver and ending filters all still work. Export CSV still exports every recorded point of the selected trips.
Only the drawn route needs the map. Print report is the one thing that cannot be produced — the report is the annotated map — and it will tell you so rather than printing a blank page.