Manage Community
Once a community is created, ongoing management keeps the BOLO Board useful and the membership healthy. The community management page in CleverOps is where you approve and remove members, change roles, moderate the BOLO Board, and review a history of everything admins have done in the community.
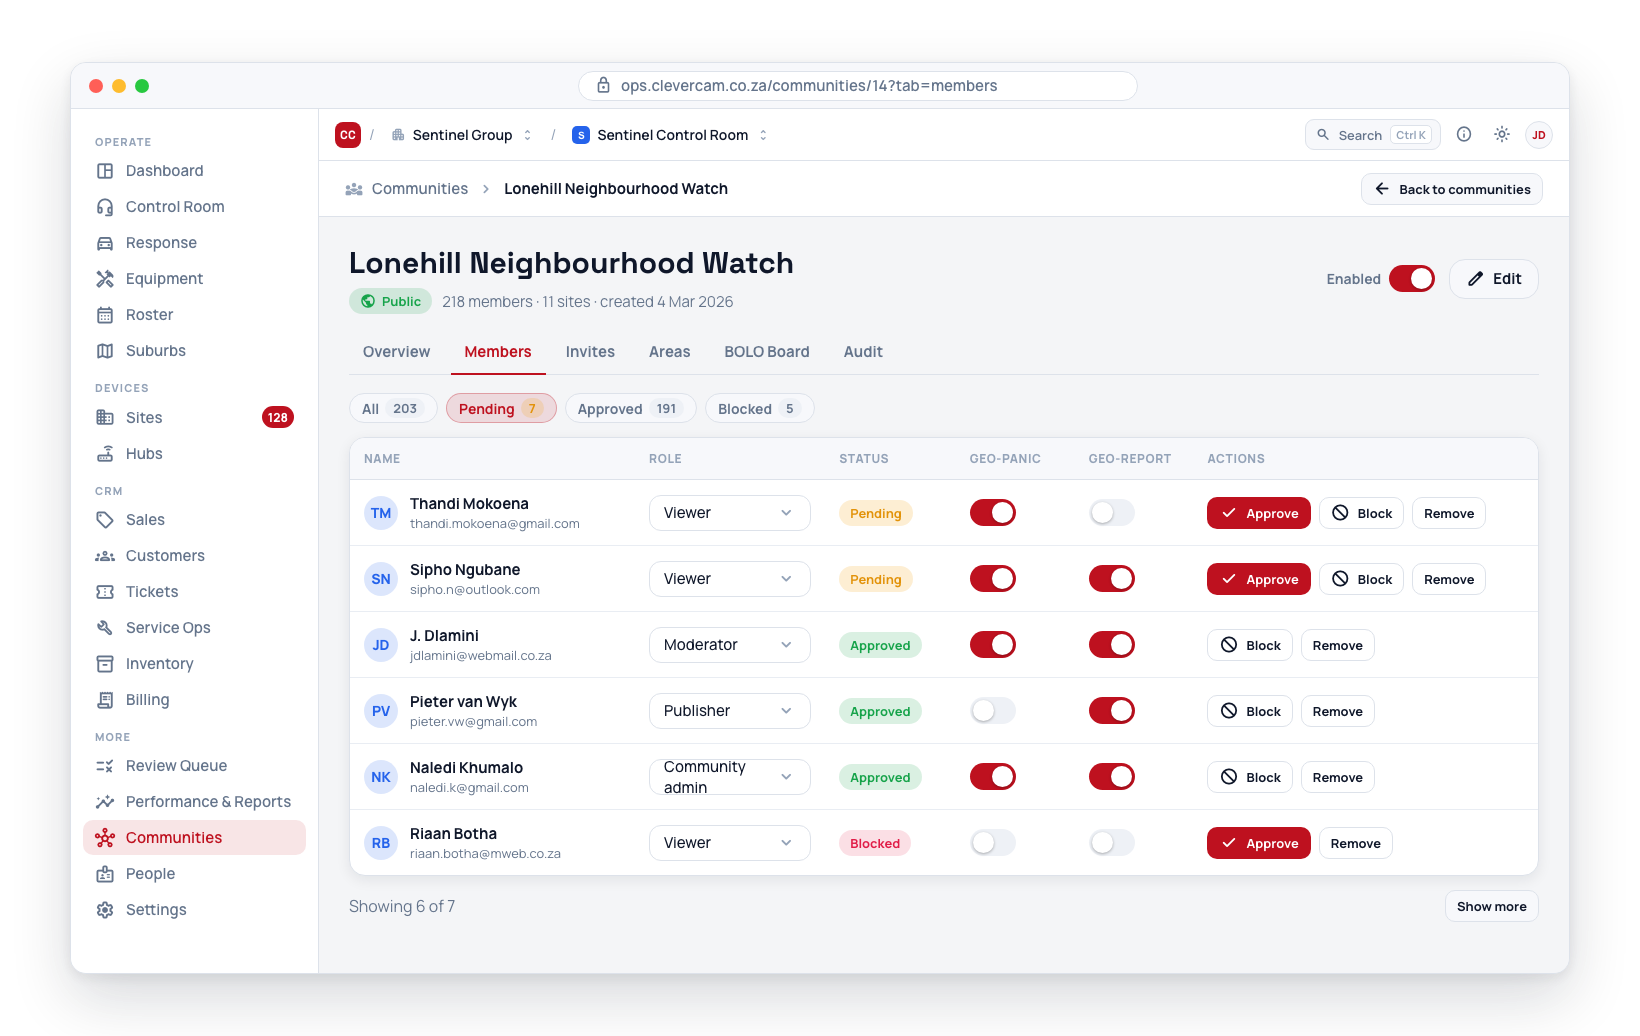
Community admins can manage their own community only. Your monitoring centre's staff in CleverOps have all community admin powers across every community your centre owns, plus the ability to create and disable communities and link suburbs.
Accessing Community Management
- Navigate to Communities in the CleverOps sidebar.
- Click on the community you want to manage.
- The community opens on its own detail page with a row of tabs: Overview, Members, Invites, Suburbs, BOLO Board, and Audit. Each tab loads its own data when you open it, and the active tab is reflected in the URL — so refreshing the page, using the browser Back button, or sharing the link all land on the same tab. A Communities breadcrumb (and a Back to communities button) returns you to the list.
Enabling and Disabling a Community
You can temporarily disable a community without deleting it:
- On the Overview tab, locate the Enable/Disable toggle.
- Switch to Disabled to deactivate the community.
- Members can no longer see or submit BOLOs.
- The community disappears from public listings (if it was public).
- Existing membership data is preserved.
- Switch back to Enabled to reactivate the community.
Disable a community if it is no longer needed temporarily (e.g., during a restructuring) or if moderation issues require a pause. Disabling does not delete members or settings.
Editing Community Settings
- On the Overview tab, click Edit to open the edit dialog.
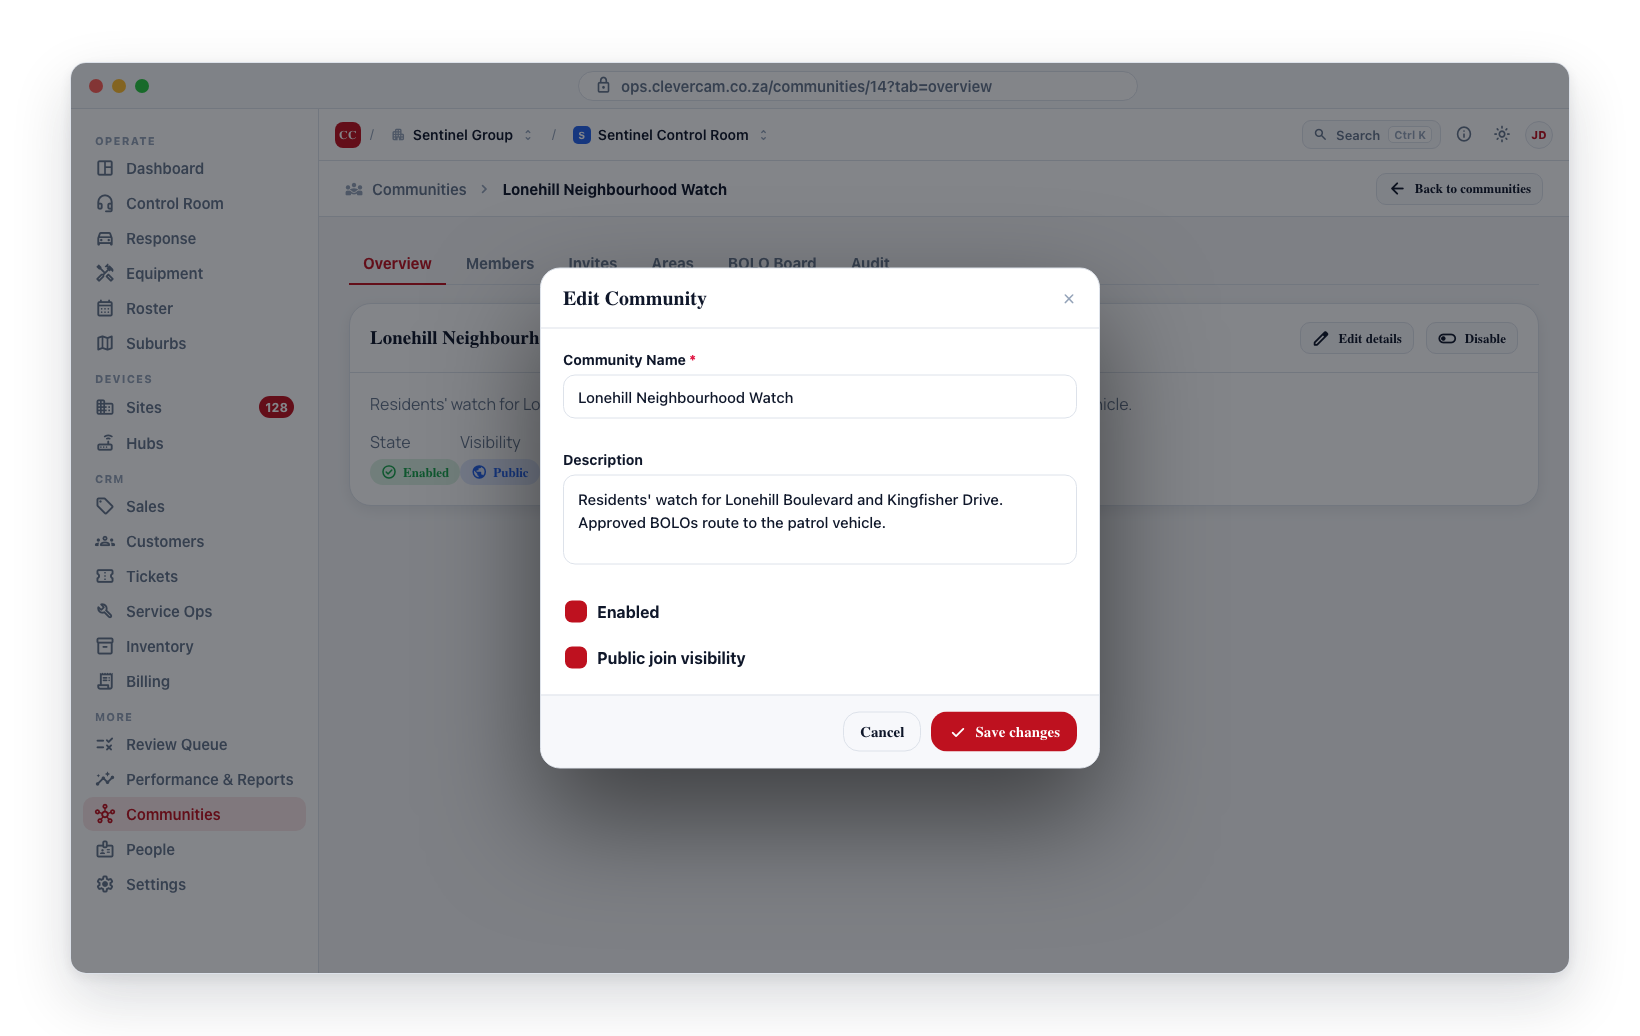
- Update any of the following:
- Community name — Change the display name
- Description — Update the community description
- Visibility — Switch between public and private
- Enabled — Toggle the community on or off
- Click Save to apply changes.
Geo-panic and geo-report access are configured per membership and per invite, not at the community level. See Roles & Invitations.
Member Management
Member management lives on the Members tab of the community detail page. A row of status filter chips (All / Pending / Approved / Blocked / Removed) sits above the list, and long lists page in 50 at a time with a Show more button. Each row includes:
- Name
- Role — Viewer, Publisher, Moderator, or Community admin
- Status — Pending, Approved, Blocked, or Removed
- Geo-panic and Geo-report toggles
- Note — Optional internal note
1. Approve a Pending Member
When auto-accept is off (or when a previously removed member rejoins), new members land in the Pending queue.
- On the Members tab, click the Pending filter chip to narrow the list to members awaiting approval.
- Review each pending member.
- Approve them and save the row. The member is added and the action is recorded in the audit log.
To decline instead, click Block (see below).
2. Change a Member's Role
- Find the member in the list.
- Use the Role dropdown on their row to select Viewer, Publisher, Moderator, or Community admin.
- The change is saved immediately and recorded in the audit log.
3. Block a Member
Blocking hides the community from the member and stops them from reading or submitting BOLOs. Their record remains on file.
- Find the member in the list.
- Click Block.
- The member is blocked and the action is recorded in the audit log.
To unblock, approve them again.
4. Remove a Member
Removing a member is a soft action — their history is preserved so you can see when they were in the community and who removed them. Removed members can be re-admitted later; they re-enter via the pending queue.
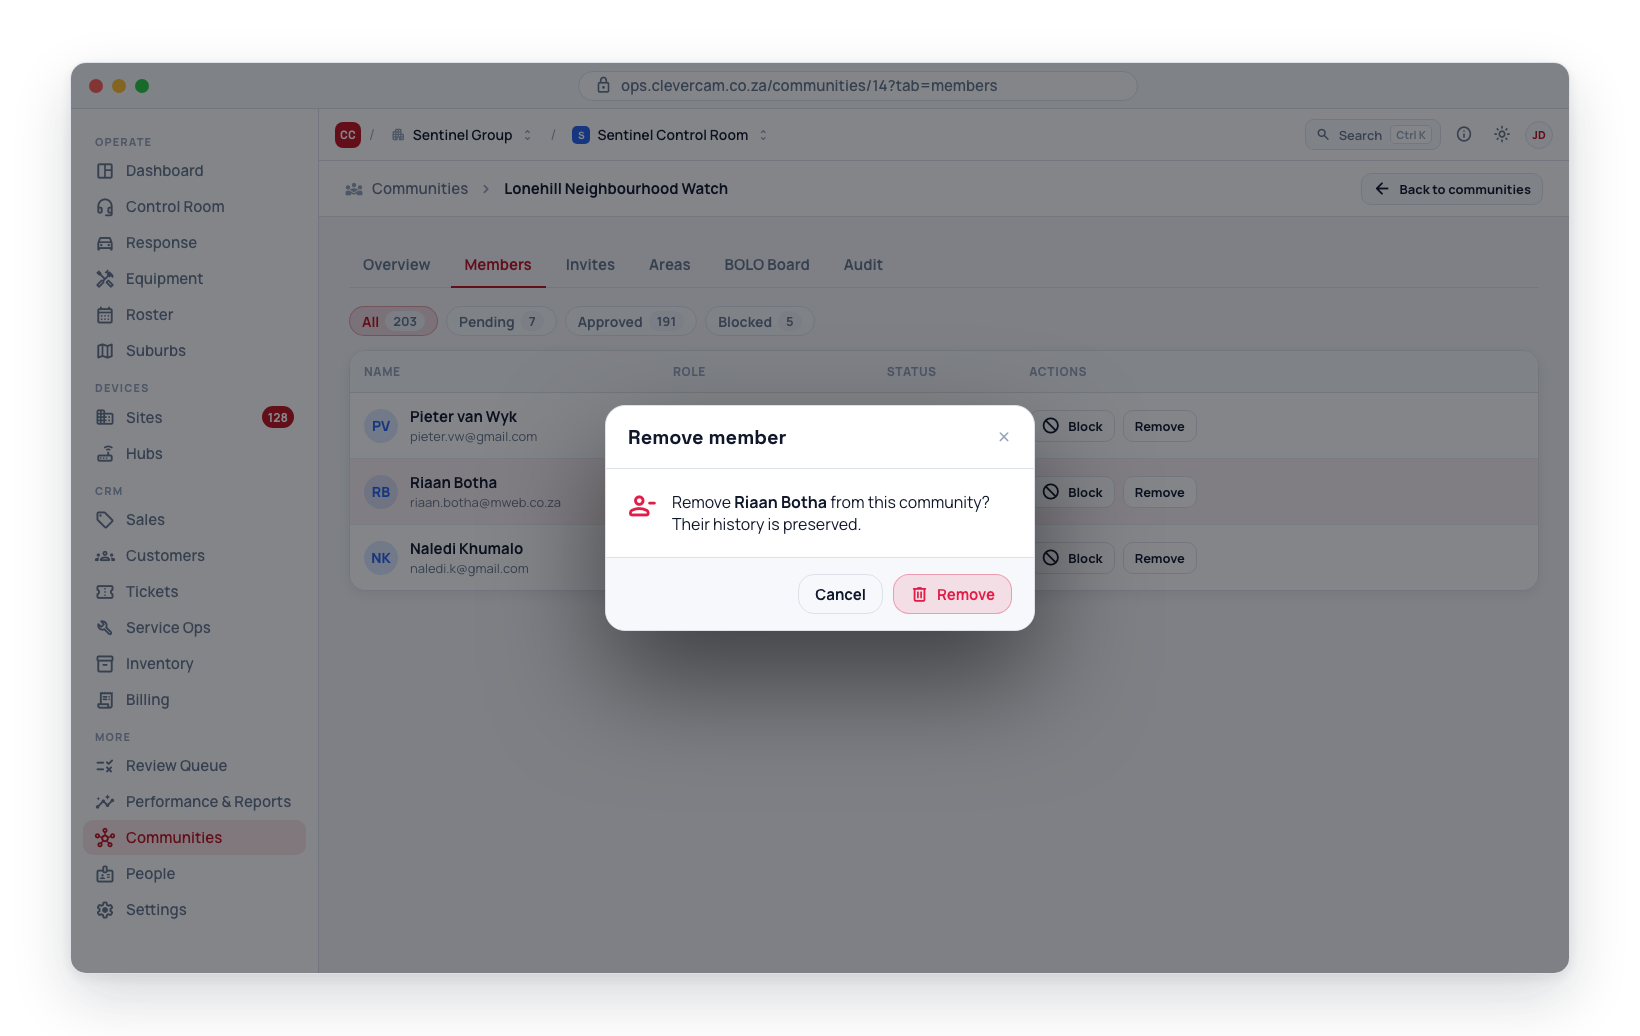
- Find the member in the list.
- Click Remove in the row actions.
- Confirm the action.
- The member is removed and the action is recorded in the audit log.
If the same person later rejoins the community via an invite, a community admin must approve them again, even if the invite has auto-accept on.
Use Block when you want to prevent the person from rejoining without an admin's intervention. Use Remove when they are simply leaving and may return later on good terms.
BOLO Board Moderation
Every submitted BOLO starts as pending. Only approved BOLOs appear on the public BOLO Board. Moderators, community admins, and your monitoring centre's staff all have access to the moderation queue. See BOLO Board for the full flow, including how members submit from the mobile app.
Reviewing the Queue (CleverOps web)
- Open the community in CleverOps.
- Open the BOLO Board tab.
- The Pending view shows every submitted BOLO awaiting review, oldest first.
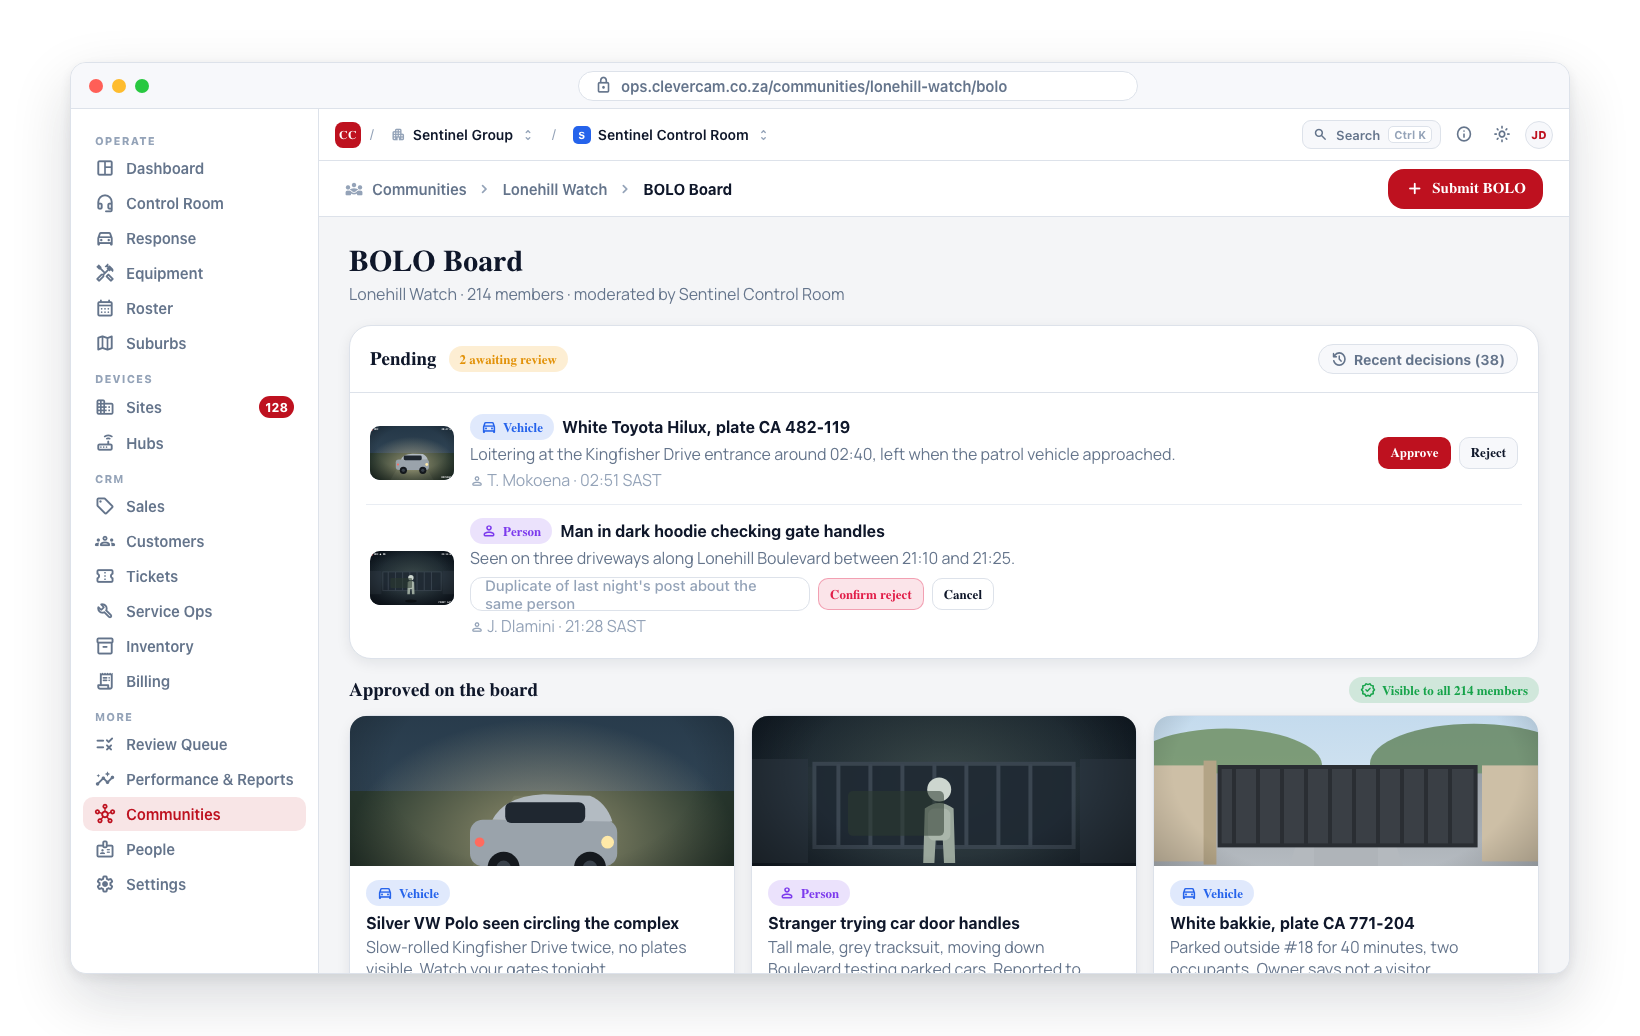
- For each post you can:
- Approve — The post becomes visible on the BOLO Board to all viewers and above.
- Reject — The post is hidden. An optional Reason field is offered; any text you enter is shown to the author.
- Both actions are recorded in the audit log with who did it, when, and (for rejections) the reason.
Reviewing the Queue (mobile)
Community admins and moderators can also moderate from the CleverCommunity app:
- Open the community in the CleverCommunity app.
- Tap the BOLO Board tab.
- Tap Queue (N) — the badge shows how many posts are pending.
- Approve or reject each post in the list. The rejection reason field is the same as on web.
Viewing the Audit Log
Every admin-level action on a community is recorded in the audit log:
- Member approved, blocked, removed, or role changed
- BOLO post approved or rejected (with reason when provided)
- Invite created or disabled
The audit log is visible to community admins (for their own community) and to your monitoring centre's staff (for every community your centre owns).
How to view
- Open the community in CleverOps.
- Open the Audit tab of the community detail page.
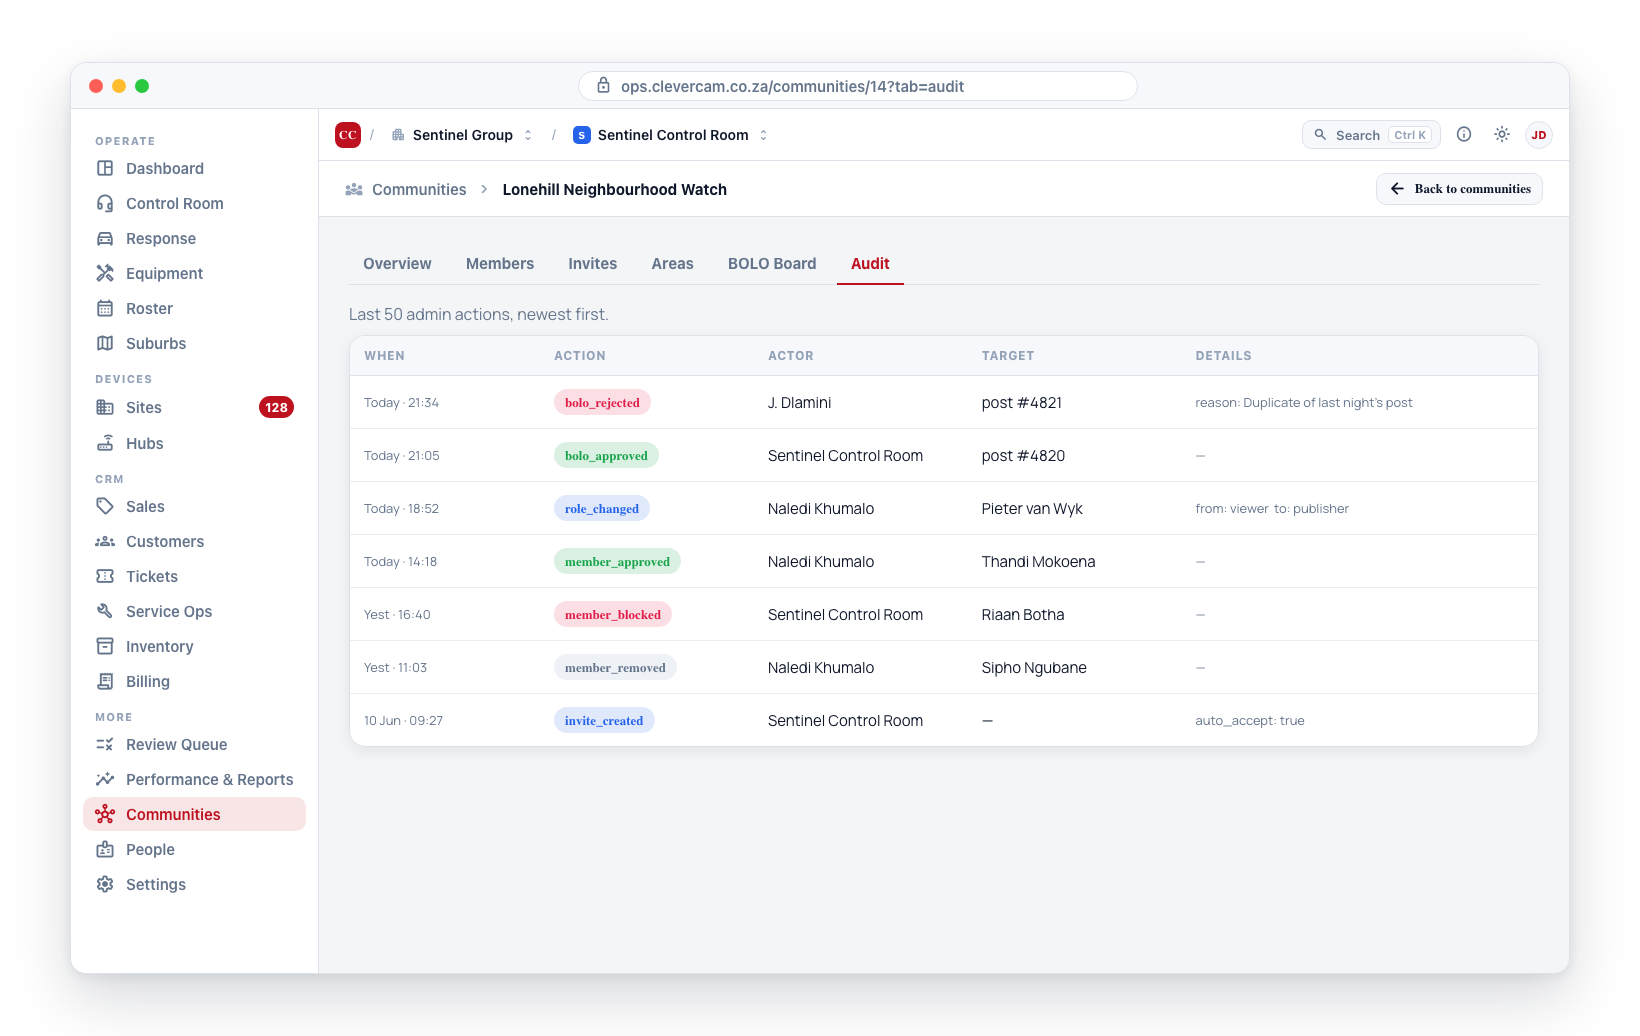
- The tab shows the last 50 actions in reverse chronological order. Each entry includes:
- Who did it (name of the staff member or admin)
- What happened (e.g. member approved, BOLO rejected)
- Who or what was affected (the member or the BOLO post)
- When it happened
- Additional details — such as the rejection reason or the previous role when a role was changed
Use the audit log when investigating disputes, onboarding new community admins, or reviewing a moderator's activity.
Shared Cameras
A community only shows cameras that have been explicitly shared into it. Sharing is per camera, not per site — linking one street camera at a residence does not expose that home's other cameras.
Sharing a camera
- Open the site (Sites → the site) and open the camera you want to share.
- In the camera editor, find the Communities panel. It lists the communities the camera is already linked to, or reads "Not linked to any communities."
- Click + Add to community.
- Choose the community in the Community dropdown and save. The link is approved immediately — there is no second approval step.
Site owners can also share their own cameras from the CleverAlert app; both routes create the same link.
What approved members see
Every approved member of the community sees the shared camera, whether or not they have an app login on the site the camera belongs to. A neighbour who joined from an invite link or QR code gets the same view as a member who happens to also be a user on that site:
- The camera's still frame, its name, and how recently the frame was taken.
- The site name and map position, so the camera can be placed on the community map.
- Live view, but only when the camera's owner has switched on Allow external live view for that camera in CleverAlert. Without that opt-in, live view tells the member the owner has not shared it — see Live view.
Members never receive the camera's credentials, its RTSP address or its IP — only the picture. Sharing a camera exposes nothing else about the site: not its address, contacts, response instructions, or unshared cameras.
Un-sharing the camera, disabling the camera, or disabling the community removes it from every member's view.
Linked Suburbs
You can link one or more suburbs from your monitoring centre to a community. All sites assigned to a linked suburb automatically become discoverable in that community via the CleverCommunity mobile app — without needing to manually link each camera feed.
This is the recommended way to include a whole neighbourhood or zone in a community.
Linking a Suburb
- Navigate to Communities in the sidebar and open the community.
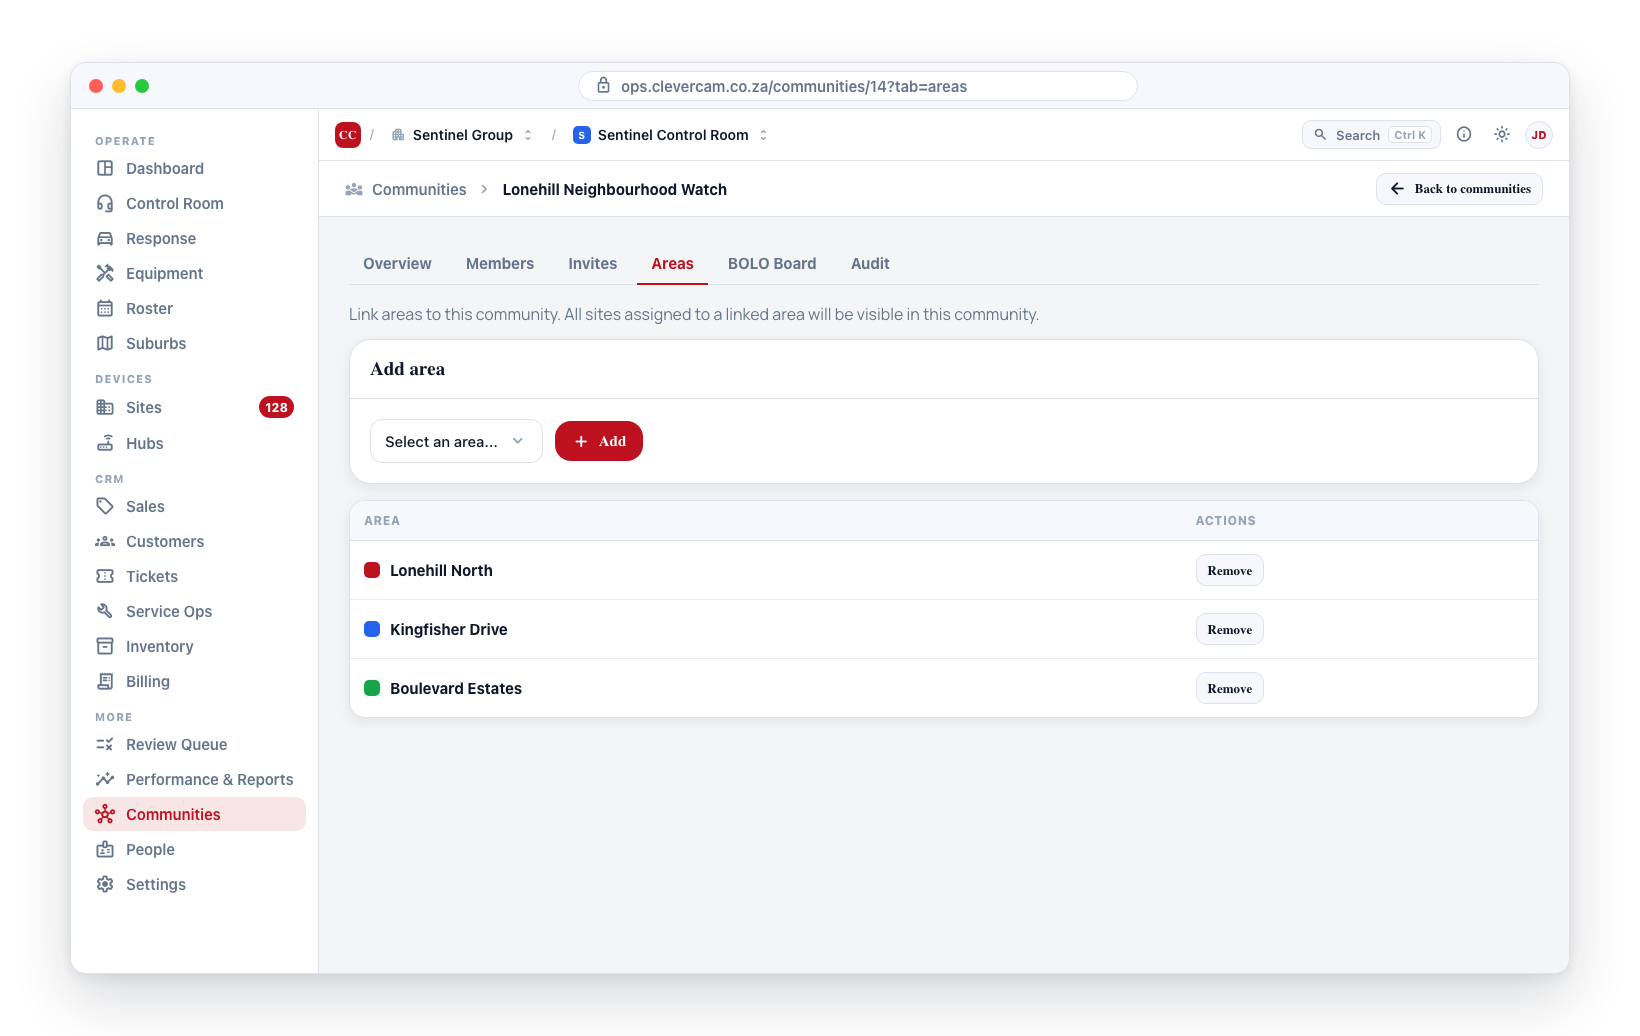
- Open the Suburbs tab.
- In the Add suburb section, select a suburb from the dropdown.
- Click Add.
- The suburb appears in the list (with its colour swatch). All sites in that suburb are now included in this community.
Removing a Suburb
- Open the Suburbs tab for the community.
- Find the suburb in the linked suburbs list.
- Click Remove and confirm.
- Sites in that suburb are no longer included in this community.
Suburbs and individual stream links are independent. A site already linked via an individual stream link is not affected by suburb removal. Communities linked via a suburb show a "Via site suburb" label in the mobile app so members can see why that community is visible for a particular site.
Best Practices
- Respond to join requests promptly — Delayed approvals frustrate potential members.
- Delegate — Do not try to run a large community alone. Promote trusted members to Moderator for BOLO triage and Community admin for membership management.
- Write rejection reasons — A short reason on a rejected BOLO helps the author understand what belongs on the board.
- Review the audit log periodically — Check that admin actions line up with what you expect, especially after adding a new community admin.
- Use Remove for routine churn, Block for problem members — Remove is reversible and friendly; Block is a standing denial that requires an admin to reverse.