cleverBridge
A cleverBridge is a small piece of hardware that connects to a Clever Hub and exposes physical inputs and outputs to the app. It lets you pulse relay switches (for gates, doors, or sirens), monitor dry-contact sensor inputs, and trigger a piezo buzzer — all from your phone.
Finding the Bridge Screen
- Tap the Devices tab in the bottom navigation.
- Tap the hub entry that has a cleverBridge attached.
- Tap cleverBridge in the hub detail screen.
What You See
The screen is divided into sections:
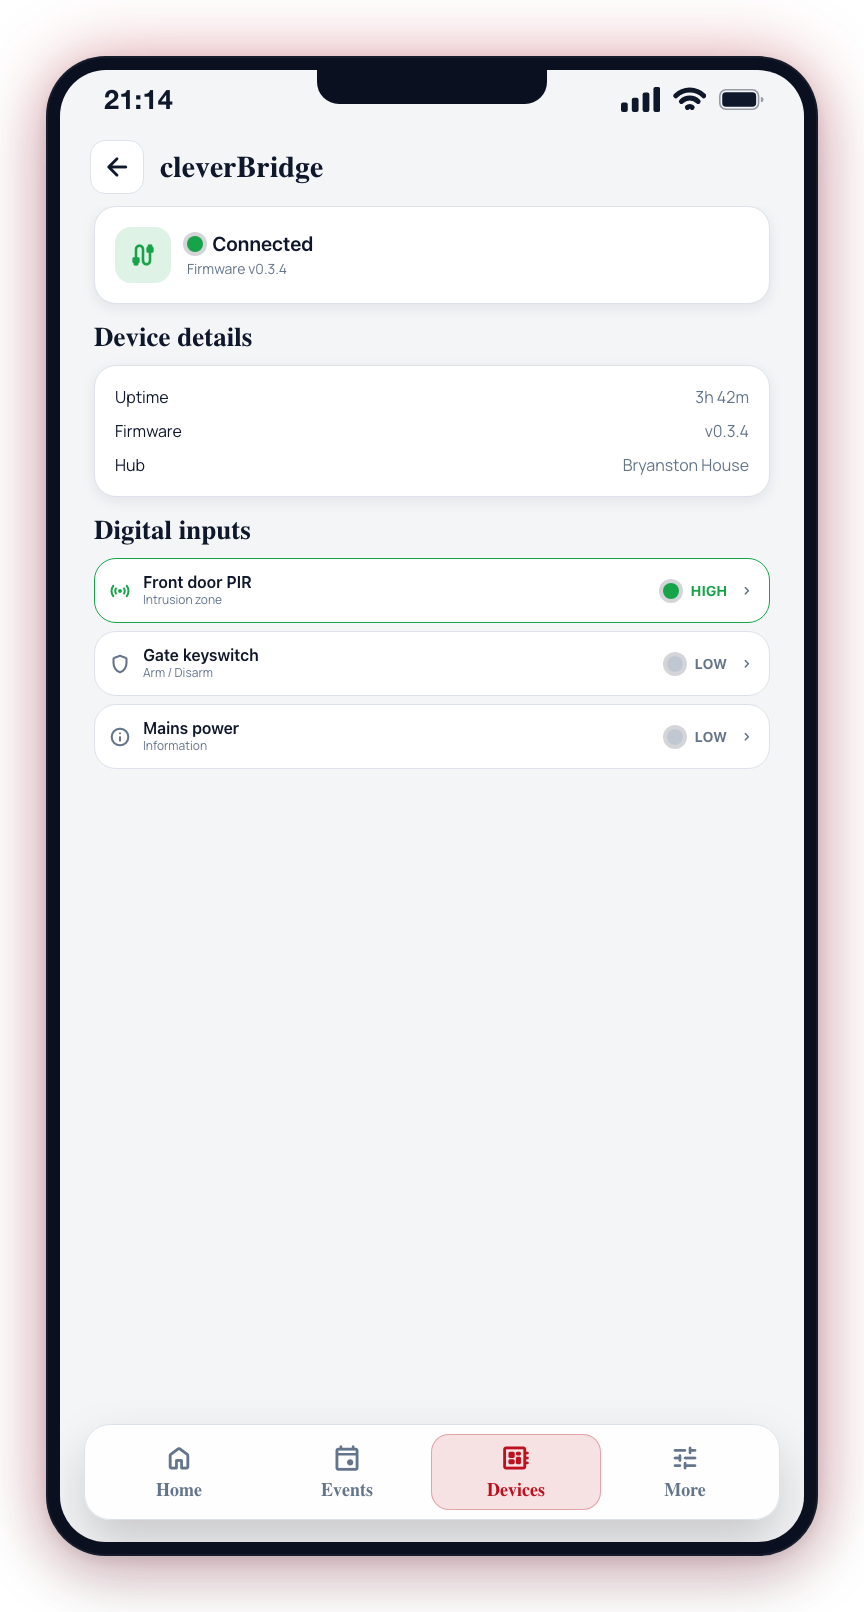
Connection status
A card at the top shows whether the bridge is Connected or Disconnected, along with its firmware version. If the bridge is offline, an Offline badge appears next to the Output controls heading and all outputs are dimmed.
Device details
Shows the bridge uptime, firmware version, and the hub it belongs to.
Quiet hours
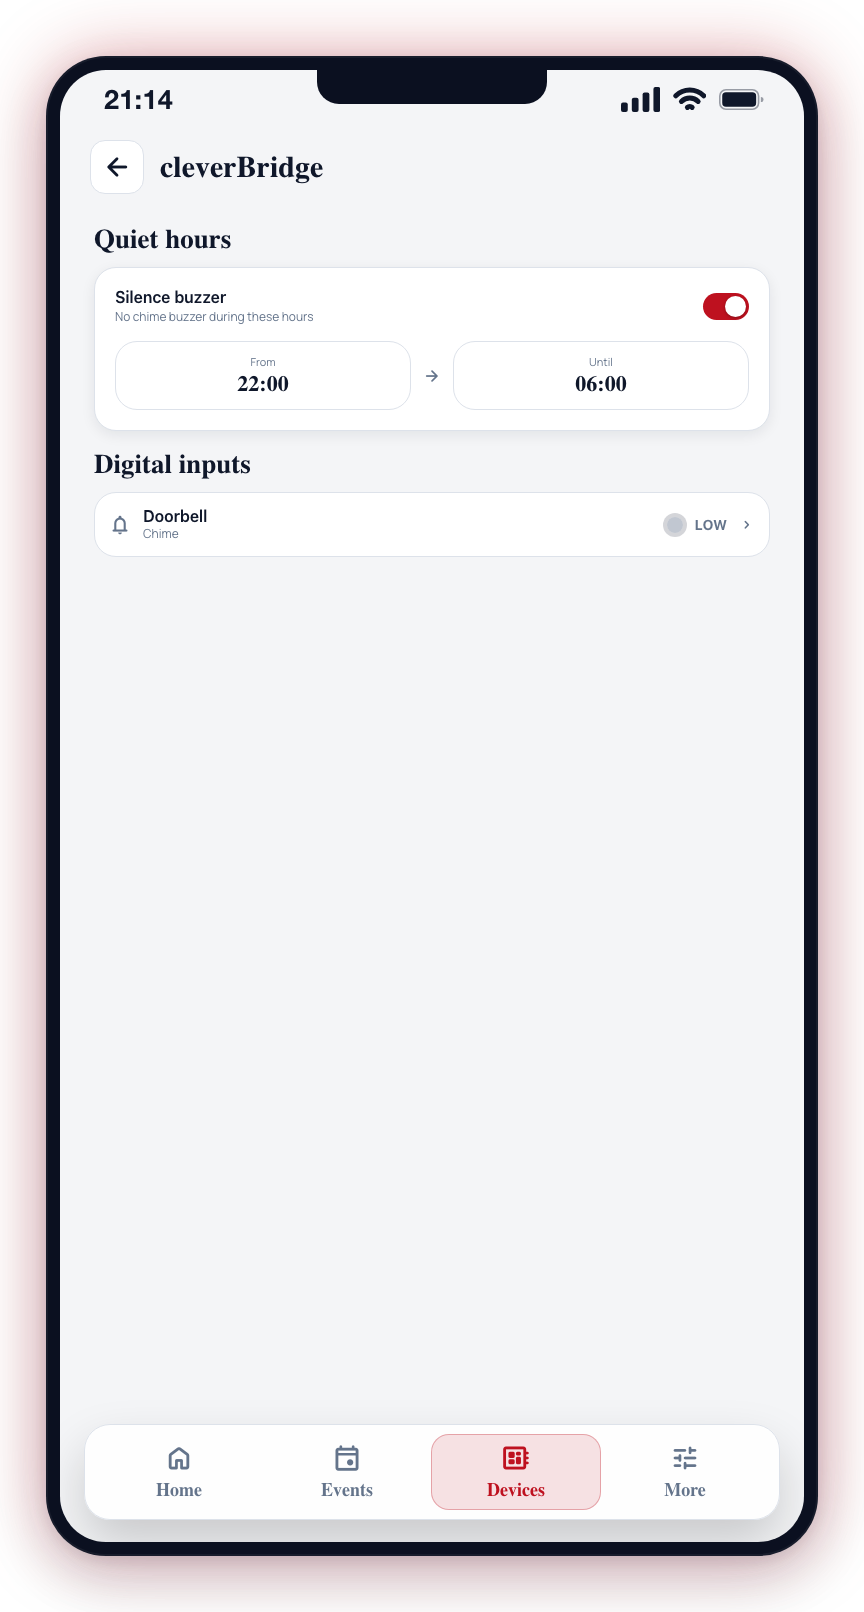
A toggle labeled Silence buzzer suppresses the on-bridge chime buzzer during a scheduled time window. When enabled, tap From or Until and a time sheet slides up: two scrolling columns, hours on the left and minutes on the right, with the time you are setting shown large above them. Tap Done to keep it, Cancel to leave it alone. Changes save automatically.
Times here are always 24-hour (22:00, 06:00) whatever your phone's own clock is set to. An Until earlier than the From means the quiet window runs through the night, which is the usual case.
Digital inputs
Three input rows show the current state (HIGH or LOW) for each dry-contact input. A green border appears when an input is active. Tap any input row to configure its label and category.
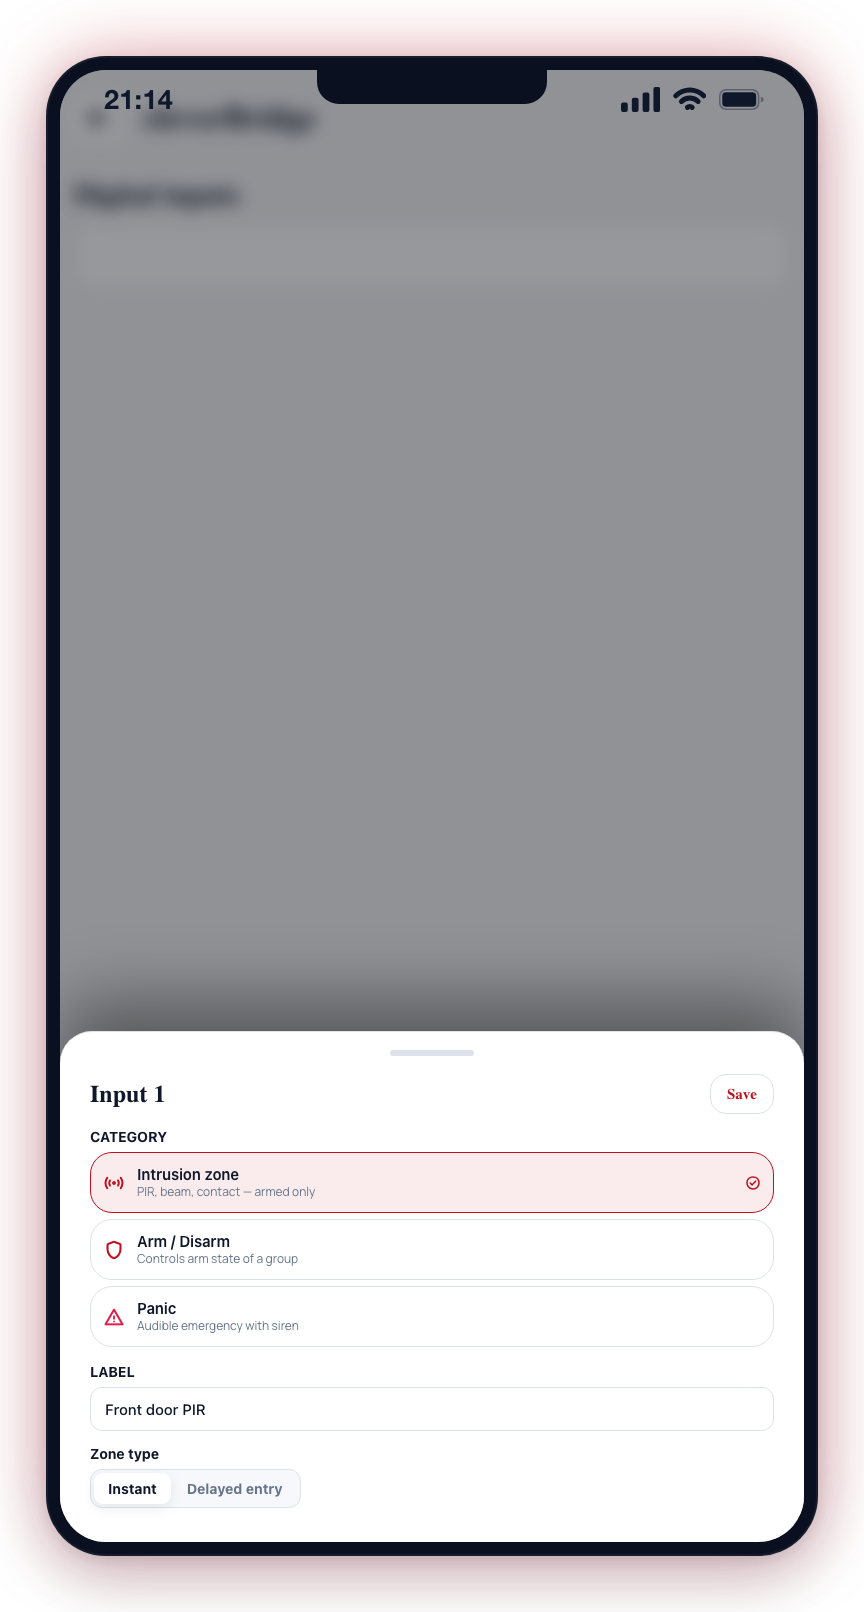
Input categories:
| Category | Purpose |
|---|---|
| Arm / Disarm | Triggers arm or disarm |
| Panic | Silent panic signal |
| Duress | Duress code input |
| Emergency | Fire or medical |
| Intrusion zone | Perimeter sensor |
| Chime | Doorbell-style chime |
| Information | General purpose |
Input history
If the bridge has logged recent input events, a timestamped list appears below the inputs showing which input triggered or cleared, and when.
Output controls
Four outputs are available: Relay 1, Relay 2, Relay 3, and Siren. Tap an output row to send a Pulse command to that output. Long-press to configure the output's label and category. The buzzer control has an additional frequency slider (100 Hz to 10 kHz) — set the tone, then tap Pulse.
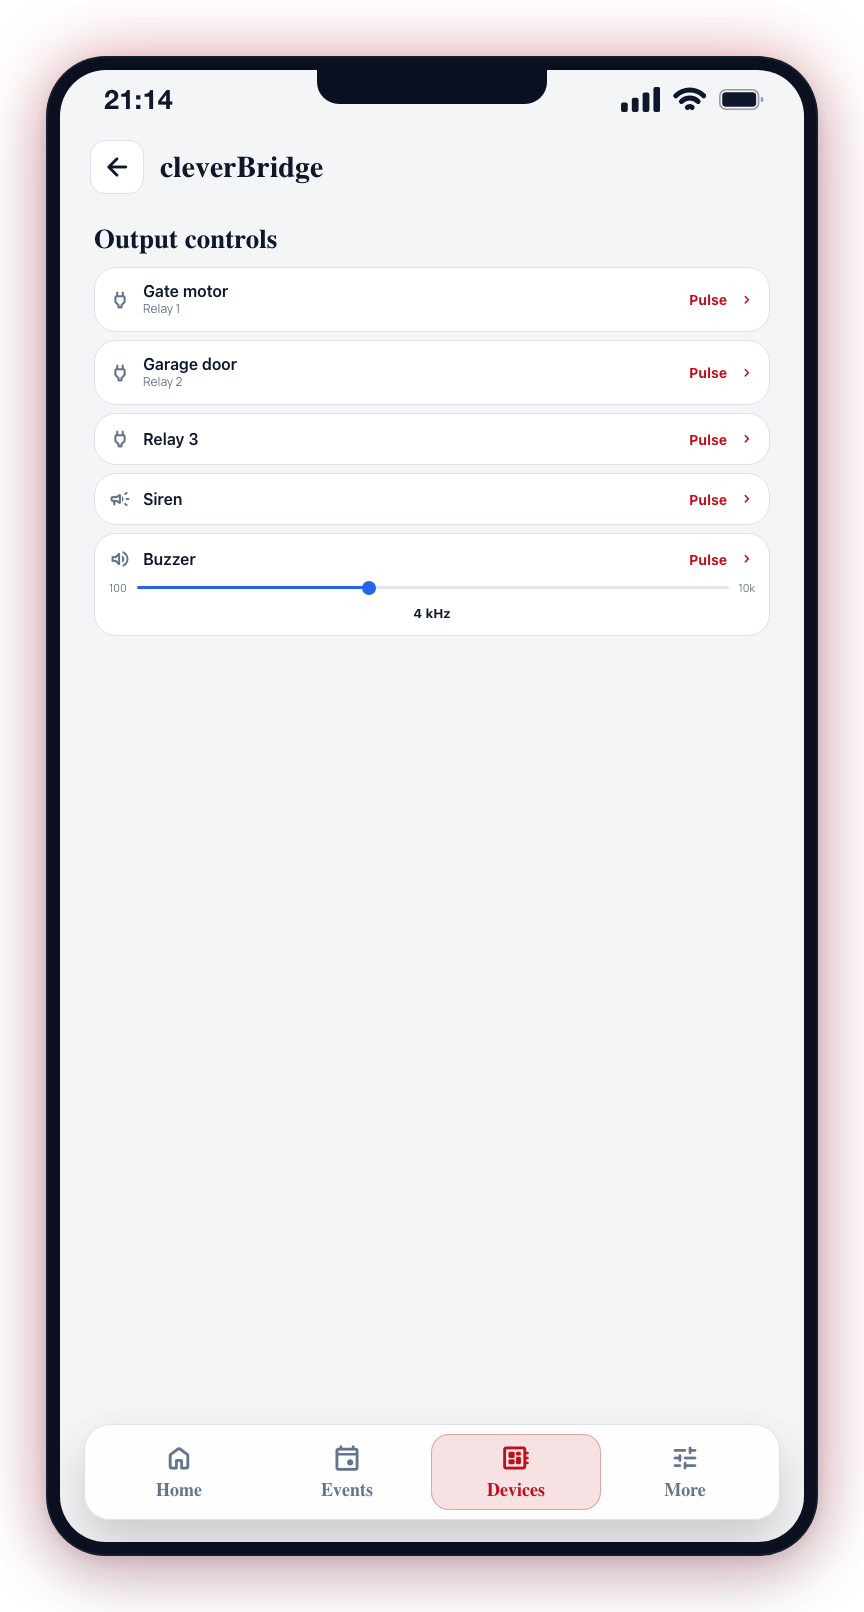
If the bridge is offline, tapping any output shows a message: "Bridge offline — command not sent." No command is queued.
Sherlo transmit
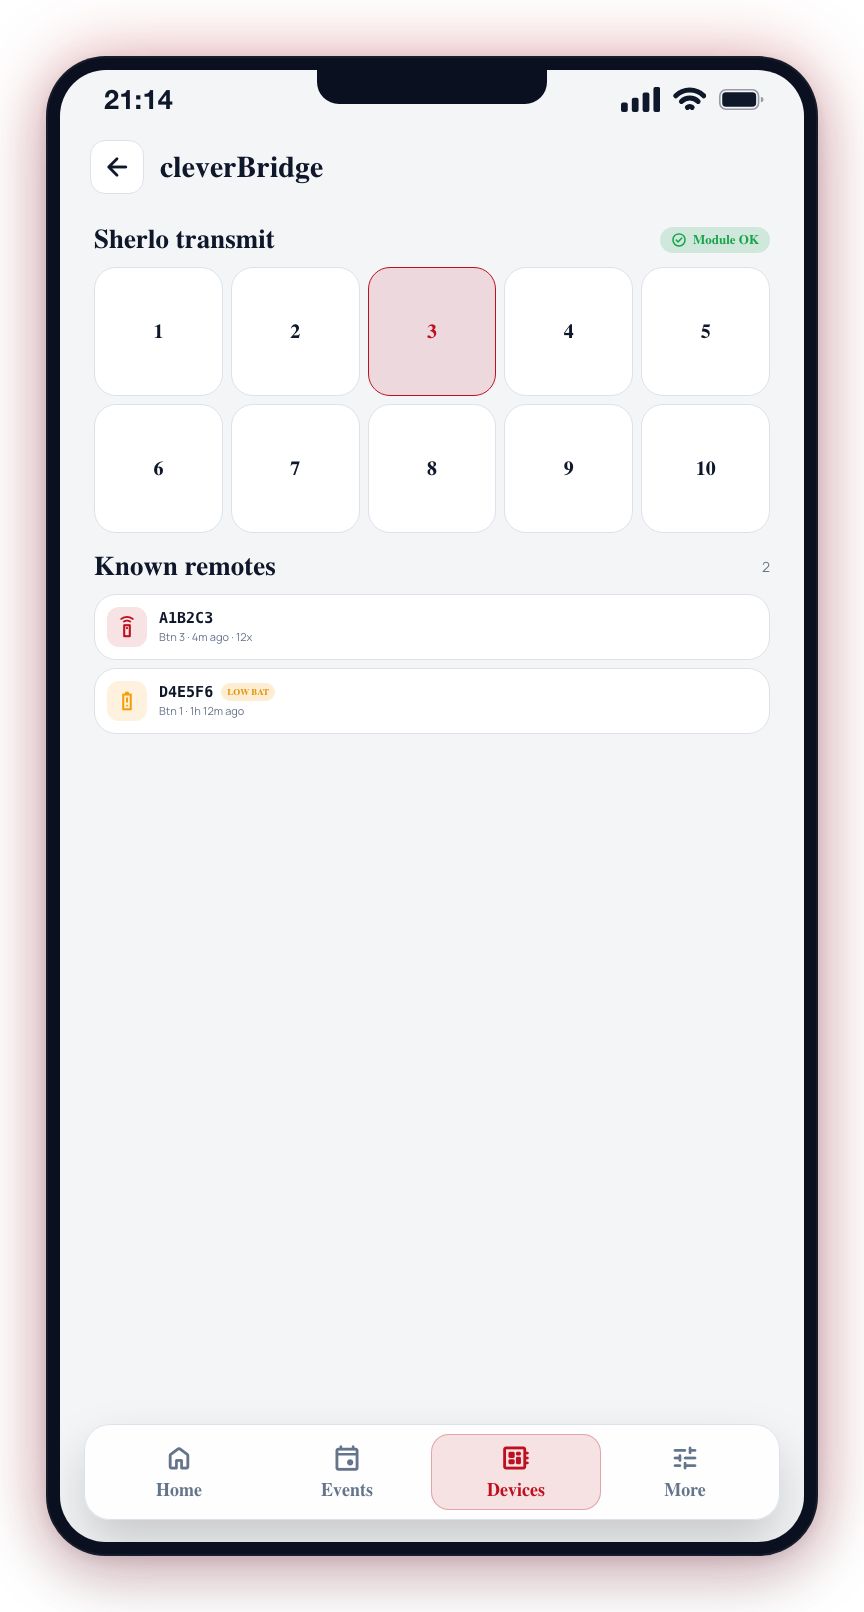
If a Sherlo RF transmitter module is fitted, a grid of numbered buttons (1–15) lets you transmit Sherlo remote codes. The last button transmitted is highlighted. A status indicator shows Module OK or No module. Tapping a button while the bridge is offline does nothing.
Known remotes and receive log
If Sherlo remotes have been seen by the bridge, cards appear showing each remote's serial number, last button pressed, and time since last activity. A LOW BAT badge appears if the remote is reporting low battery. The receive log shows the last 20 received signals for each remote.