Event Timeline
Every event in CleverCommand has a chronological timeline that records all activity from the moment the event was created to its resolution. The timeline provides a complete audit trail of what happened, when it happened, and who was involved. This is essential for post-incident review and accountability.
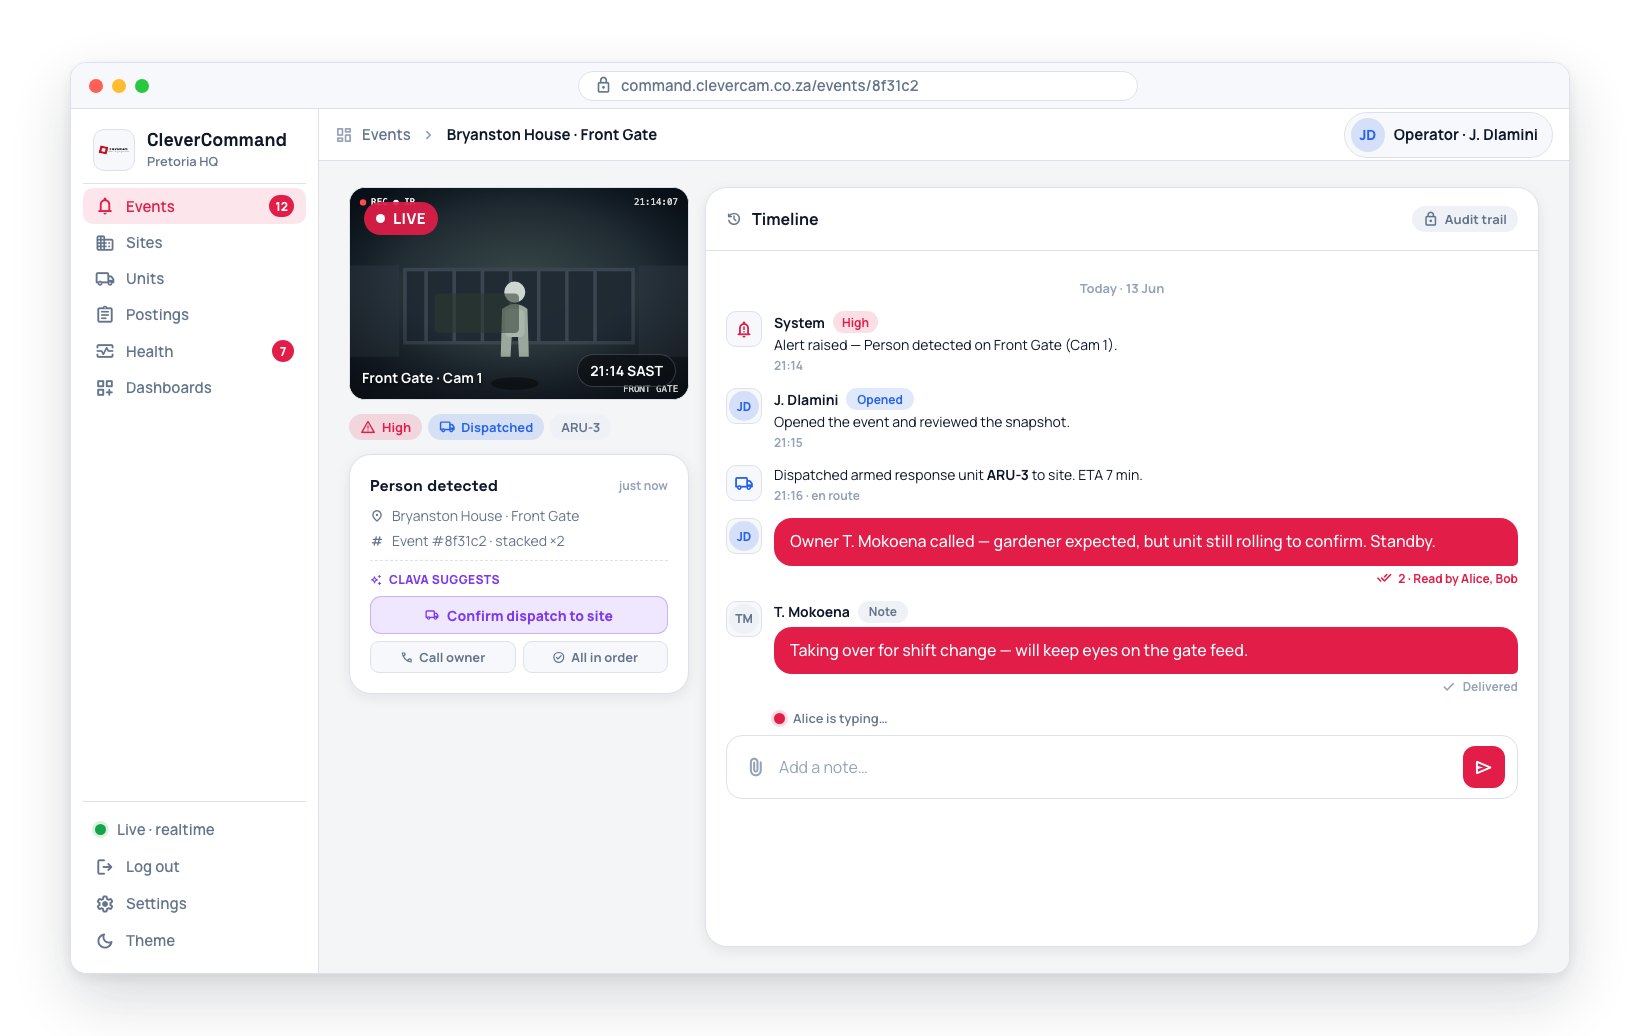
What the Timeline Shows
The timeline displays entries in chronological order -- oldest at the top, newest directly above the message composer at the bottom. This makes it easy to follow the sequence of events and ensures your most recent messages stay in view. Each entry is stamped with the clock time it happened (e.g., "05:51") -- never "5 minutes ago", so a timeline read at a shift handover means the same thing an hour later.
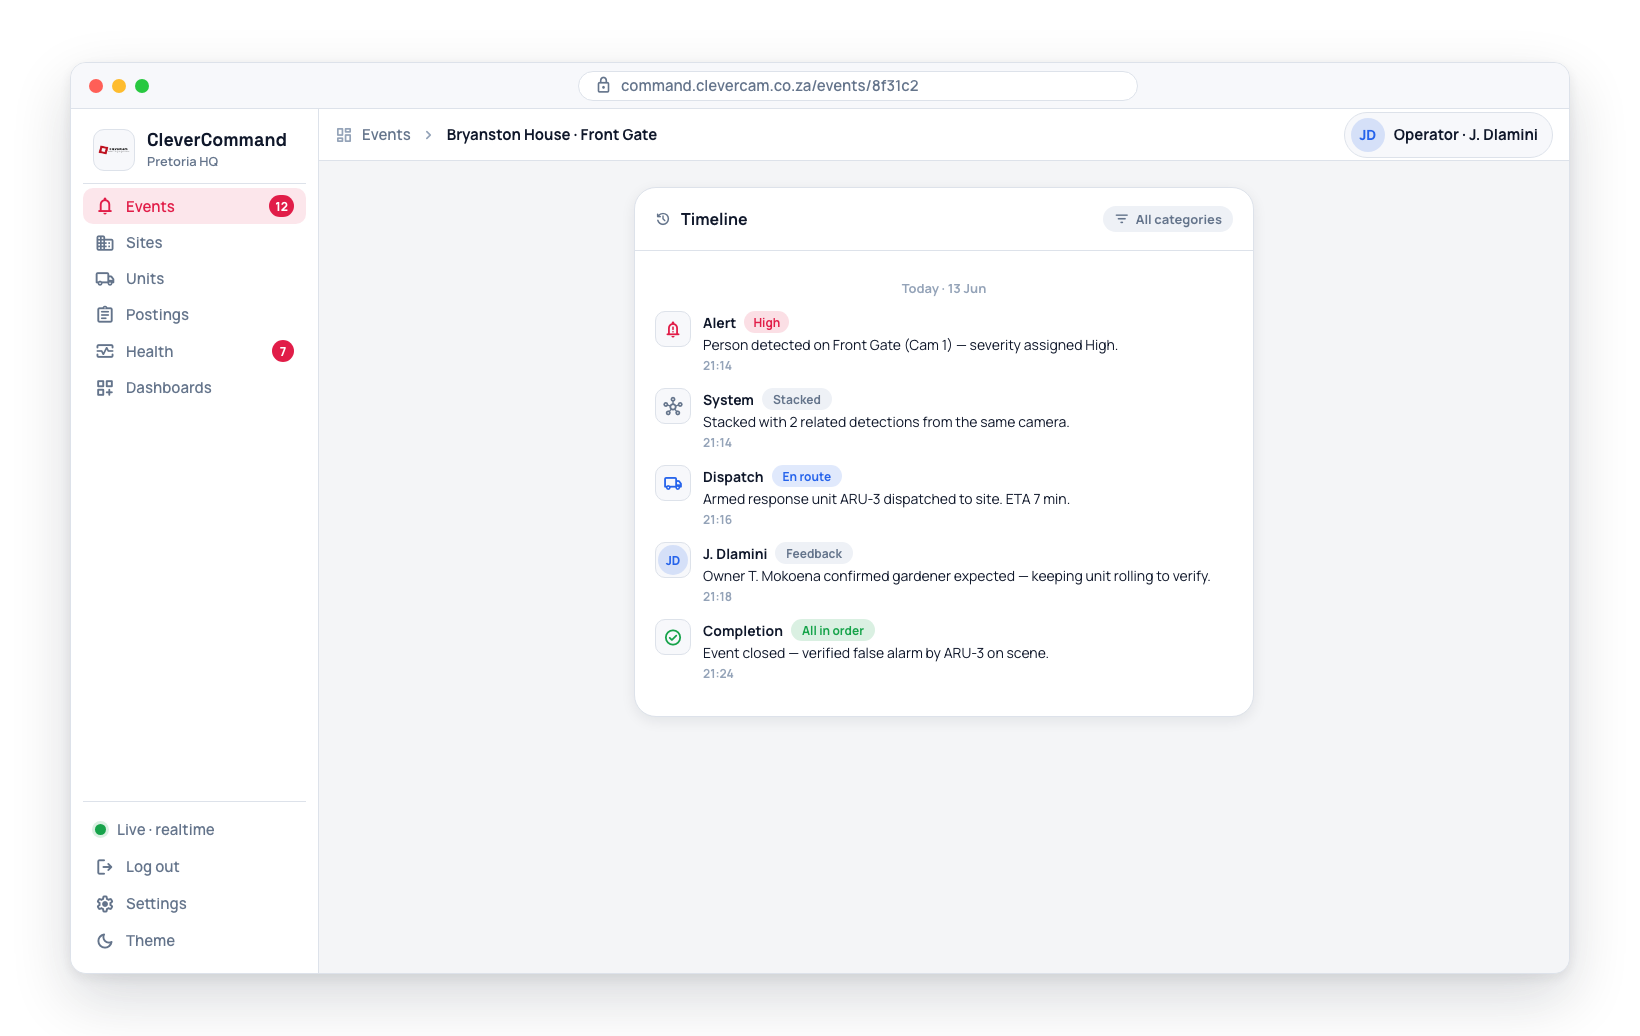
Timeline entries are grouped visually by day with separator labels (Today, Yesterday, or an abbreviated date). Consecutive messages from the same operator within a short window are grouped together, with the operator's name only shown on the first message to keep things tidy.
Timeline entries fall into several categories:
| Category | Examples |
|---|---|
| Alerts | Event created, severity assigned, camera that triggered the detection |
| Completions | Event closed, marked as verified, marked as false alarm |
| Feedback | Notes added, observations recorded, decisions documented |
| Dispatches | Unit dispatched or queued, dispatch cancelled, reaction arrived (recorded by an operator), dispatch declined by the responder — and, when the crew presses the buttons in CleverResponder, Responder on the way, Responder arrived and Responder finished (ending All in order. or Problem found.) |
| Responder reports | Responder report — what the responder found and their note; Responder photo — one entry per photo, with a thumbnail. See Responder Incident Report |
| System | Event stacked with related events, automatic actions triggered |
Responder photos open full size when you click the thumbnail. Your control room sees every responder report and photo; whether the customer sees them in CleverAlert follows the Show responder reports to customers setting in CleverOps.
Reading the Timeline
- Open an event from the queue to view its details
- Navigate to the Timeline section within the event details
- Scroll up through older entries -- the newest activity is pinned at the bottom next to the message area. The timeline only scrolls itself to a new entry while you are at the bottom (or when the entry is your own), so reading further up is never interrupted by someone else's note arriving
- Each entry shows the category icon, description, and the time it happened
The timeline builds up as actions are taken on the event. A brand-new event will have just the initial creation entry. As operators add notes, dispatch units, verify the alarm, and eventually close the event, each action adds a new timeline entry.
Timeline Entry Details
Each timeline entry contains:
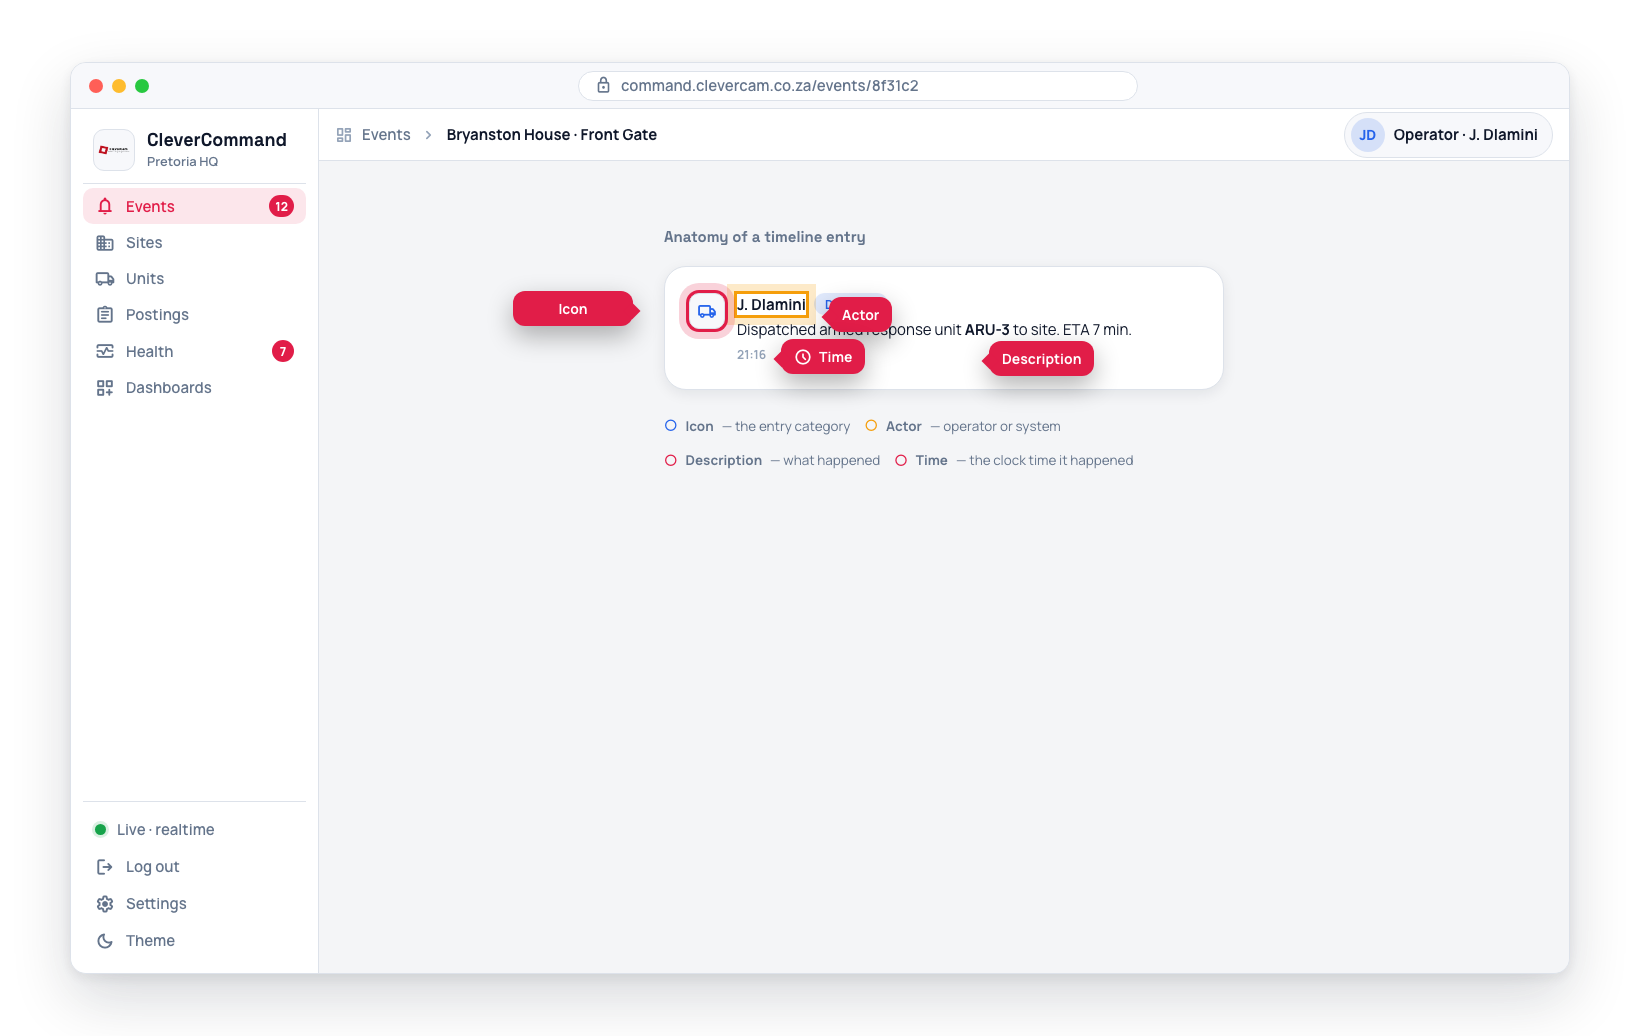
- Icon -- Visual indicator of the entry category (alert, dispatch, note, etc.)
- Description -- What happened (e.g., "Response unit Alpha dispatched to site")
- Time -- The clock time the entry was created (e.g., "05:51"); the day comes from the separator above it, and hovering gives the full date
- Actor -- The operator or system that performed the action (when applicable)
Using the Timeline for Handoffs
The timeline is especially valuable during shift changes or when multiple operators work on the same event. An incoming operator can read the timeline to understand:
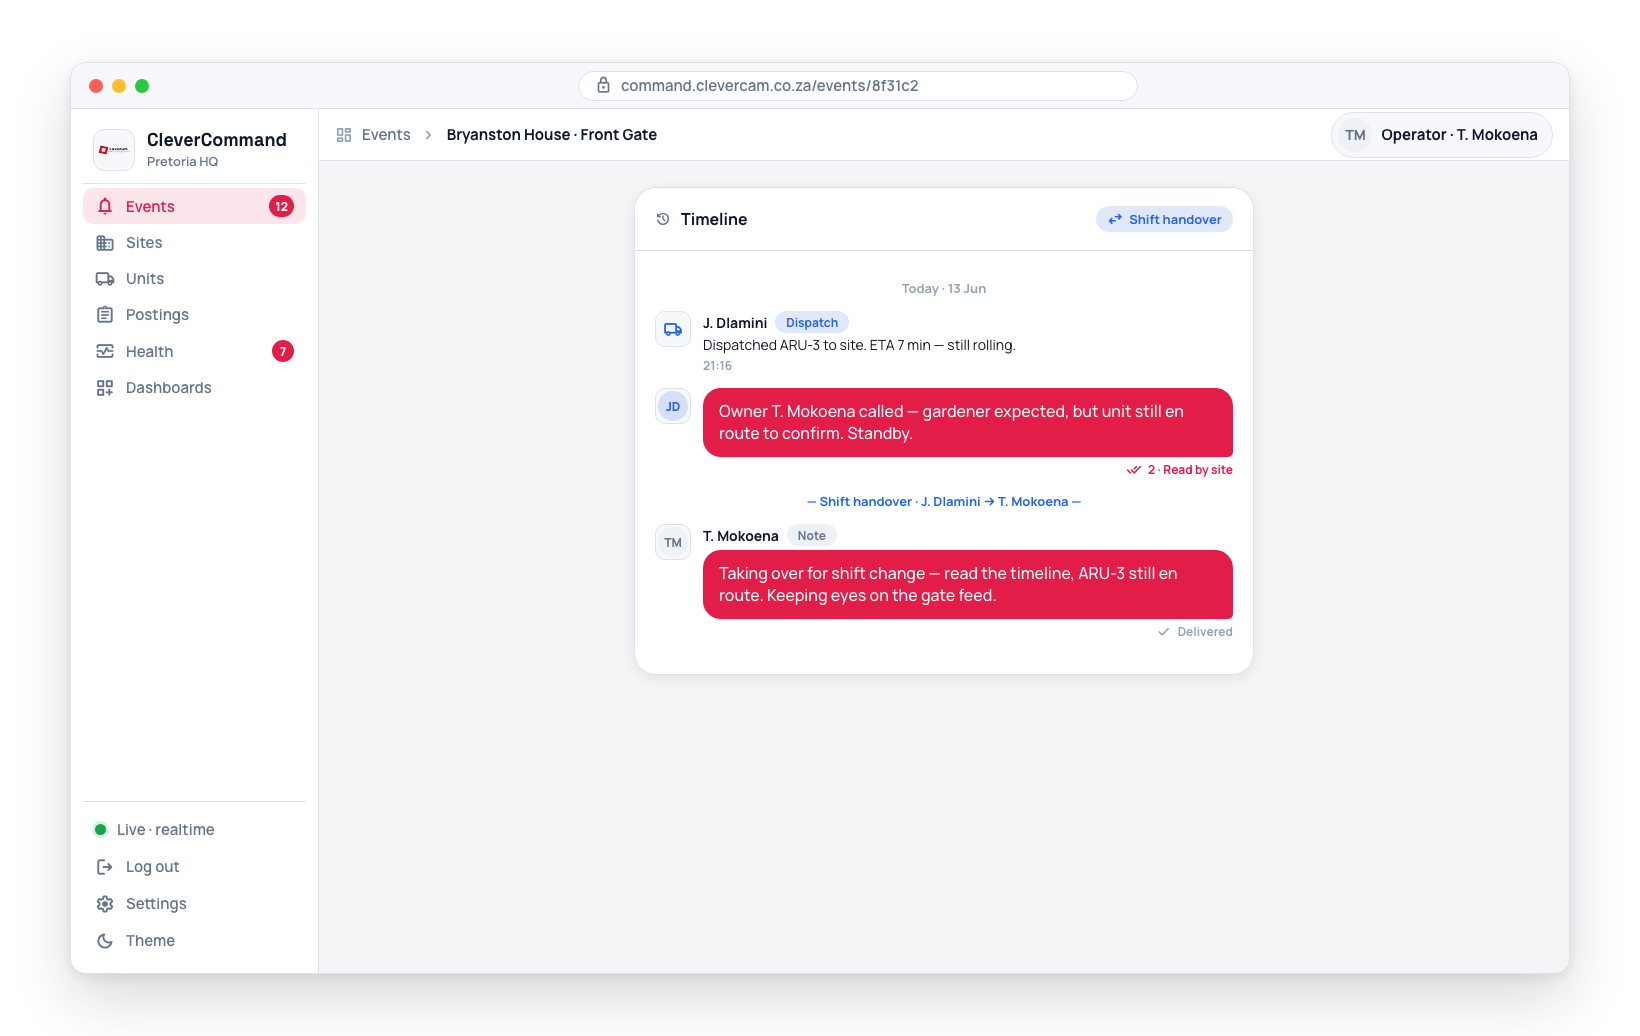
- When the event was detected
- What actions have already been taken
- Whether a response unit has been dispatched and its current status
- Any notes or observations from the previous operator
Before taking action on an event that has been open for a while, always review the timeline first. Another operator may have already dispatched a unit, made a verification call, or added important notes.
Timeline as Audit Trail
The timeline serves as a permanent record of the event lifecycle. This information is available for:
- Post-incident review and debriefing
- Client reporting and accountability
- Training new operators with real-world examples
- Investigating response times and operator performance
Timeline entries cannot be edited or deleted. This ensures the integrity of the audit trail for compliance and accountability purposes.
Composing Messages
The message composer is pinned to the bottom of the Timeline panel. Type your note in the text area and press Enter (or click the send button) to post; Shift+Enter inserts a new line. The image button lets you attach images -- several at once -- and you can also paste or drag-and-drop image files onto the composer. Every attached image goes out in the next send, each as its own Photo entry, with your note on the first (see Uploading Additional Images).
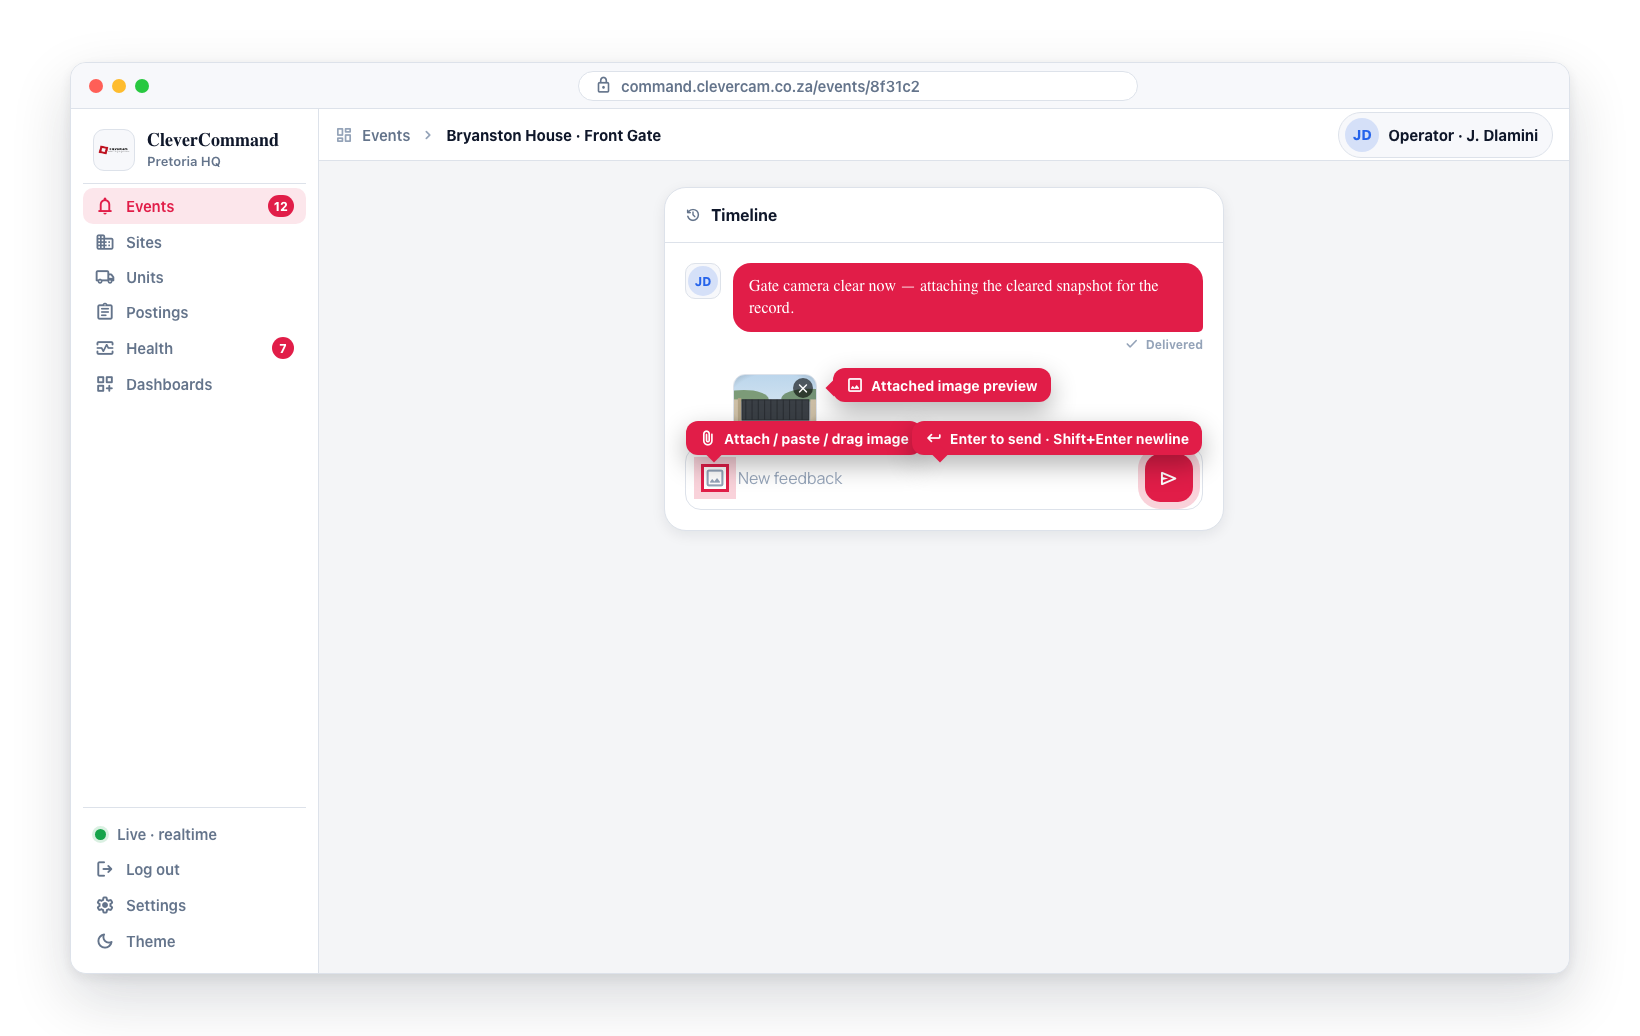
Messages you send appear immediately in the timeline. The verification and dispatch controls (Owner, Dispatch, Reaction Arrived / All in Order / Burglary, Provide Access) are in the separate Actions panel above the timeline.
Read Receipts
Messages you send to the timeline show delivery and read status below the message:
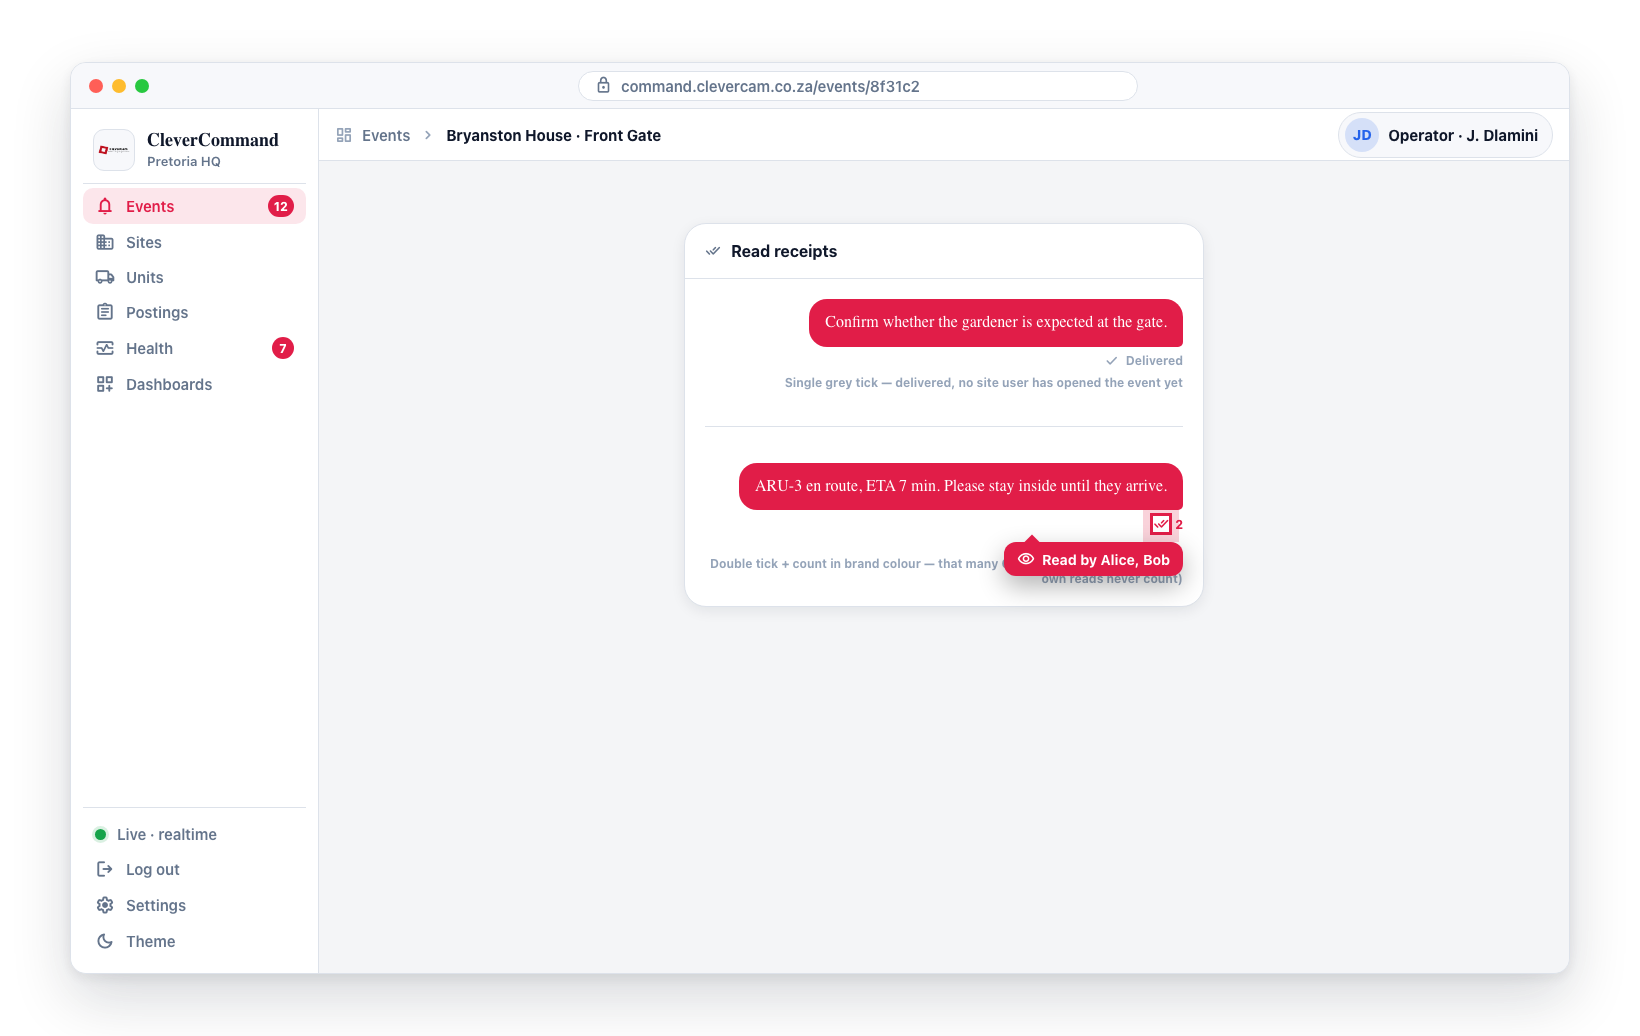
- A single grey tick means the message has been delivered but no site-side user has opened the event since you posted it.
- A double tick with a number shown in the brand color means that many CleverAlert users have read the event since your message was posted. Your own reads are never counted.
- Hover the receipt to see who has read it (e.g., "Read by Alice, Bob"). When more than five readers are present it shows "Read by [first five] and more."
Read status updates in real time as site users open the event.
Read status is tracked at the event level, not per individual message. A contact opening the event updates the receipt on every message posted before that moment.
Typing Indicators
When a site user on CleverAlert is actively typing a reply in the same event, a small indicator appears at the bottom of the timeline showing their name and animated dots. Multiple people typing at once are shown together (e.g., "Alice, Bob are typing...").
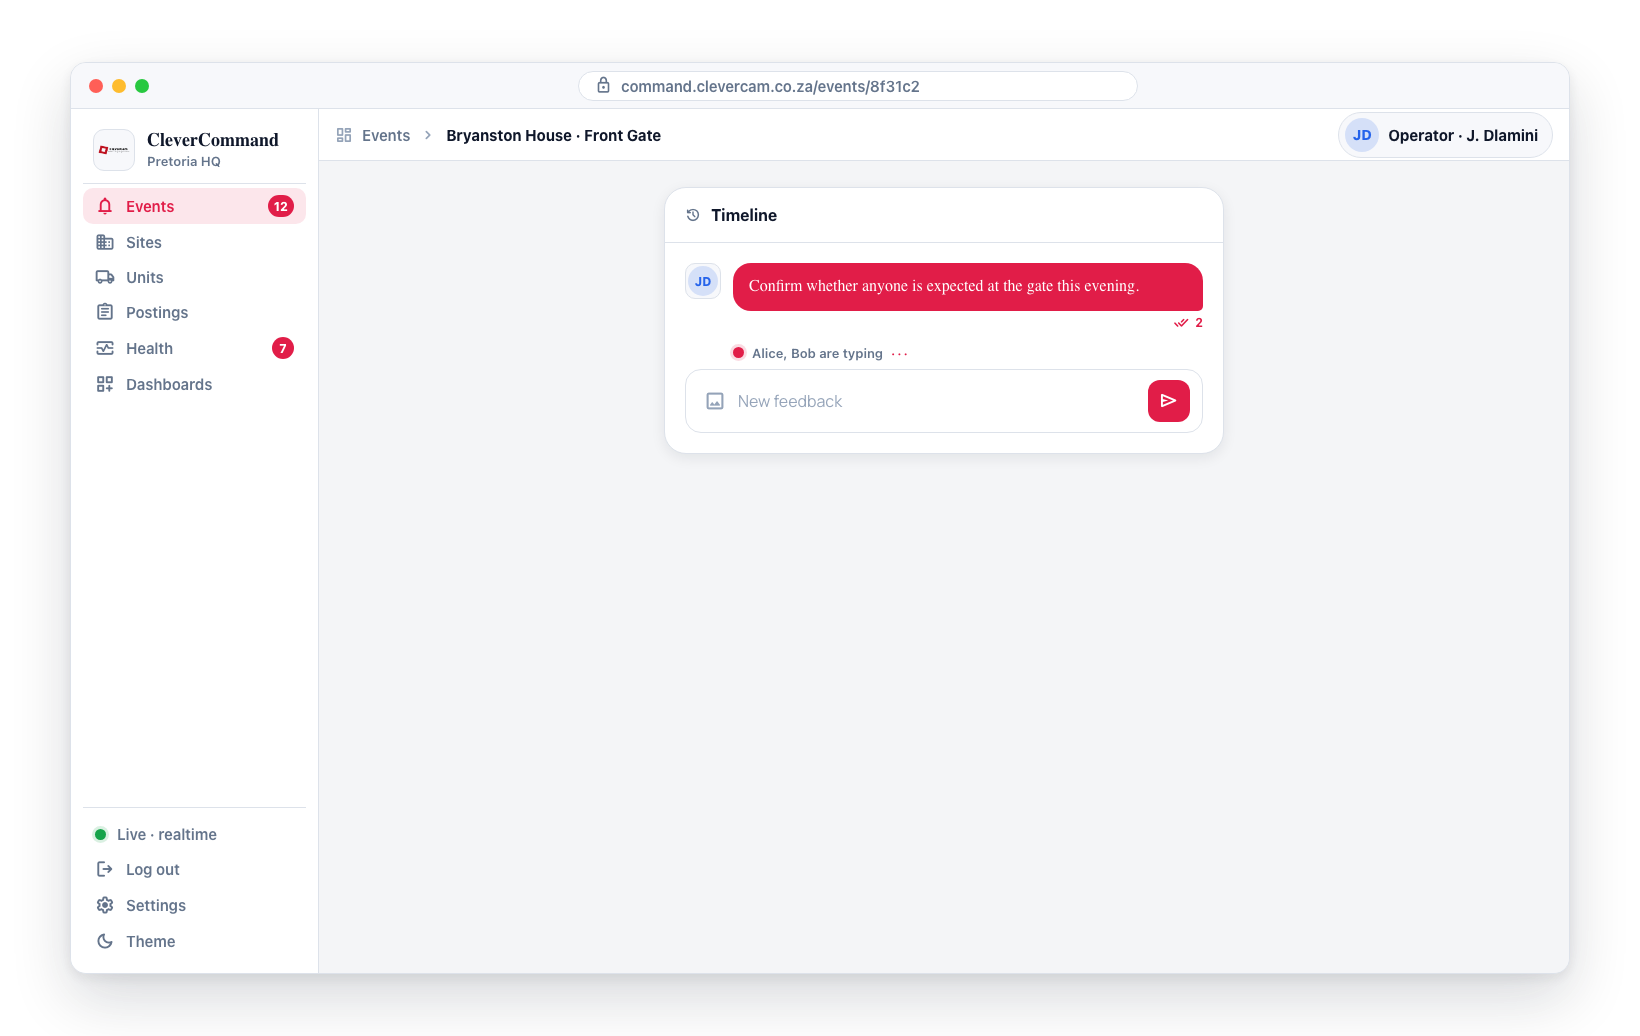
This keeps both the operator and the site user aware of each other in real time, reducing uncertainty during live incidents.
If you see the other party is typing a reply, consider waiting for their message before pressing Send -- it avoids responses crossing each other.
How Customers See Operator Names
Action entries that name the acting operator ("Event completed by …", "… reported all in order.", "… dispatched …") are written with the customer-facing operator identity chosen by the control room in CleverOps (Settings → Customer messaging → Customer experience → Operator identity): the operator's name, their nickname, their current desk, the control room name, or a fixed custom text.
Inside CleverCommand you always see the real operator name on these entries regardless of that setting, and PDF event reports keep the full name too. The typing indicator shown to the site user carries the same customer-facing identity.