Interface Overview
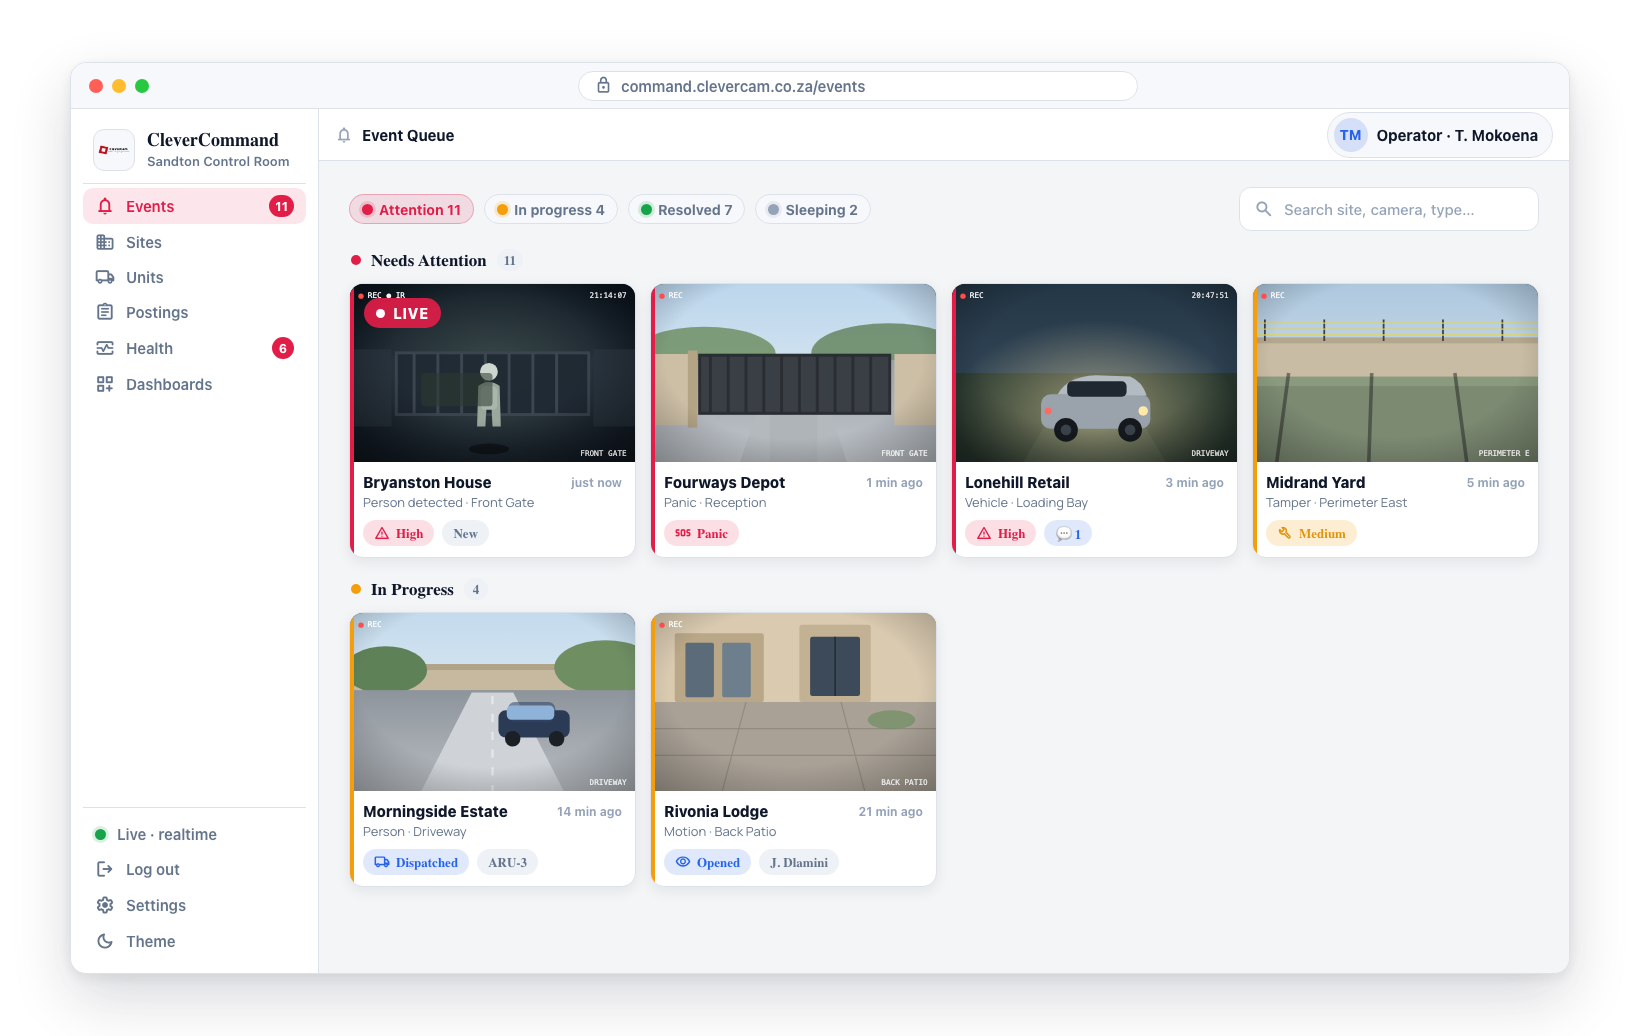
The CleverCommand interface is organized around a left sidebar for navigation, a main content area for the active page, and status indicators that keep you informed at a glance. Understanding this layout is essential for efficient control room operations.
Sidebar Navigation
The left sidebar is your primary navigation. It contains links to every major section of the application, along with status indicators and controls at the bottom.
Top Section -- Main Pages
The top portion of the sidebar contains links to the main pages. Every entry shows a small text label under its icon, so you never have to guess what an icon means (hovering still shows a tooltip too):
| Icon | Page | Shown to | What it is |
|---|---|---|---|
| Bell | Events | Everyone | The home page and primary command centre — your live event queue |
| Building | Sites | Everyone | Search and manage every site your control room monitors |
| People | Units | Advanced Alarm Handling rooms | Response unit tracking — GPS map, Plan board and dispatch status |
| Clipboard | Postings | Roster module rooms | The guarding posting sheet — book-ons, check calls, no-show watch |
| Heart | Health | Everyone | System health for Clever Hubs, cameras and disarm states |
| Card grid | Dashboards | Everyone | Wall screens you can pop out onto a second monitor or a TV |
Nothing here is switched on per operator. Units appears for every operator in a control room with the Advanced Alarm Handling module, and Postings for every operator in a room with the Roster module — a guarding roster is its own product, so the two gates are independent. A room without a module simply never sees that entry.
Team, Agents Performance, Brain SOP, Maps, Trouble, Area
Routing and Responder Delegations live together on one page at /more.
It was deliberately taken off the rail so the operator's navigation stays short.
Supervisors reach it by opening the address directly; the page still checks
team-management rights and the Advanced Alarm Handling module before it renders.
It used to be its own rail entry. It is now one of the wall screens under Dashboards, and it is still available to every control room, with or without Advanced Alarm Handling. See Dashboards.
Bottom Section -- Status and Controls
The bottom portion of the sidebar contains:
- Desk chip -- Which desk (seat) this browser holds, shown only in control rooms that use desks; click it to move to another desk (see Leaving a desk). A small dot on the chip is green while CleverCommand sees you in the tab and grey otherwise — that dot is all you see of desk monitoring. When you hold no desk the chip reads None; click it to take one
- Connection status indicator -- Shows whether you are connected and receiving live updates (see Connection Status below)
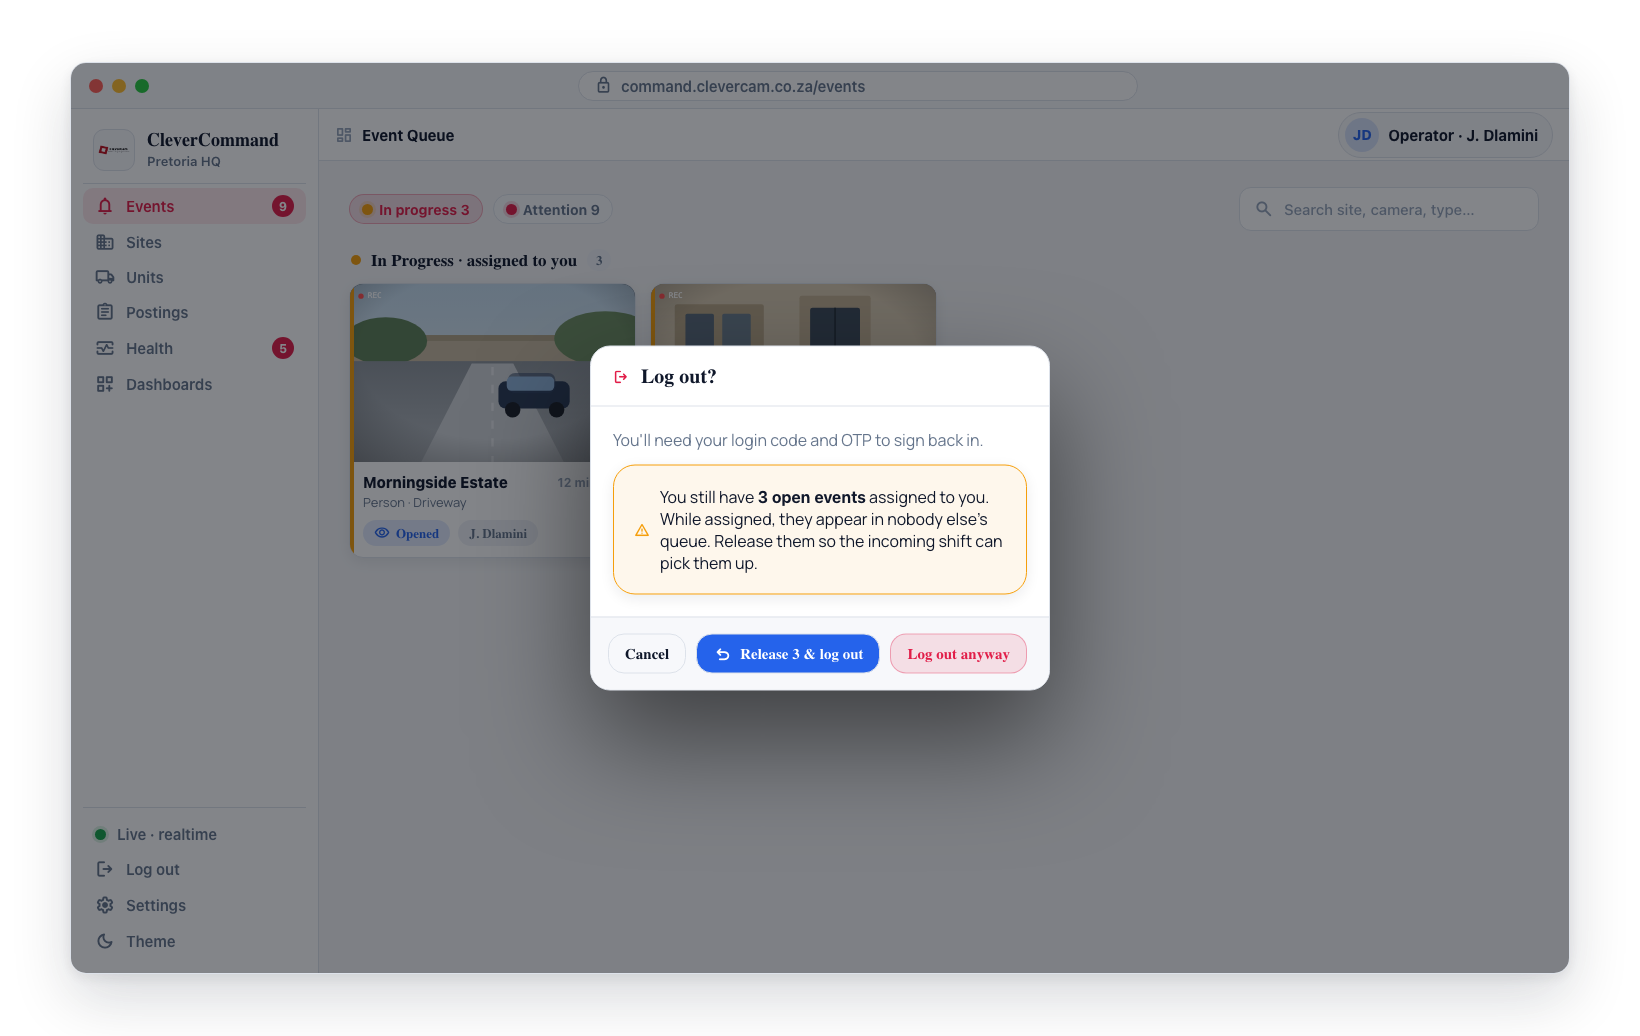
- Logout button -- Signs you out and returns to the login screen (with a confirmation dialog)
- Settings shortcut -- Quick access to the settings page
- Theme toggle -- Switch between light and dark mode (sun/moon icon)
Leaving a desk
While you hold a desk, CleverCommand quietly tells the server once a minute that you are still there. If that stops -- you close the tab, the PC shuts down, the laptop sleeps, the network drops -- the desk releases itself about five minutes later and the session is recorded as ended.
This matters because a held desk counts as a manned desk. The supervisor's desk board shows it as occupied, and the red not watched warning stays quiet for anything routed to it, on the assumption that somebody is reading those events. Before desks released themselves, a tab closed without pressing Log out could hold a seat for days and hide a queue nobody was watching.
A short interruption does not cost you the desk. If the tab starts checking in again within half an hour -- you open the laptop lid, the network comes back -- it takes the same seat back on its own and there is nothing to do. Past half an hour, reload CleverCommand and pick the desk again. A desk a colleague has taken in the meantime is never handed back.
You do not have to wait for that five minutes. Log out releases the desk straight away, and it is still the right way to end a shift. Closing the last CleverCommand tab releases it straight away too. A colleague taking the desk from the picker also signs the previous occupant off immediately.
Reloading the page, or opening CleverCommand in a second tab, keeps the desk you hold: you are not asked to pick again, and the supervisor's board does not record a move. A tab closed by mistake and reopened within two minutes gets the same desk back the same way. Only after that does the picker ask again.
If your supervisor has assigned you to particular desks, the picker only lets you take those; the rest are greyed and marked not assigned to you. If your control room requires a desk, Not now is not offered — but if none of your desks is in service you can still Carry on without a desk, and your supervisor is told why.
Choosing Not now holds for the browser tab: reloading does not ask again. When you are ready to sit down, click the Desk chip in the sidebar, which reads None while you hold no desk.
A browser that has not yet reloaded onto the current version cannot send those minute-by-minute check-ins, so its desk is given a much longer window instead of five minutes -- an operator on an older tab is never signed off mid-shift. Reloading the page puts the desk back on the normal five-minute window.
Shift handover at logout
Queue events are scoped to the signed-in operator, so logging out with open events would strand them in a queue nobody else can see. The logout dialog protects against this: if you still have open events, it shows the count with a warning and offers Release N & log out, which sets those events back to unassigned (claimable by the incoming shift / queue routing) before signing out. Log out anyway keeps them assigned to you — use it only when you'll be right back.
Operator Label
Your name or operator label is displayed in the page header area, confirming which account is currently signed in.
Main Content Area
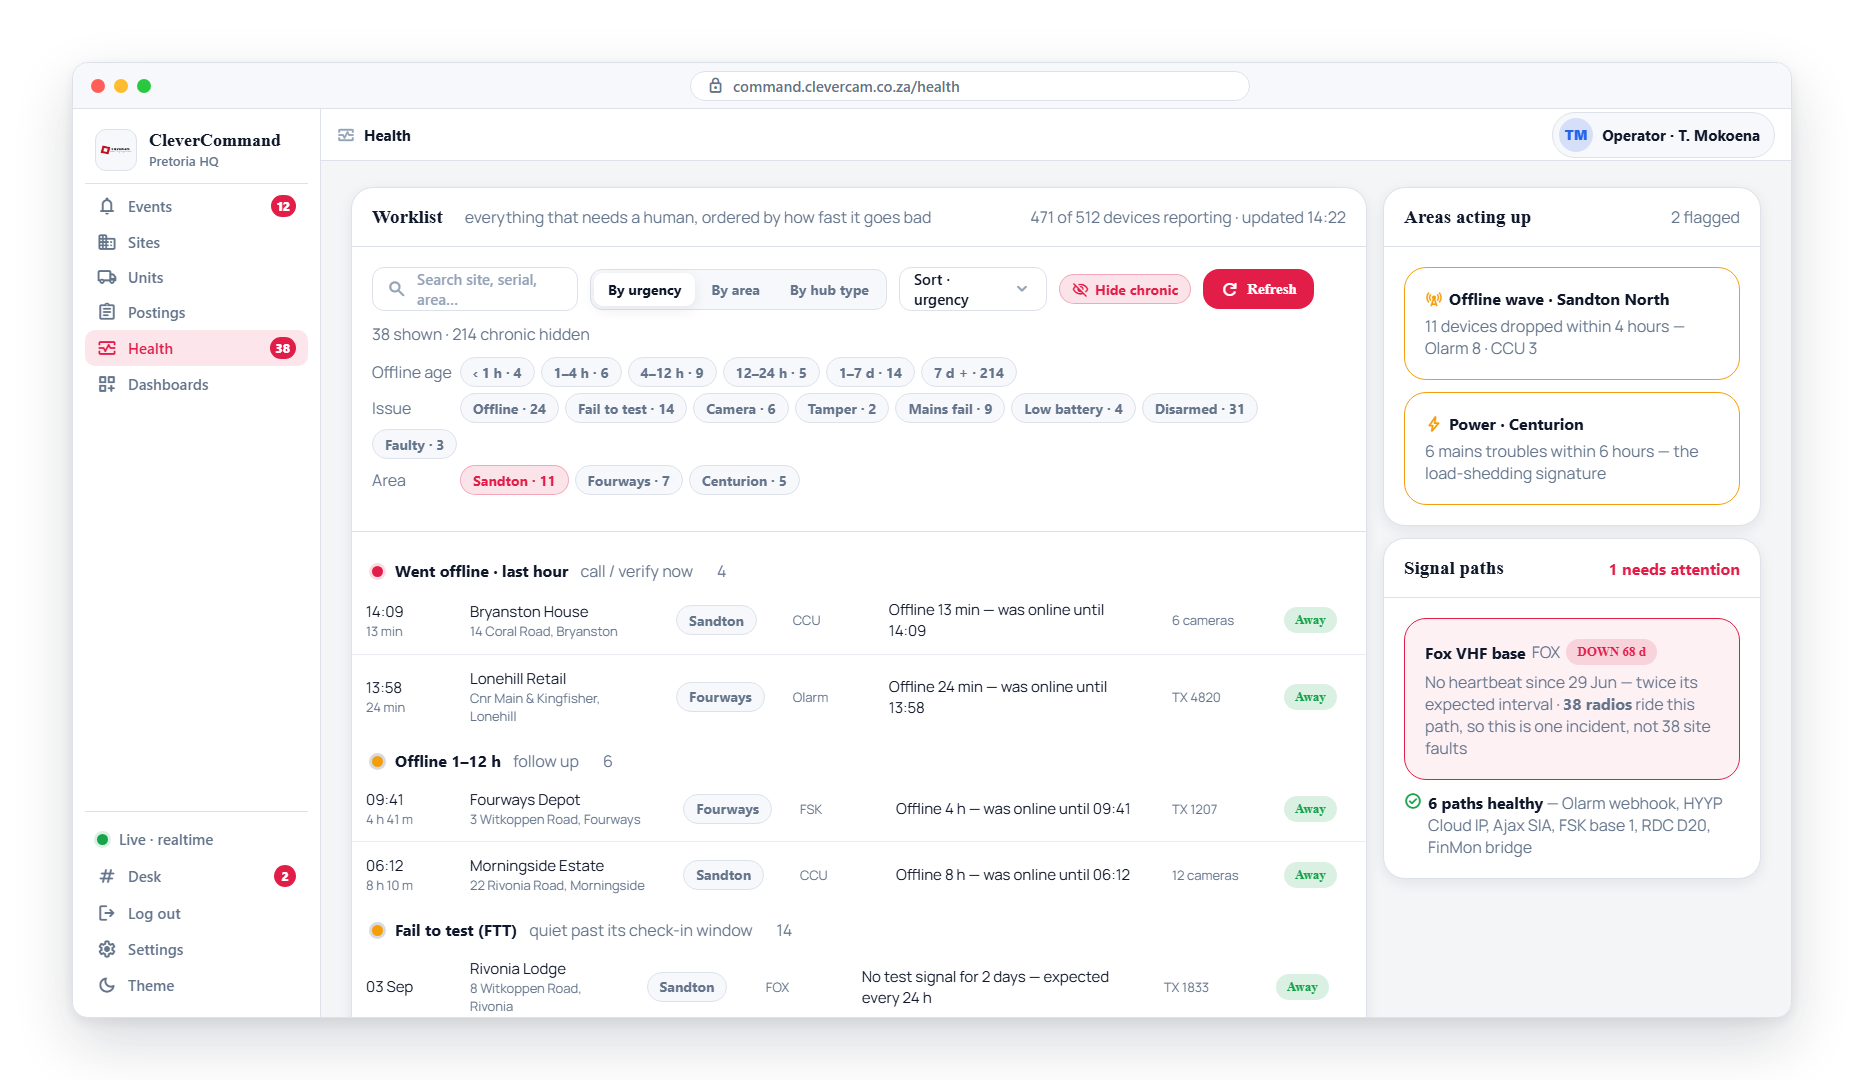
The main content area fills the rest of the screen and displays the active page. Depending on which page you are viewing, this area may contain:
- Event queue -- Cards or table rows showing live events
- Event detail panel -- Full event information, photos, timeline, and actions
- Site directory -- Searchable list of all sites
- Health dashboard -- Filterable list of system health issues
- Dashboards -- Second-screen views, including the Snapshot Wall photo grid
- Map view -- Interactive geographic map with markers
- Settings panels -- Configuration options for alerts and features
Navigation Workflow
A typical operator workflow moves through these areas:
- Start on the Events page to monitor the live queue
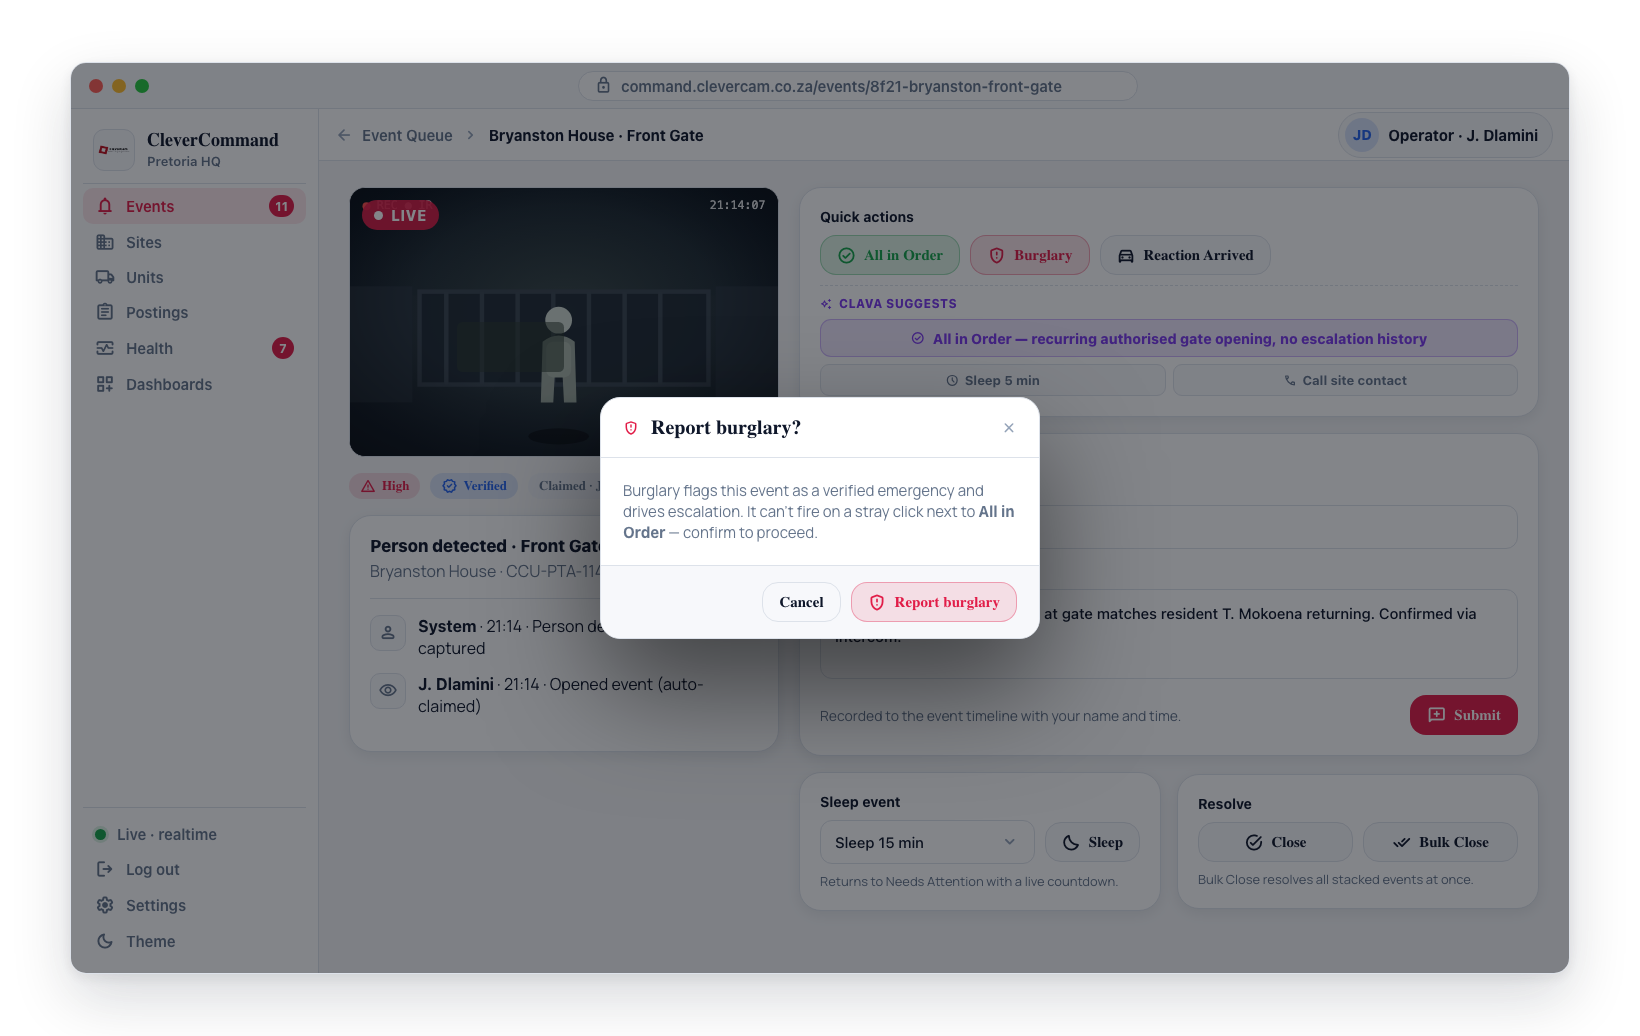
- Click an event to open the Event Details panel
- View photos, take actions (verify, note, dispatch), and resolve the event
- Return to the Events queue to handle the next event
- Periodically check Health for Clever Hub or camera issues
- Use Sites to look up site details or create manual events as needed
Connection Status
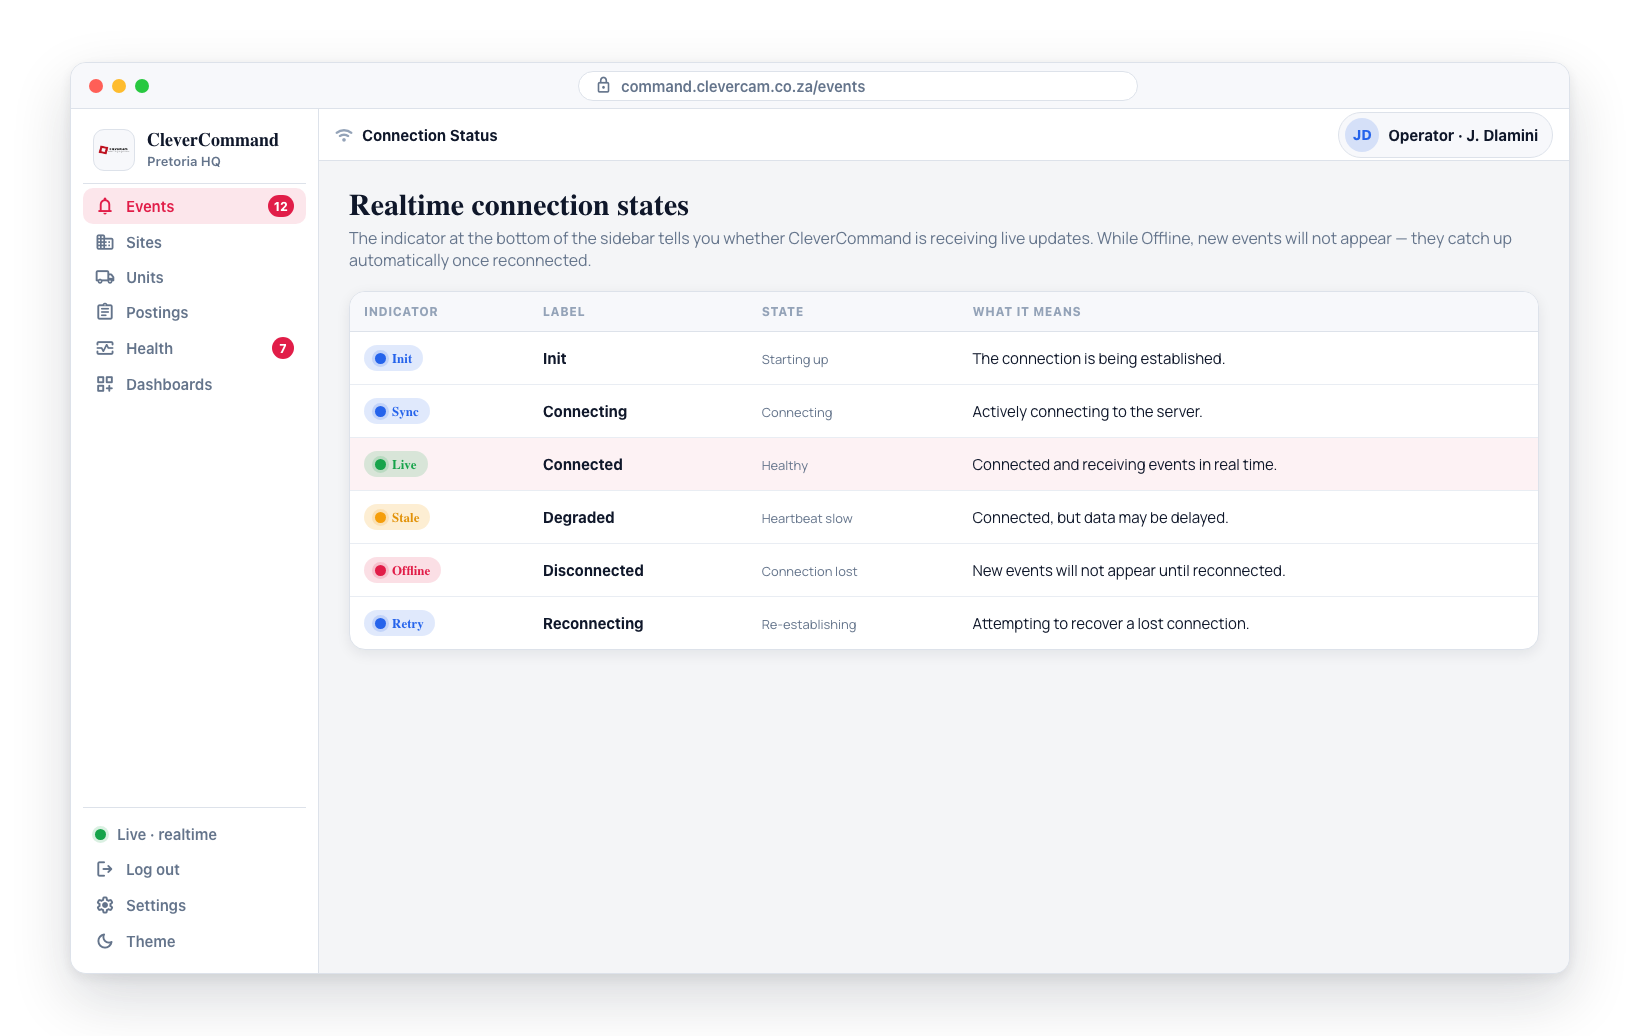
The connection status indicator in the bottom-left corner of the sidebar is one of the most important elements on the screen. It tells you whether CleverCommand is receiving live updates. Six of its states describe the connection to the server itself:
| State | Label | Indicator | Description |
|---|---|---|---|
| Init | Init | Blue | Starting up -- the connection is being established |
| Connecting | Sync | Blue | Actively connecting to the server |
| Connected | Live | Green | Connected and receiving events in real time |
| Degraded | Stale | Yellow | Connected but data may be delayed |
| Disconnected | Offline | Red | The connection has been lost |
| Reconnecting | Retry | Blue | Attempting to re-establish a lost connection |
If the connection indicator shows Offline (red), check your internet connection immediately. While disconnected, new events will not appear in your queue. Events will catch up automatically once the connection is restored.
Poll -- your queue feed is blocked
A seventh state, Poll (yellow), means something different from the six above: the connection to the server is fine, but the server has refused to send this browser one specific live feed -- most often your own event queue.
| State | Label | Indicator | Description |
|---|---|---|---|
| Live updates blocked | Poll | Yellow | Connected, but a live feed was refused. The page is refreshing on a timer instead |
Poll overrides the other six, because in this situation the connection genuinely is healthy -- the indicator would otherwise sit on a reassuring green Live while your queue received nothing. Hover the indicator to see which feed was refused.
Your board still works. Events, dispatches and status changes continue to appear, but they arrive on the background refresh (roughly every 30 seconds) rather than the instant they happen.
The usual cause is that a different operator signed in on this browser and this tab was left open from the previous shift. Sign out and sign back in to clear it. If Poll persists after a fresh sign-in, report it -- your account may not be linked to the operator record it is trying to use.
Poll means your queue is up to 30 seconds behind. On a busy board, treat it the way you would treat Stale: finish what you are on, then sign out and back in rather than working a whole shift on the timer.
Theme Toggle
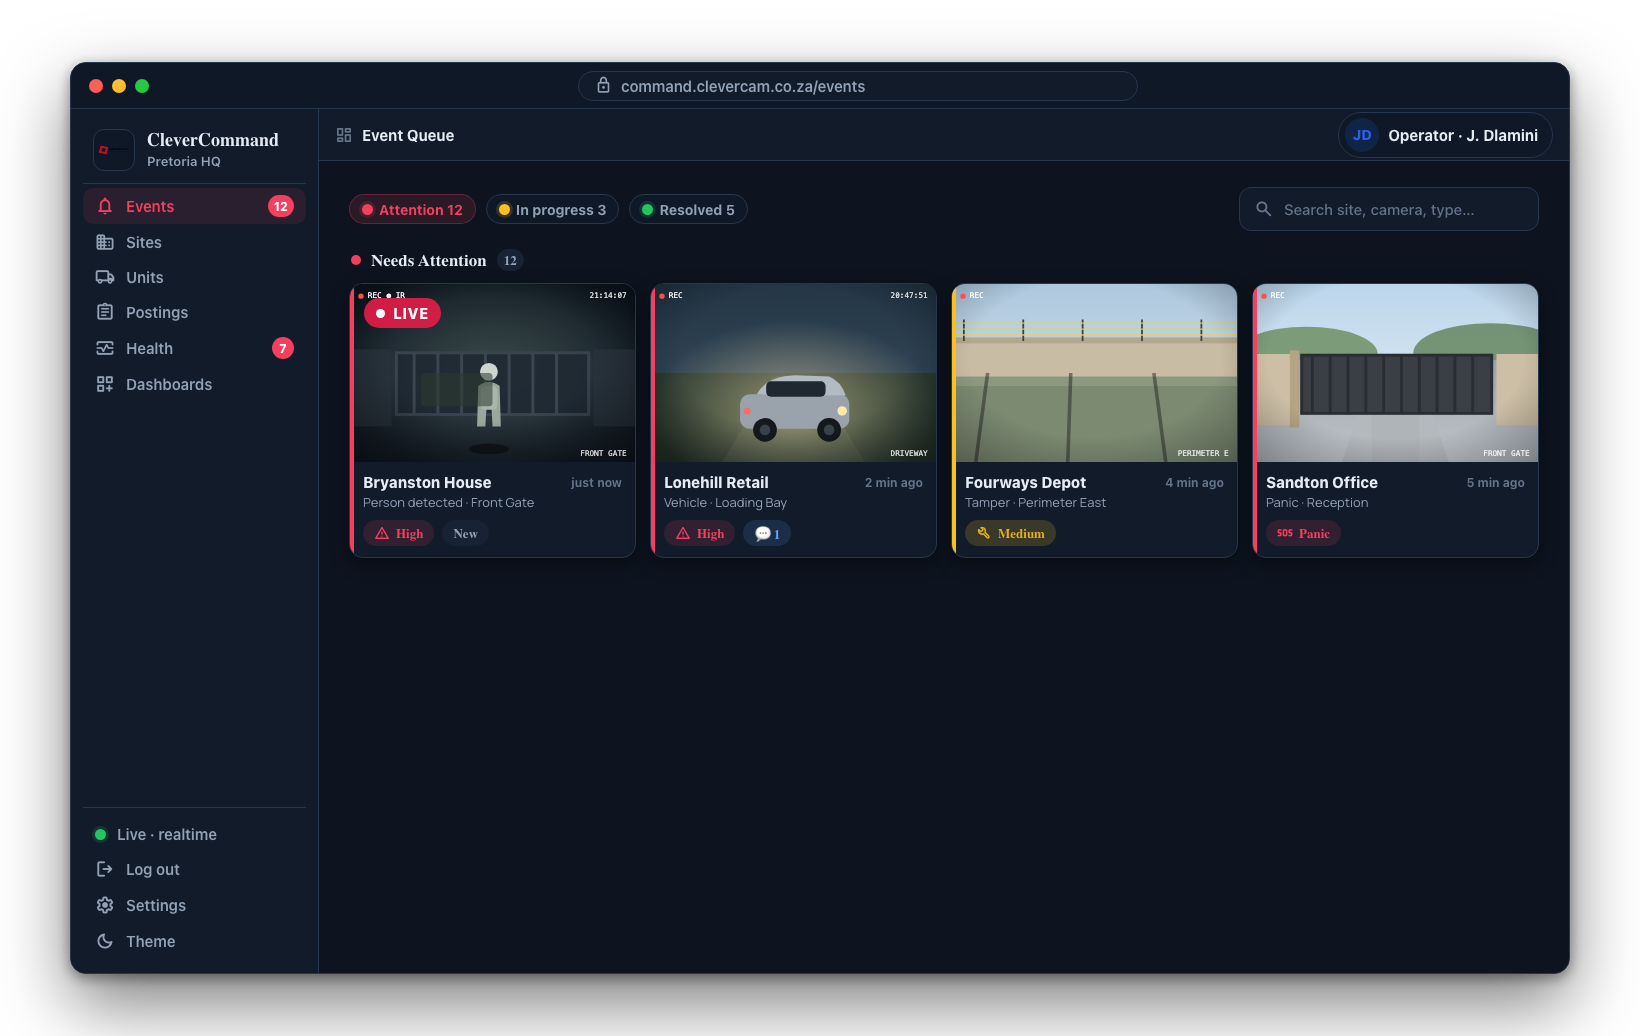
CleverCommand supports both light and dark modes. The theme toggle in the bottom of the sidebar lets you switch instantly. Dark mode is recommended for control rooms with dim lighting to reduce eye strain during long shifts. Your theme preference is saved locally and persists across sessions.
Responsive Layout
While CleverCommand is designed primarily for desktop monitors in control room environments, it adapts to different screen sizes. On screens narrower than about 1000 px, the sidebar becomes a horizontal icon-only bar along the top (the labels hide to save space). For the best experience, use a full-sized desktop monitor.
The sidebar can be used to quickly gauge the overall state of your control room. The Events page badge count, connection status, and Health indicators all provide at-a-glance situational awareness without navigating away from your current page.