Create a Suburb
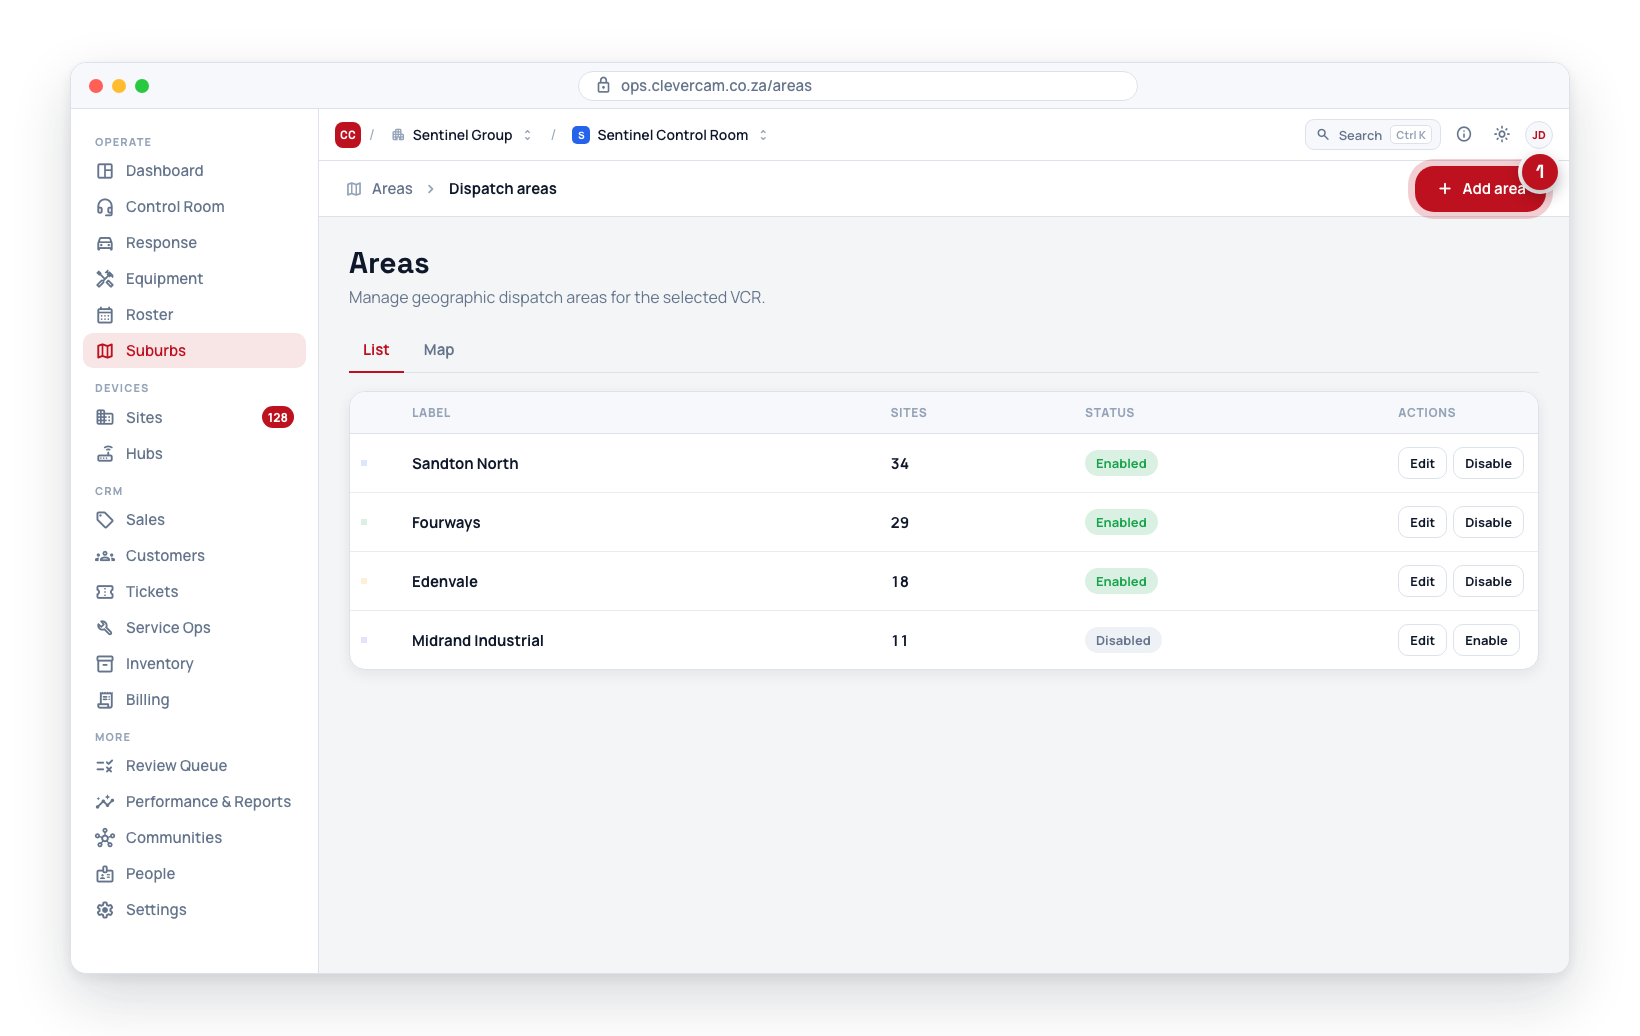
Suburbs are the geographic zones that divide your monitoring centre's coverage into manageable sectors. "Suburb" is the everyday case — a residential suburb or neighbourhood — but the shape is yours to draw: a business district, an estate, or a numbered patrol sector all work the same way. Suburbs are the foundation of intelligent event routing: when an event occurs at a site, CleverOps uses the site's suburb to determine which response unit to dispatch.
The Overview dashboard
The Suburbs page opens on an Overview dashboard, with Branches, Suburbs and Map tabs beside it — the operation from the outside in. The Overview answers is my coverage complete? — and every tile jumps to where you close a gap.
- Coverage KPIs — Suburbs, Branches, Sites in a suburb, Sites in no suburb (outside every boundary — the gap to close), Pinned by hand (assigned manually rather than by location), Empty suburbs (no sites yet), and Unbranched suburbs (not grouped into a branch).
- Sites per suburb — which suburbs carry the most sites, so you can spot lopsided coverage.
- Suburbs by branch and Branches by handler — how suburbs roll up into dispatch domains, and who responds (own units vs a partner VCR, third party or virtual).
Every site count on this page counts a site the way dispatch does: the suburb pinned on the site if there is one, otherwise whichever boundary its coordinates fall inside. See Site Assignment.
Before you've drawn anything
Most control rooms start here, and it is a perfectly workable state — it just means you have handed the ordering decision to distance. With no suburbs drawn, the Overview drops the suburb-quality tiles and says so plainly: your sites still get a response, but nothing you have said influences who is offered first.
The quickest way in is the Map tab. It plots every site you have, so you can see where your work actually clusters and draw boundaries around those clusters rather than guessing from a list. The Suburbs tab's empty state has a Show me my sites button that takes you straight there.
Why Suburbs Matter
Without suburbs, every event would need to be manually routed to a response unit. With suburbs in place:
- Events are automatically matched to the response unit assigned to that suburb.
- ETA calculations are more accurate because the nearest unit is dispatched.
- Performance metrics can be broken down by suburb, showing you which zones have the most activity.
- Staffing decisions are easier when you can see event density per suburb.
Step-by-Step Suburb Creation
- Navigate to Suburbs in the sidebar.
- Click the Add suburb button. (When no suburbs exist yet, the Suburbs tab's empty state offers the same Add suburb button.) The Create Suburb dialog opens.
- Enter the suburb name — use a clear, recognisable name such as the suburb or district name (e.g., "Sandton", "CBD North", "Industrial Zone 3").
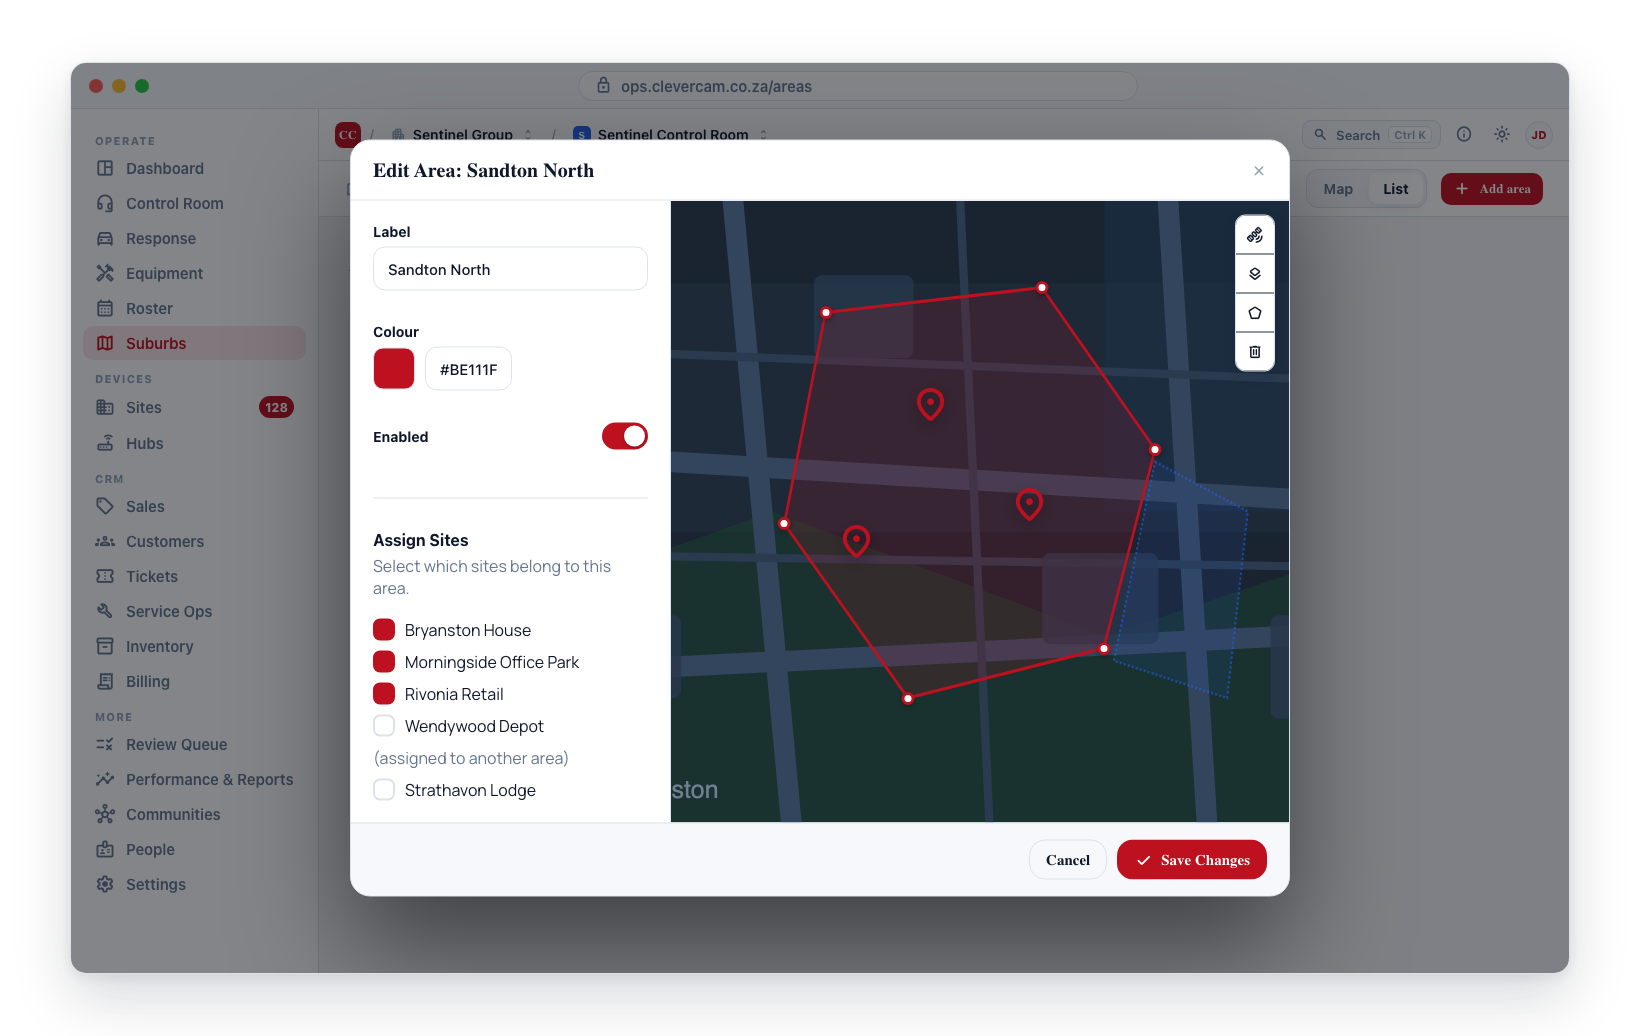
- Draw the boundary on the map:
- Pan and zoom the map to the suburb.
- Click Add boundary box. A rectangle lands over the middle of the view with four corner handles.
- Drag the corners out to the edges of the suburb.
- Click a small dot on an edge to add a corner there, and keep going until the outline follows the ground.
- The boundary should encompass all the sites that belong to this suburb.
- Set a colour for the suburb. Choose a distinct colour so the suburb is easily identifiable on the map alongside other suburbs. The boundary on the map takes that colour as you pick it.
- Review the boundary shape and adjust if needed by dragging corners.
- Click Create suburb. The editor stays open on the new suburb — pick another one from the rail beside the map, or click Close when you are done.
Start with the box and refine afterward — a four-corner rectangle roughly over the suburb is a perfectly good first save, and you can add corners later. Use major roads, rivers, or landmarks as natural boundary lines to make the suburbs intuitive. See Map Boundaries for the full set of handles.
After Creating a Suburb
Once the suburb is created, you need to:
- Check which sites it picked up — open the suburb from the Suburbs tab. Any site whose coordinates fall inside the new boundary is already in it, tagged By location; you only need to pin the exceptions, which is done on the site itself. See Site Assignment.
- Assign response units — Go to Response Units and add this suburb to one or more units, as primary or as a backup.
- Check dispatch priority (optional) — a suburb is one of the things unit ranking can sort on, alongside driving distance, and it is what a branch cap is built from. See Dispatch branch & priority.
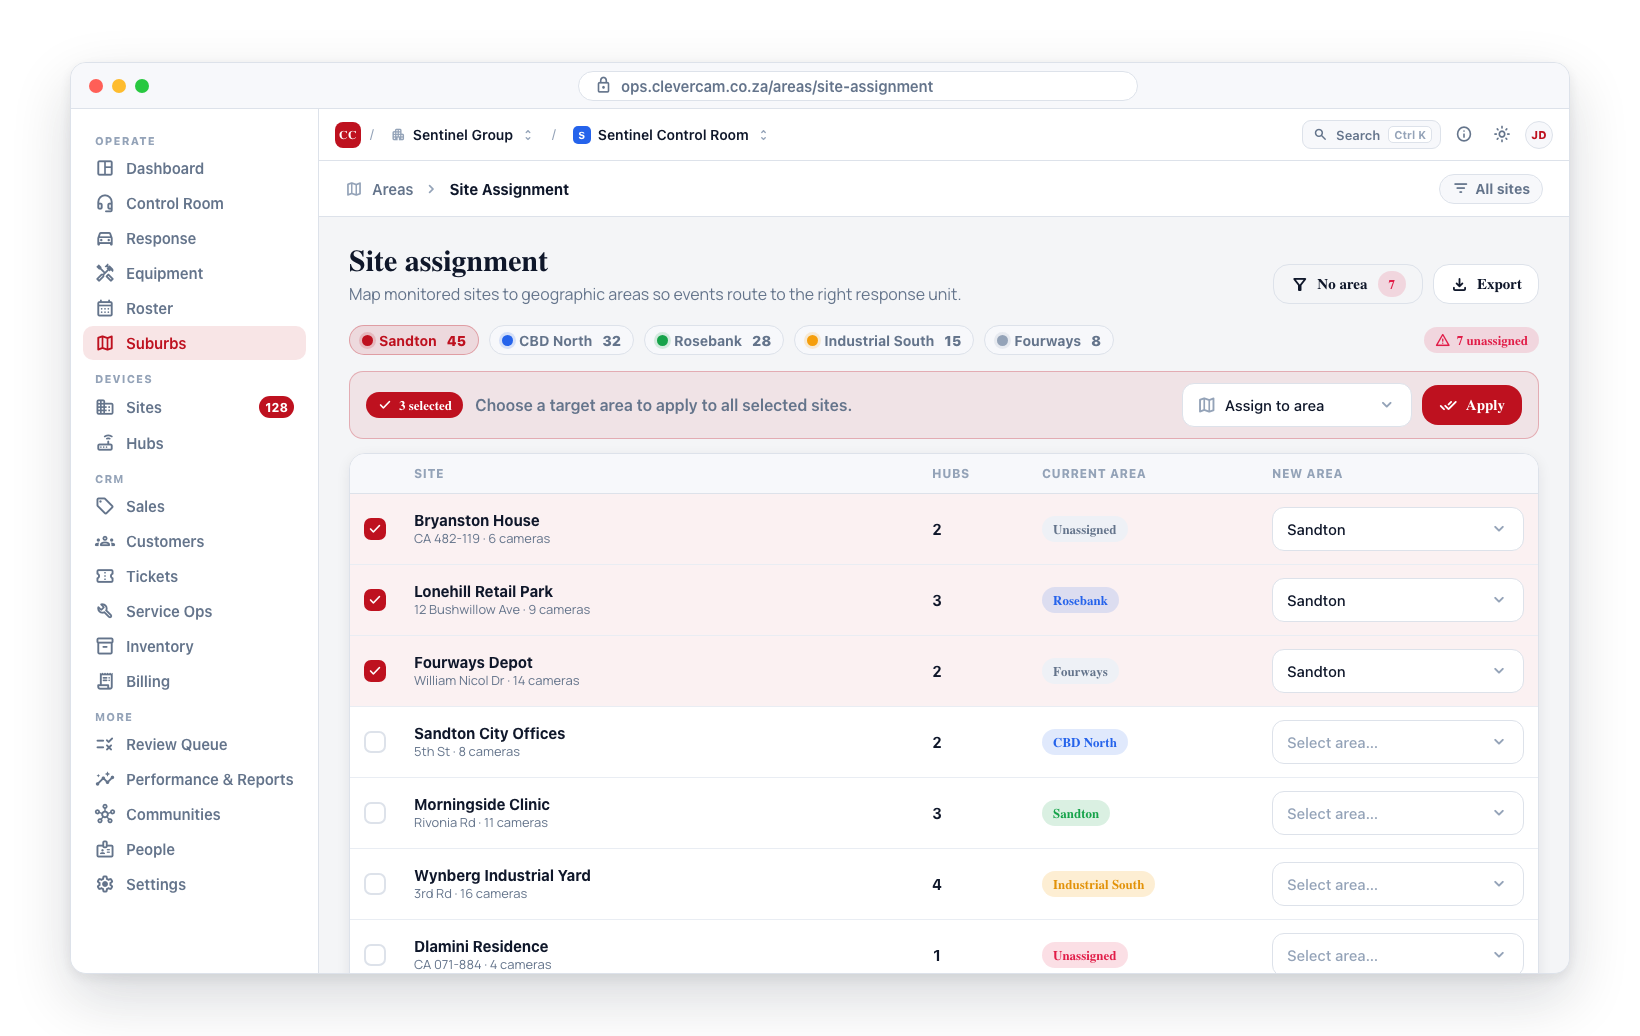
A site outside every suburb still gets a response — it is just ranked on distance alone, with no suburb preference and no branch. Use Suburbs → Map → Only sites in no suburb to find them, then extend a boundary rather than pinning each one.
Editing an Existing Suburb
- Navigate to Suburbs and click the suburb row. Its detail opens — the sites inside it and who responds there.
- Click Edit suburb (or the edit action on the row itself) to open the editor.
- Edit the name, colour, or boundary as needed. To adjust the boundary, drag existing corners, add new ones from the edge dots, or drag the centre handle to move the whole shape.
- Click Save changes to apply them.
The editor is a workbench rather than a one-suburb dialog: it stays open after a save, and the rail beside the map lists every suburb grouped by branch. Click another suburb's name — or its shape on the map — to start editing that one instead, and use the checkboxes to decide which neighbours are drawn while you work. See Working on several suburbs at once.
Enabling and Disabling Suburbs
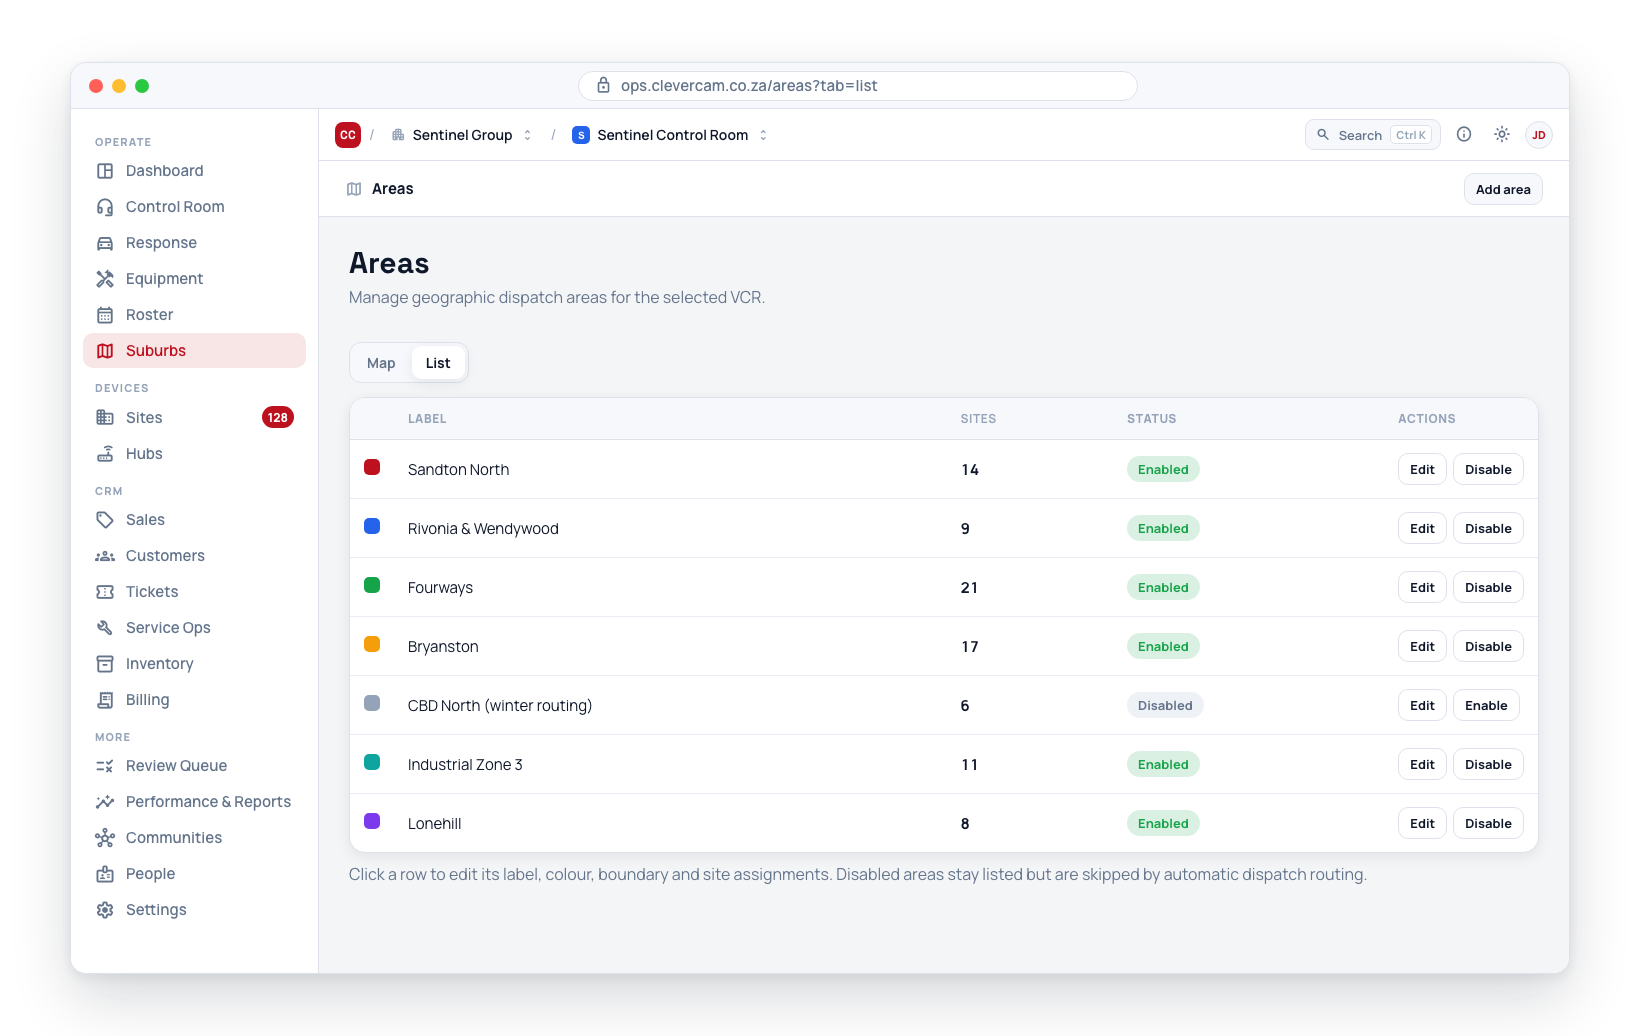
Suburbs can be enabled or disabled:
- Enabled — The suburb is active: sites fall into it by location.
- Disabled — Sites no longer fall into it by location. Sites pinned to it by hand stay pinned.
Toggle it with the enable/disable action on the suburb's row.
Suburb Planning Best Practices
- Avoid overlapping boundaries — Each site should fall within exactly one suburb. Where two boundaries overlap, an unpinned site lands in whichever is read first, which isn't a meaningful choice. The suburb detail flags overlaps when it finds them.
- Size suburbs appropriately — Suburbs that are too large may result in long response times. Suburbs that are too small may not have enough sites to justify a dedicated unit.
- Align with response capacity — Each suburb should have at least one response unit assigned. If you do not have a unit for a suburb, consider merging it with an adjacent suburb.
- Review and adjust — As your customer base grows, revisit suburb boundaries to ensure they still make sense operationally.