Map Boundaries
The map editor in CleverOps gives you a visual tool for defining and managing suburb boundaries. Using an interactive map, you can draw shapes that represent each suburb, adjust their outlines by dragging points, and assign distinct colours so your operational zones are easy to identify at a glance. Accurate map boundaries ensure that sites are correctly assigned to suburbs and that event routing works as expected.
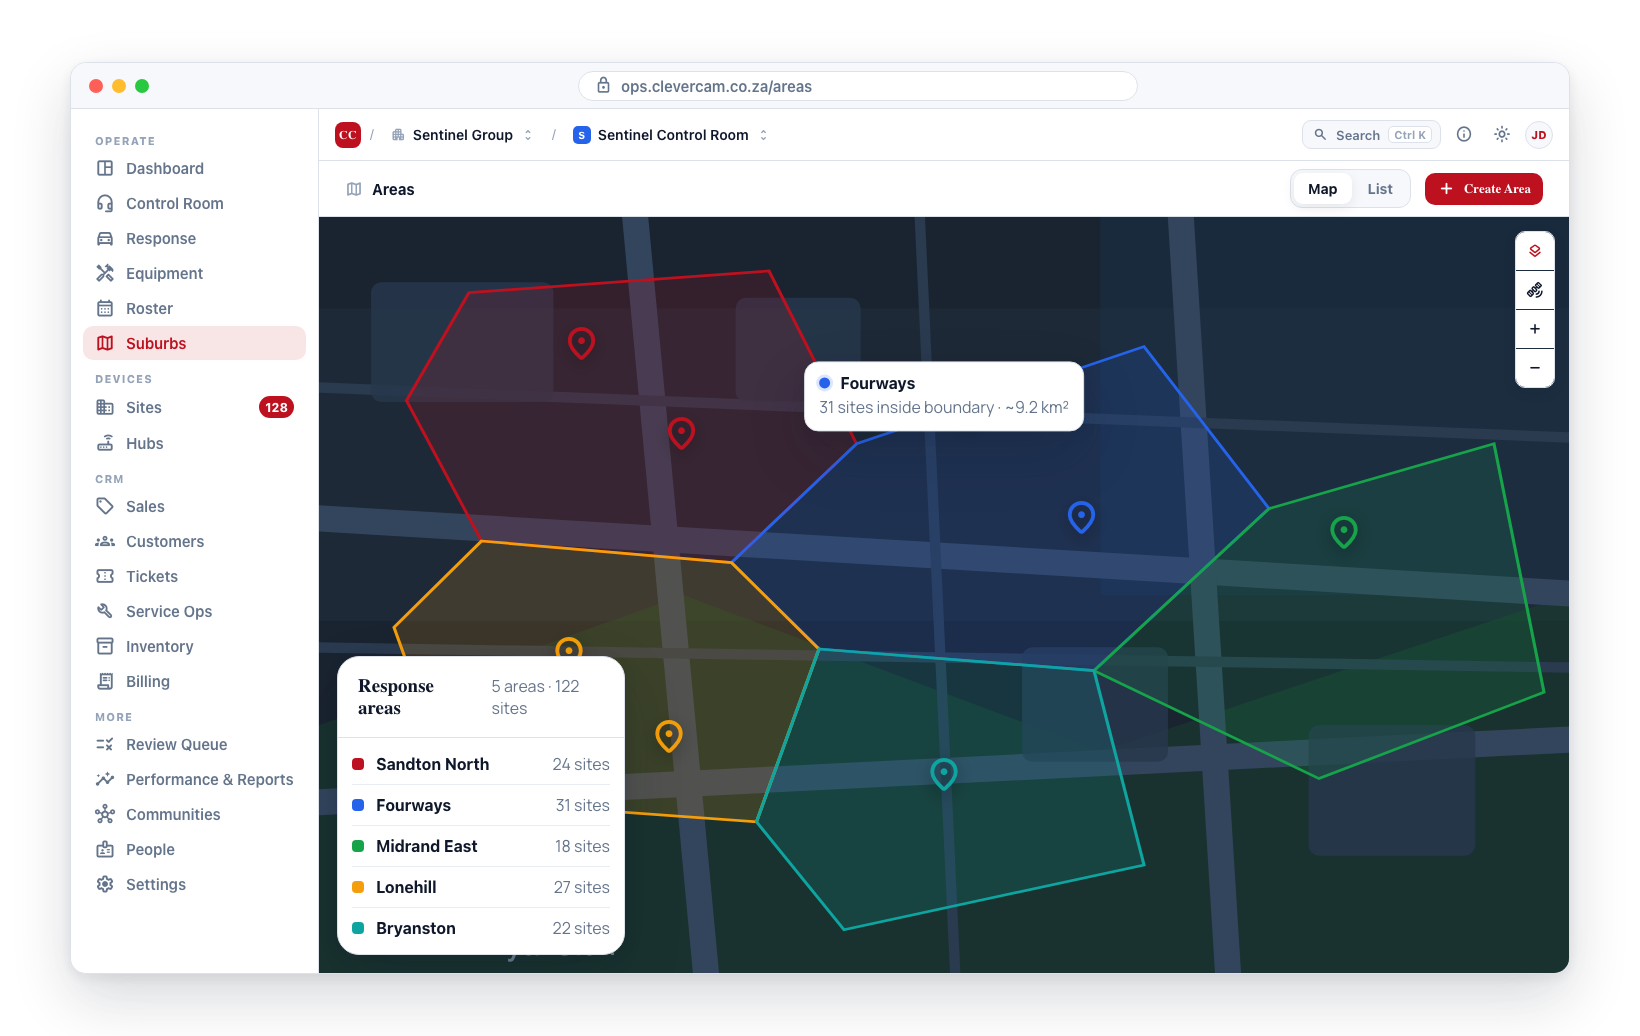
Opening the Map Editor
Drawing and reshaping happen inside the suburb's own editor, not on the page's Map tab — that tab is a read-only explorer, so a stray click can never move a boundary.
- Navigate to Suburbs in the sidebar and open the Suburbs tab.
- Click Add suburb to draw a new boundary, or open an existing suburb and click Edit suburb.
- The editor opens with the boundary on an interactive map, and a rail down the left listing every suburb you have.
You do not have to close and reopen the editor to work on the next suburb — the rail switches which one the map is holding. See Working on several suburbs at once.
(On the Map tab, clicking a boundary opens that suburb's detail — the sites inside it and who responds there — with Edit suburb at the bottom if you want the editor.)
Drawing a New Boundary
You do not trace a suburb point by point. You drop a rectangle over it and pull that into shape — so there is always something on screen to react to, and nothing to finish before you can start adjusting.
- Click Add suburb, or open an existing suburb without a boundary.
- Pan and zoom the map to the suburb you want to draw. The map is fully live at this stage — only the button takes clicks.
- Click Add boundary box. A rectangle lands over the middle of the view with four corner handles.
- Drag the corners to the corners of the real suburb.
- Click a small dot on an edge to add a corner there — or drag that dot straight to where you want the new corner. Each new corner splits the edge in two, so a rough box becomes a real outline a corner at a time.
- Drag the handle in the middle to slide the whole boundary without changing its shape.
- Click Save when the outline matches.
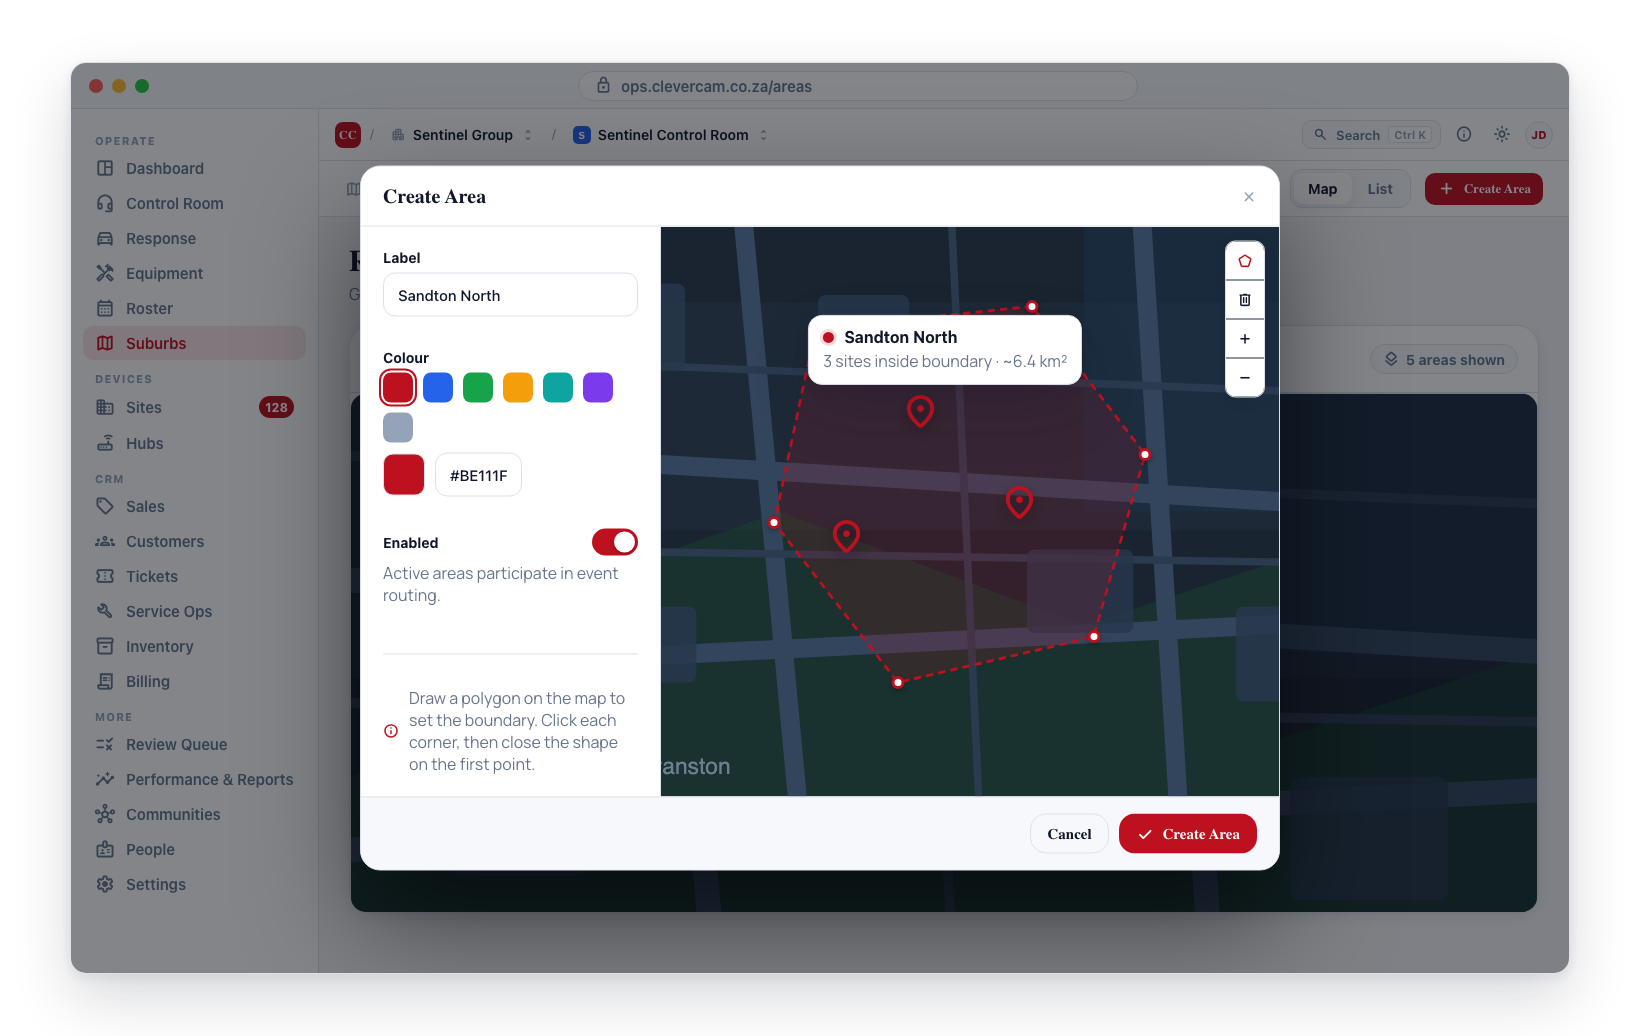
The bar under the map shows the current corner count and two actions:
- Remove corner — click a corner on the map to select it (it fills in and grows), then click Remove corner. It stays greyed out until a corner is selected, and once a boundary is down to three corners, since a polygon cannot have fewer.
- Clear boundary — removes the shape entirely and returns the Add boundary box button, to start again somewhere else.
A boundary needs at least three corners to form a closed shape. Most suburbs end up with more — add them from the edge dots wherever the outline has to follow a road, a river, or a wall.
Editing an Existing Boundary
Opening a suburb that already has a boundary drops you straight into the same editor, zoomed to fit the existing shape with every corner handle in reach.
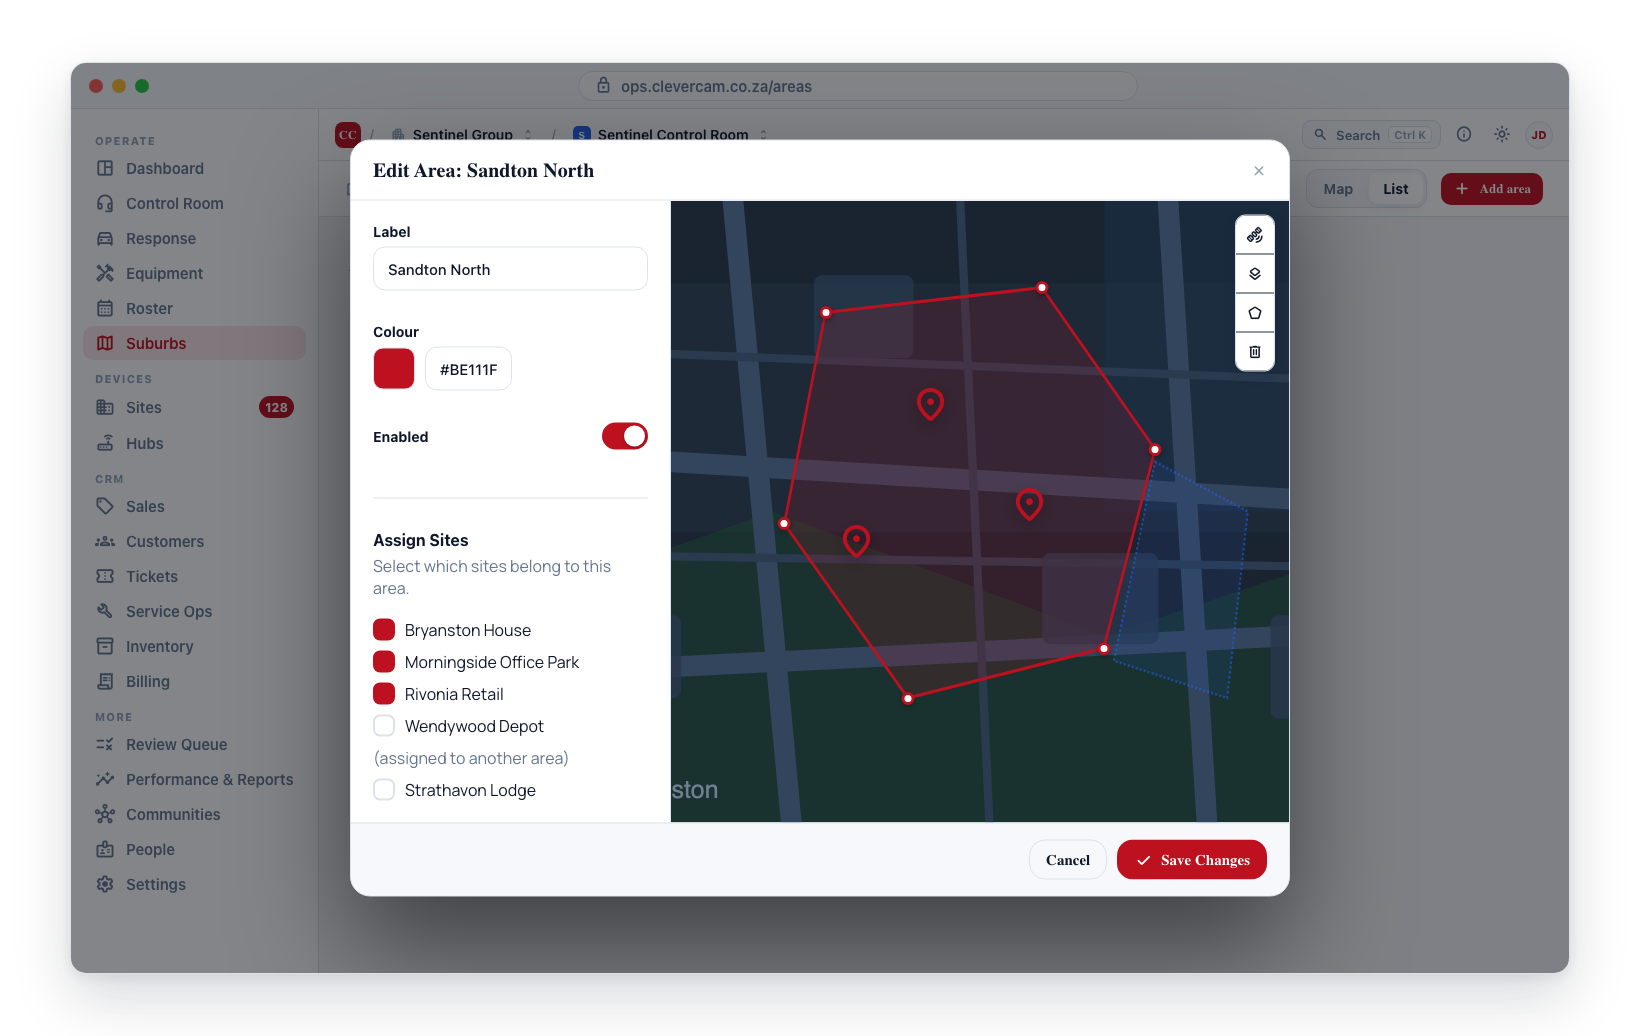
- Open the suburb and click Edit suburb.
- Drag a corner to move it.
- Click a dot on an edge to add a corner between two existing ones.
- Select a corner and click Remove corner to take one out.
- Drag the centre handle to move the whole boundary at once.
- Click Save changes to apply the updated boundary. The editor stays open, so you can carry straight on to the next suburb.
Zoom in on the map for more precision when placing or adjusting corners. At higher zoom levels, you can follow specific streets or property lines. Dragging the map background always pans the map — the boundary only moves when you grab one of its handles.
Colour-Coding Suburbs
Each suburb can be assigned a unique colour to make the map easy to read:
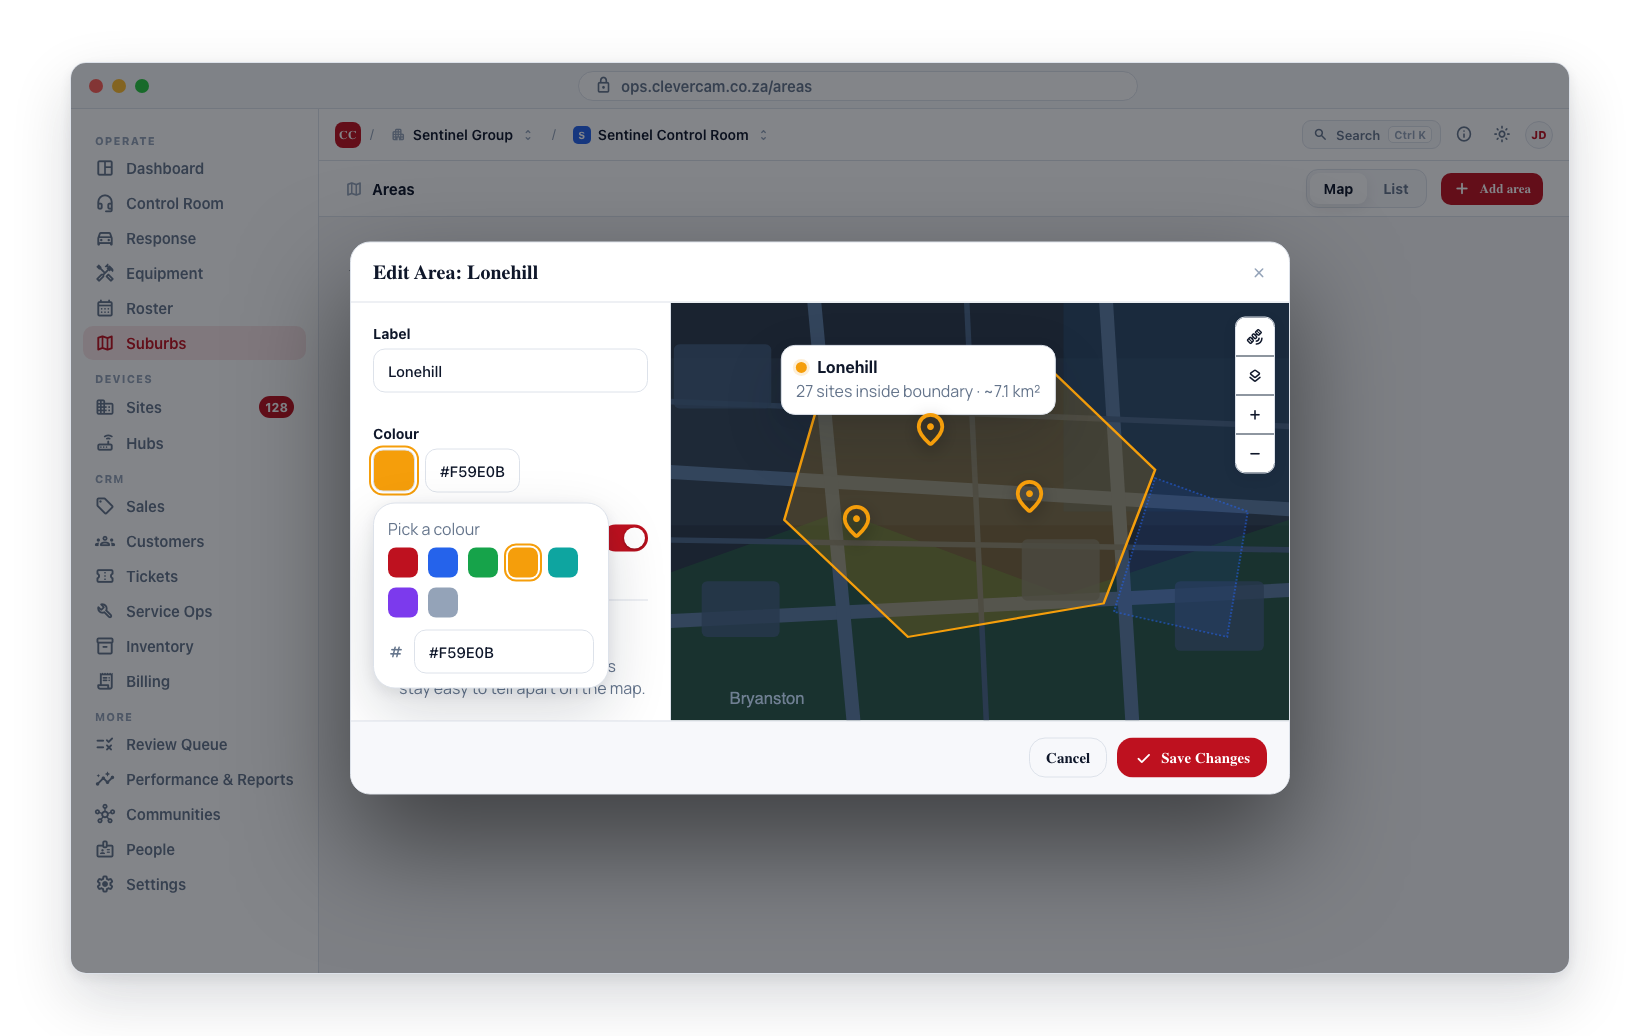
- Select the suburb (either during creation or while editing).
- Choose a colour from the colour picker or enter a hex code.
- The suburb's fill and border will update to the selected colour.
- Save the changes.
Colour recommendations:
- Use contrasting colours for adjacent suburbs so boundaries are visually distinct.
- Consider using a colour scheme that aligns with your company's conventions (e.g., red for high-risk suburbs, green for low-activity suburbs).
- Avoid colours that are too light, as they may be hard to see against the map background.
Map Controls
The map editor supports standard navigation:
- Zoom in/out — Use the scroll wheel, pinch gesture, or the +/- buttons.
- Pan — Click and drag the map background to move the view.
- Satellite/map toggle — Switch between satellite imagery and the standard map for better context when drawing boundaries. The neighbouring suburbs stay drawn either way; over imagery they switch to a solid, heavier outline so they do not sink into the picture.
- Zoom to a suburb — Picking a suburb in the rail frames the map on its boundary.
Working on several suburbs at once
Boundaries are drawn against their neighbours, so the editor keeps all of them in view and lets you move between them without leaving.
The rail beside the map lists every suburb, grouped under the branch that owns it. Each row does two separate things:
- The checkbox decides whether that suburb is drawn on the map. Tick a branch heading to show or hide a whole branch at once, or use All / None above the list. A suburb with no boundary yet has nothing to draw, so its checkbox is disabled and the row is marked no shape.
- The name switches the editor onto that suburb. The map zooms to it, and the label, colour and corner handles all become that suburb's. The row you are editing is marked down its left edge, and its boundary is always drawn.
You can also click a suburb's shape on the map to start editing it. Clicks that land on the boundary you already have in hand are ignored, so dragging corners around inside your own suburb never hands you a different one.
If the suburb you are leaving has unsaved changes, the editor asks before discarding them. New suburb at the bottom of the rail starts a blank one without closing.
Viewing All Suburbs Together
The Map tab shows every suburb, site and vehicle at once, with filters to pull them apart — it is the place to check coverage rather than edit it. Full detail on the Coverage Explorer page.
Look for gaps between boundaries where sites fall outside every suburb — the explorer's Only sites in no suburb filter isolates them in one click. Those sites still get a response, but it is ranked on distance alone with no suburb preference. Extend an adjacent boundary to close the gap.
Overlapping Boundaries
CleverOps does not prevent overlapping boundaries, but an overlap makes assignment arbitrary: an unpinned site inside two enabled boundaries lands in whichever is read first, and that choice is neither stable nor meaningful. Best practice:
- Review the map regularly. A suburb's detail panel warns you when it detects an overlap affecting its own sites.
- If two suburbs overlap, decide which should cover the shared zone and adjust the boundaries.
- Where the overlap is deliberate, pin the affected sites so the choice is explicit rather than incidental.
If the map area is blank
Drawing a boundary needs WebGL and a connection to Mapbox. If the editor shows a message where the map should be — This browser can't draw the map, Couldn't reach the map service or The map service rejected this request — the rest of the editor still works: you can rename the suburb, change its colour, and enable or disable it, then Save changes. Only the boundary itself needs the map. What each message means.