Groups
Groups are collections of devices that can be armed or disarmed together as a single unit. A group can contain CleverCam cameras, an alarm panel, or a combination of both. Instead of toggling each device individually, groups let you control your entire perimeter, your indoor cameras, or any other logical set with one tap. The Home tab displays all your groups as color-coded cards so you can see your system status at a glance.
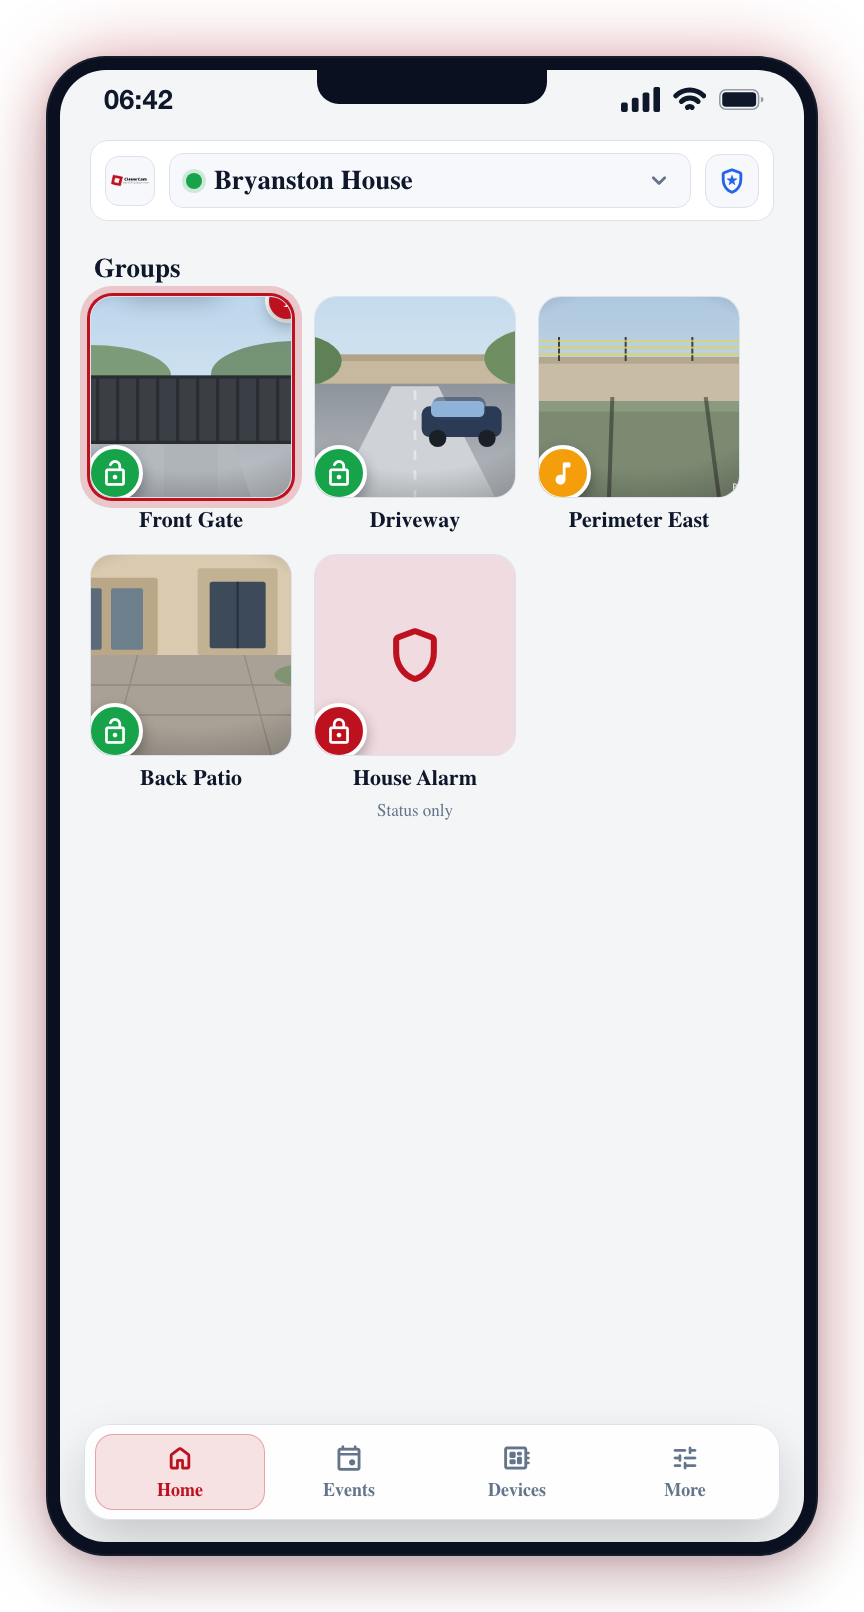
On the Home tab, tap the group you want to arm. Disarmed groups show a green open-lock badge.
Group Types
Every group card shows a small icon badge in the top-left corner that tells you what is inside:
![A view-only (lock badge) group opens a read-only panel with an Open [Brand] app button instead of arm controls.](/img/cleveralert/mock/home-groups-view-only-panel.png)
| Badge | Type | Meaning |
|---|---|---|
| Camera icon | Camera group | The group contains CleverCam cameras. Tapping the card opens the arm/disarm options. |
| Shield icon | Alarm panel (managed) | The group is linked to an alarm panel that CleverAlert can control. Tapping the card opens the arm/disarm options, just like a camera group. |
| Lock icon | Alarm panel (view only) | The group is linked to a third-party alarm panel (e.g. Ajax, Olarm, IDS Hyyp) that CleverAlert can monitor but not control. The tile shows a small "Status only" subtitle under the group name so you can tell at a glance that no arm/disarm action is available from the app. Tapping the card opens a panel that explains the panel is read-only and offers a button to Open [Brand] app -- the button tries to launch the installed third-party app directly, falling back to the App Store / Play Store listing if it is not installed. |
Camera groups show no badge (the camera thumbnails already identify them). The same icon also appears in the arm/disarm panel header so you can confirm what you are about to control.
Multi-Hub Alarm Groups
Some sites have two or more alarm panels covering the same physical area -- for example a primary and secondary communicator on one panel for failover, or two panels in one building running in parallel during a hardware upgrade. CleverAlert collapses these into a single group tile so you do not see "Front Door" twice on the Home screen.
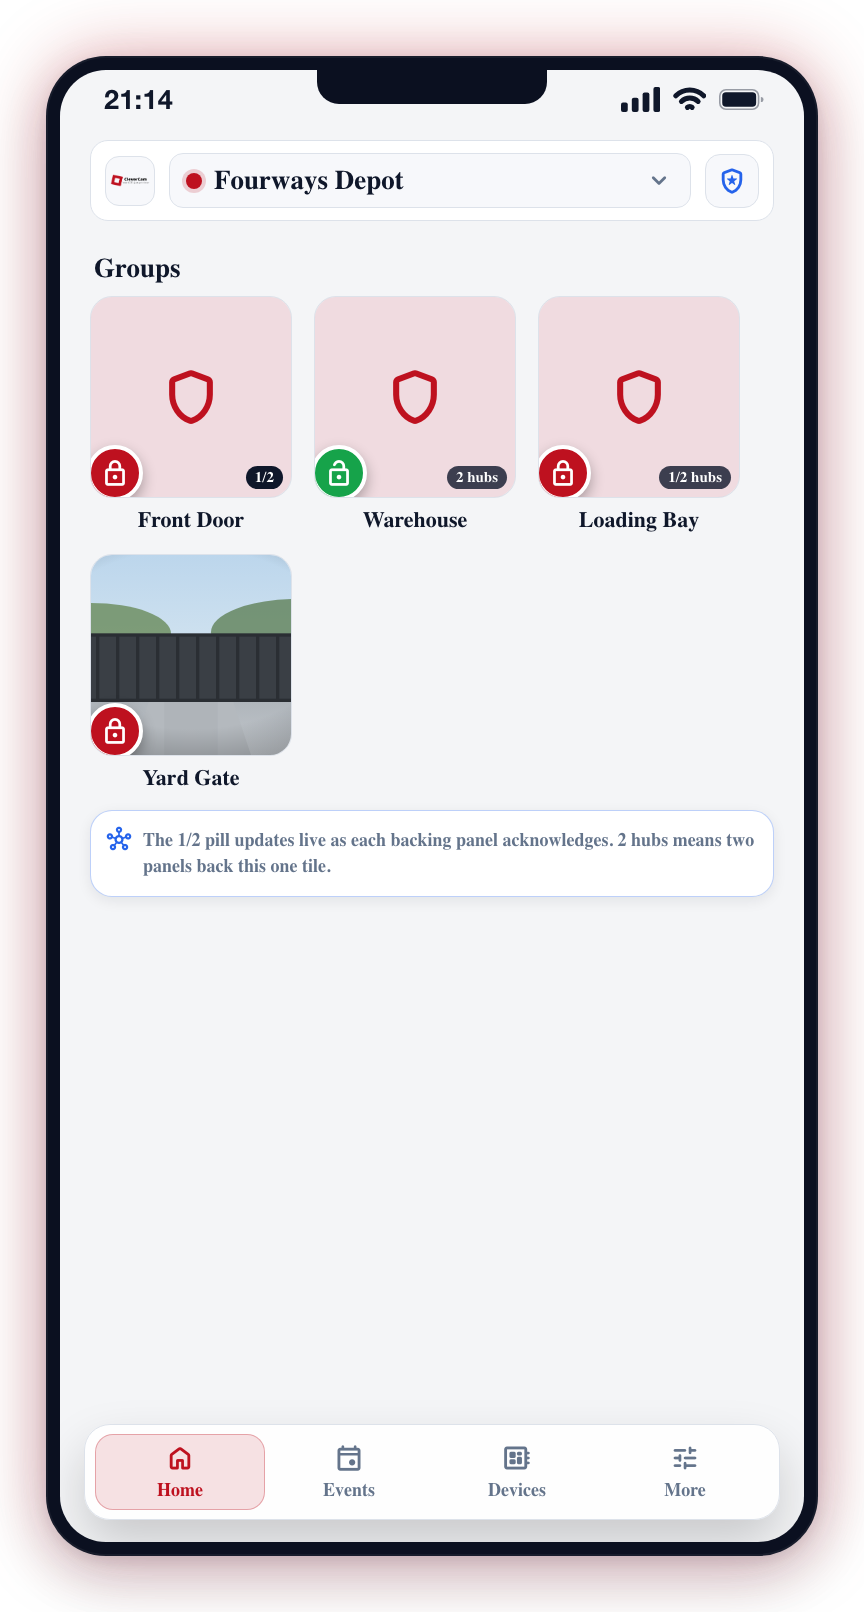
A group backed by more than one panel shows a small "N hubs" pill in the bottom-right corner of the tile (e.g. "2 hubs"). When you arm or disarm that group, the command is sent to every backing panel at once -- you tap once, the app fans the command out, and the result notification confirms how many panels acknowledged.
While the fan-out is in flight, the pill flips to a live count -- e.g. "1/2" -- updating as each backing panel acknowledges. Once every panel has confirmed, the pill returns to the resting "N hubs" form.
If one of the backing panels is view-only (recognised by CleverAlert but without a control group attached -- typically a monitor-only third-party panel), the pill renders as "X/Y hubs" at rest, where X is the number that actually take the command and Y is the total backing panels. The arm/disarm result notification will say e.g. "Command sent to 1 of 2 alarm panels (1 view-only)." so you know which panels acted on the command and which only reported the result.
For the common case of one panel per area, no pill appears -- the tile looks identical to a single-hub group.
Multi-hub groups are configured by your installer in CleverOps using the Site Security layout editor. End users do not need to set them up; they appear automatically once the merge has been performed by the installer.
Group Status Colors
Each group card on the Home screen shows a badge icon with a color to communicate its current state:
| Color | Icon | Status | Meaning |
|---|---|---|---|
| Red | Lock | Armed | All cameras in the group are actively monitoring for detections. Events will generate alerts. |
| Yellow | Music note | Chime | The group has chime mode active. Detections generate soft chime notifications rather than full alarms. |
| Green | Open lock | Disarmed | Cameras in the group are not generating alerts. |
Arming a Group
When you arm a group, all cameras assigned to that group begin actively monitoring for detection events. Any detections will generate alerts and appear in your events feed.
- Open the Home tab.
- Locate the group you want to arm.
- Tap the group card.
- A confirmation dialog appears before the command is sent (see Scope Preview Dialog below).
- Tap Arm to confirm.
- The card badge will turn red with a lock icon to indicate the group is now armed.
Disarming a Group
Disarming a group stops active alerting for all cameras in that group. This is useful when you arrive at your site and want to prevent false alarms from your own movement.
- Open the Home tab.
- Locate the armed (red) group you want to disarm.
- Tap the group card.
- A confirmation dialog appears before the command is sent (see Scope Preview Dialog below).
- Tap Disarm to confirm.
- The card badge will turn green with an open lock icon to indicate the group is now disarmed.
Scope Preview Dialog
Before a group arm or disarm is sent, CleverAlert shows a confirmation dialog that lists exactly what will and will not be affected. This prevents surprises when your site has a mix of CleverCam cameras and third-party alarm panels that require their own keypad.
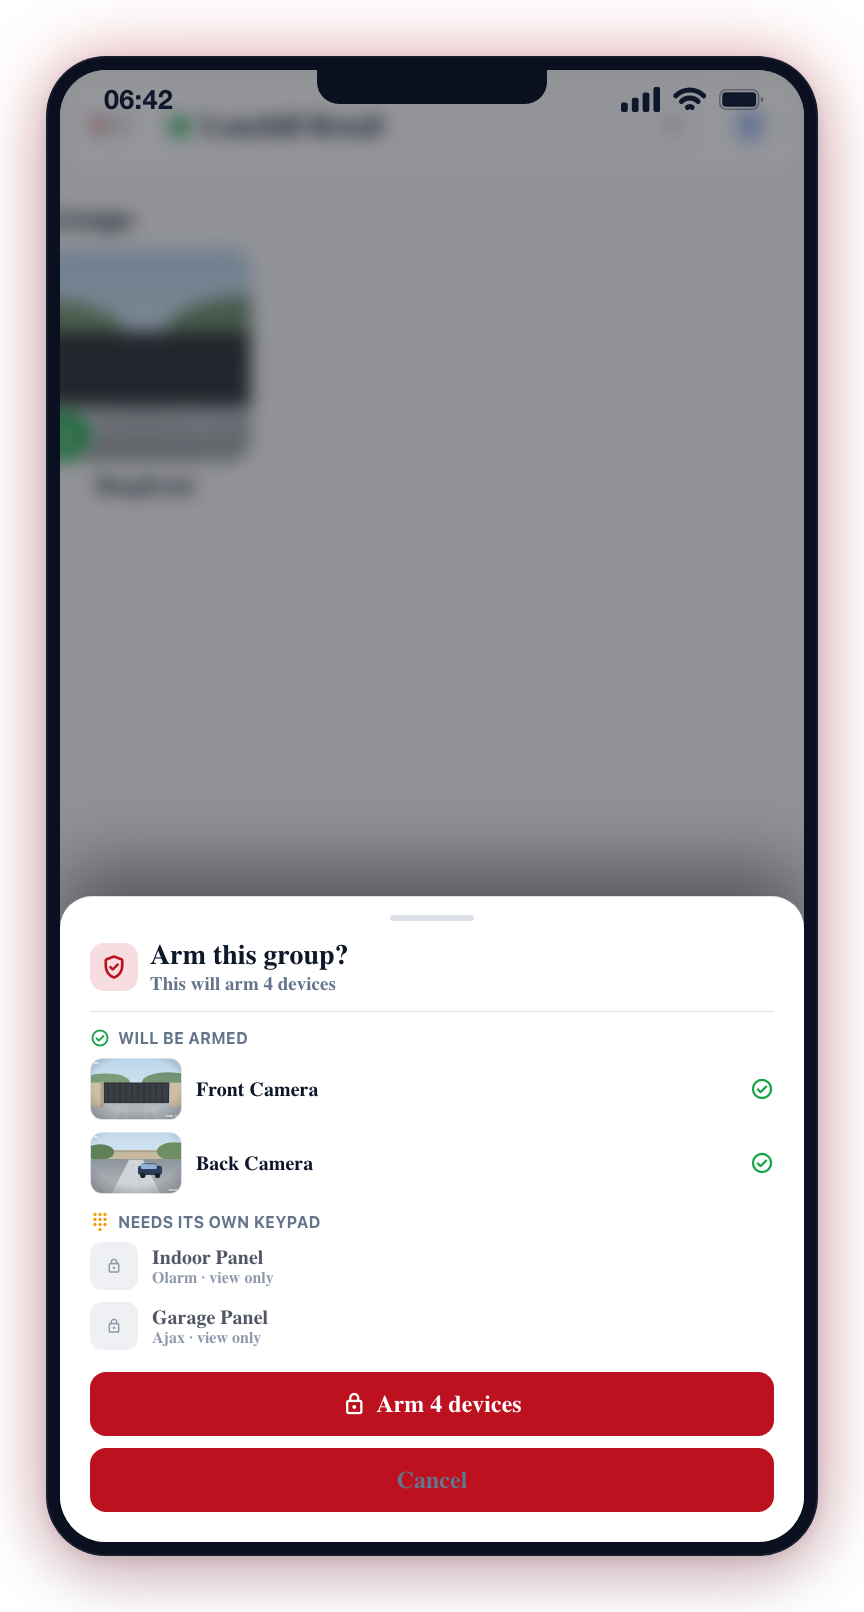
An example dialog for a mixed site might read:
This will arm 4 devices: Front Camera, Back Camera, Driveway, Side Gate. 2 devices need to be controlled from their own keypad: Indoor Panel, Garage Panel.
The dialog is skipped only when the outcome is completely straightforward (for example, all devices can be controlled, or none can be controlled and there are no cameras to arm).
If your site has cameras but no alarm hub, the confirmation dialog does not appear -- this is expected, not a bug. There is nothing left out to warn you about, so CleverAlert arms or disarms your cameras immediately without the confirmation step.
Honest Result Notification
After the arm or disarm command runs, a result notification appears at the bottom of the screen. If all devices succeeded, you will see a standard success message. If some devices could not be reached or do not support remote control, the message is clear about what happened, for example:
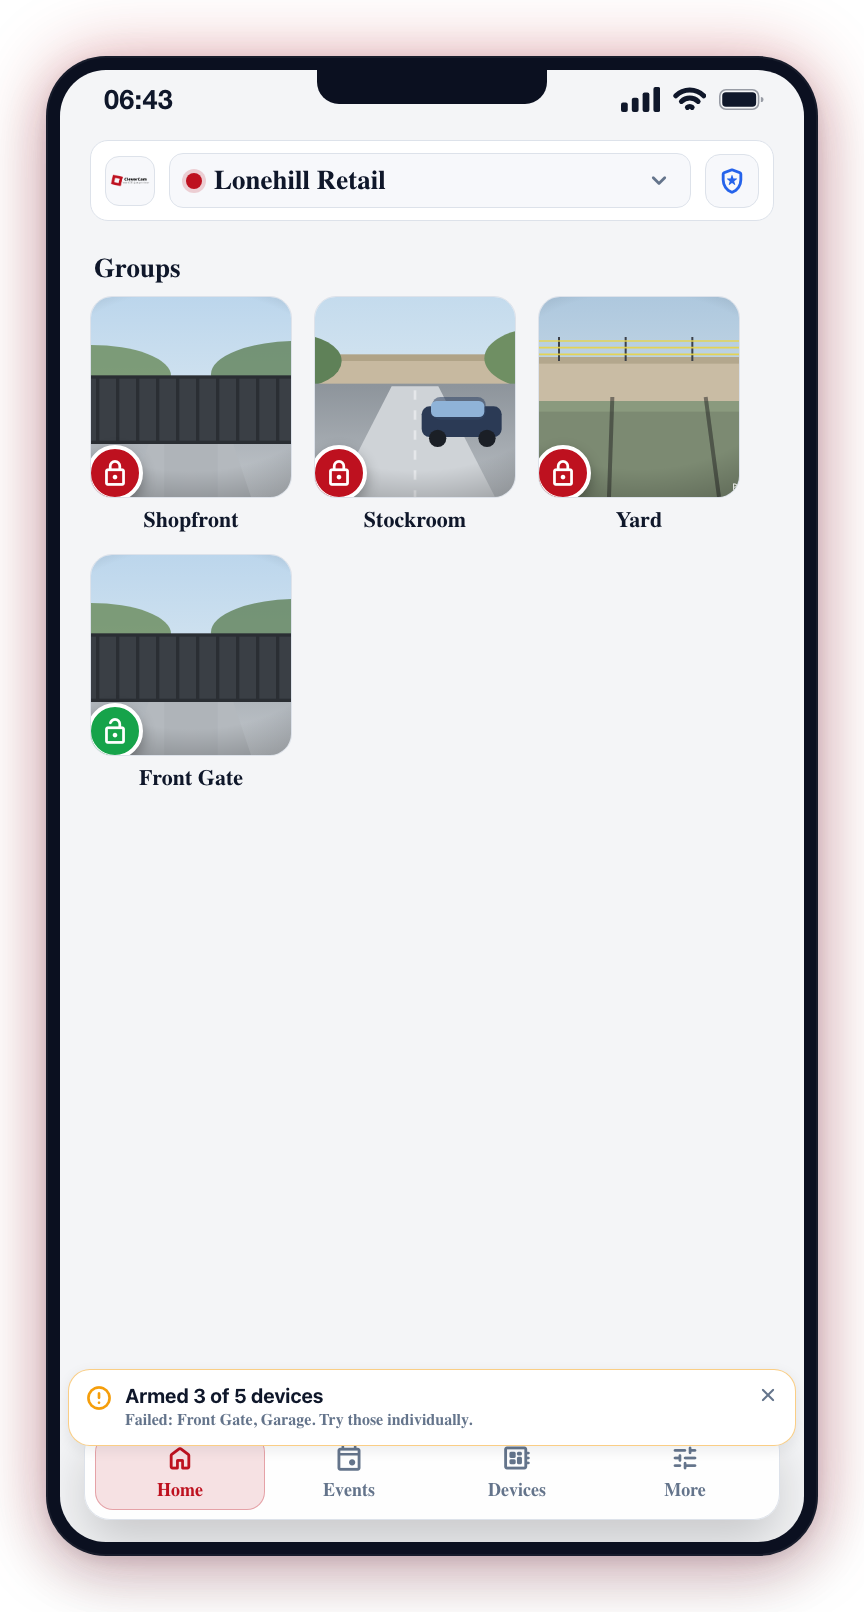
Armed 3 of 5 devices. Failed: Front Gate, Garage. Try those individually.
This ensures you always know the true state of your system after a command.
How Arming and Disarming Works
When you arm or disarm a group through the app, the command is sent to the Clever Hub at your site. The hub updates each camera's detection settings so that armed cameras actively process and report events, while disarmed cameras suppress alerts or handle detections quietly.
The arming state is kept in sync between the app and the hub in real time. If multiple users have access to the same site, arming or disarming by one user is immediately reflected for all users.
Groups are created and managed from the More tab. See Create Group for instructions on setting up your groups. The Home tab only shows the arm/disarm controls.
When a group shows a red lock badge, it means the group is armed and actively monitoring. If an event is triggered, check the active events section on the Home screen to review and respond.