Grid Configuration
The Snapshot Wall tiles the latest frame from every camera at a site with an open event, so a whole room's activity reads at a glance from across the floor.
It is built to be left alone. The wall never scrolls — nobody is standing at a wall TV with a mouse — so every tile is sized to fit the screen, and when there are more cameras than fit legibly the wall turns pages by itself.
The wall used to be its own entry in the left rail. It now lives under Dashboards — see Dashboards for opening it, popping it onto a wall TV, and going full screen. It stays available to every control room, with or without Advanced Alarm Handling.
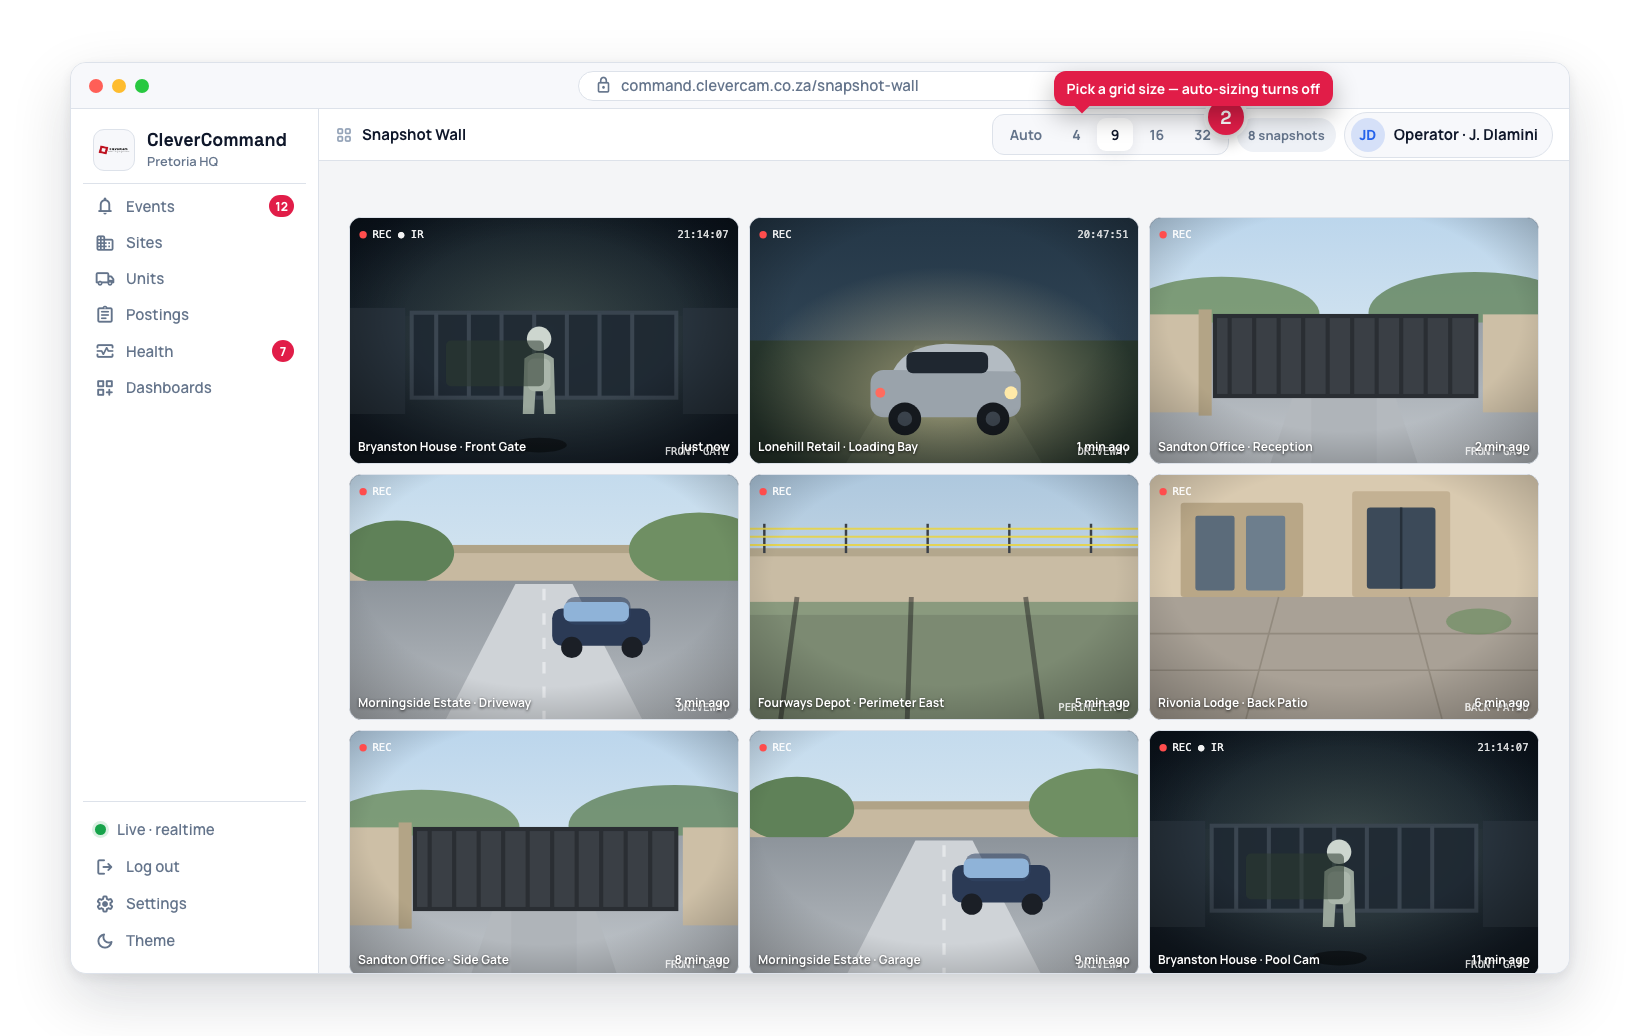
Open Dashboards → Snapshot Wall. Left on Auto it sizes itself; pick 4, 9, 16 or 32 to hold a fixed size instead.
Opening the wall
- Click Dashboards in the left rail.
- Click the Snapshot Wall card (G-13) to open it in place, or its pop-out icon to send it to a second monitor.
Like every dashboard view it supports Full screen and the kiosk pop-out for a wall TV.
The bar above the wall
A slim bar runs along the top of the wall. From left to right:
- A live dot — pulsing while the wall is updating, amber when it has lost touch (see Real-Time Updates). In a popped-out window the name Snapshot Wall sits beside it; inside the app the top bar already names the screen.
- Cameras and sites — how many cameras are on the wall and how many sites they belong to, for example 18 cameras · 6 sites. It reads -- while the first load is in progress.
- Page markers — only when the wall has more than one page. The page on screen is the wide marker, and it fills up as its time runs out. Click any marker to jump to that page. Past 12 pages the markers are replaced by a plain count such as 3 / 14.
- Grid size — Auto · 4 · 9 · 16 · 32.
- The time — a clock, which doubles as proof at a glance that the screen has not frozen.
What each tile shows
Every tile is a true 16:9 frame:
- Camera snapshot -- The most recent image from the camera. A camera whose picture is narrower than the tile (a 4:3 camera) is shown whole, on dark bars, rather than having the top and bottom of the scene cropped away
- Site name -- The site the camera belongs to, shown as the primary label. When the site has a generic name (e.g. "My Home", "Home", "Office"), its address is appended after the name so operators can tell similarly-named sites apart
- Camera name -- The specific camera, shown beneath the site name
- Relative timestamp -- How recently the snapshot was captured (e.g., "2 minutes ago"), rounded to the nearest minute. A frame more than three hours old is marked as stale — see Real-Time Updates
- Disabled cameras -- A disabled camera shows a blurred placeholder (or a plain "Disabled" label when no preview is available) with a Disabled badge, and its cell can't be clicked
- No snapshot -- A camera that has never captured an image shows a "No snapshot" placeholder, with no timestamp
- Image unavailable -- If a camera's image can't be loaded, the tile says so over a blurred preview instead of showing a broken picture. It recovers by itself when the camera's next snapshot arrives
The labels and rounded corners scale with the tile, so a wall of four large tiles reads from across the room and a dense wall doesn't drown its pictures in text.
Snapshots are sourced from cameras that have active events assigned to your control room. This focuses the wall on sites with current activity rather than showing every camera in the system.
The order of the tiles
Tiles are grouped by site. The site that went active most recently comes first, so the top-left of the first page is always the newest activity. A site keeps its place for as long as it has an open event — a site that keeps triggering does not jump back to the front each time, so the wall holds still.
Within a site, cameras run in name order, with cameras that have nothing to show (no snapshot yet, or disabled) collected at the end of that site's run.
Configuring the Grid Size
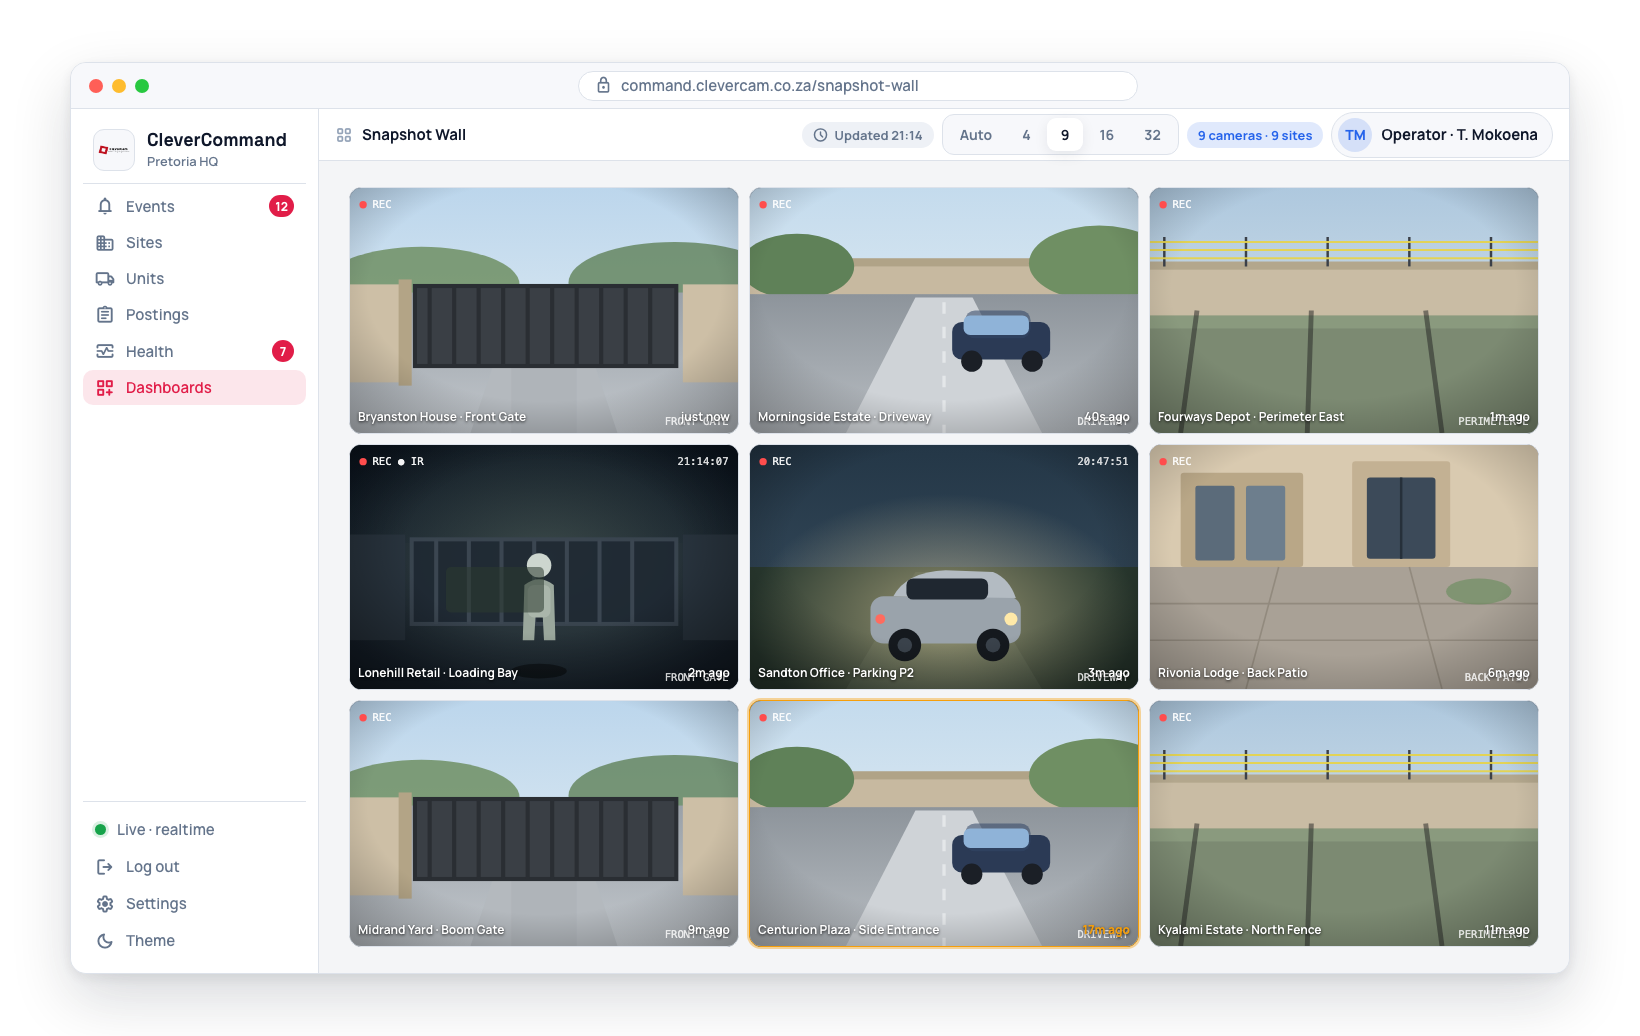
Auto
Auto is the default, and the setting to leave a wall TV on. It fits every camera on one screen, as large as the screen allows, working out the best number of columns and rows for however many cameras are up — so 18 cameras might sit 5 across and 4 down, and 6 cameras 3 across and 2 down.
Auto never shrinks a tile below roughly one-seventh of the wall's width, because past that a tile is a colour swatch from across a room. When there are more cameras than fit at that size, the wall splits them over pages instead, and spreads them evenly: 40 cameras on a wall that holds 30 becomes two pages of 20, not a full page and a nearly empty one.
A single camera is never stretched across the whole monitor; one or two cameras share the screen at half width each.
Fixed sizes
| Grid Size | Cells a page | Best For |
|---|---|---|
| 4 | 4 | Large snapshots for detailed inspection on smaller screens |
| 9 | 9 | Balanced view for standard monitors |
| 16 | 16 | More cameras visible at once on larger monitors |
| 32 | 32 | Maximum density for ultra-wide or multi-monitor setups |
A fixed size holds the cells at the same size whatever is happening: a quiet room leaves empty space rather than growing its tiles, and a busy one turns pages rather than shrinking them. The columns and rows are still chosen to suit the screen — 32 cells on a 16:9 television are laid out to make each tile as large as possible, not forced into eight narrow columns.
Changing the Grid Size
- In the bar above the wall, find the grid size toggle
- Click Auto, 4, 9, 16 or 32
- The wall immediately reorganizes to the new layout and returns to its first page
Your choice is remembered on that computer, so a wall TV that reloads — after a power cut, an update, a restart — comes back on the size you set.
Pages
When the cameras do not fit on one screen, the wall shows them a page at a time and turns to the next page every 15 seconds, looping back to the first after the last. The next page's pictures are loaded a few seconds ahead, so a page turn lands on images rather than on blank tiles.
- Click a page marker in the bar to jump straight to that page
- The wall stops turning while a tile is open full-size, and carries on when you close it
The wall carries at most 240 cameras at once. Past that the bar reads, for example, 240 of 412 cameras · newest sites first: the most recently active sites keep their place and the oldest drop off the end.
Full-Screen Lightbox
Click any snapshot in the grid to open it in a larger view for closer inspection:
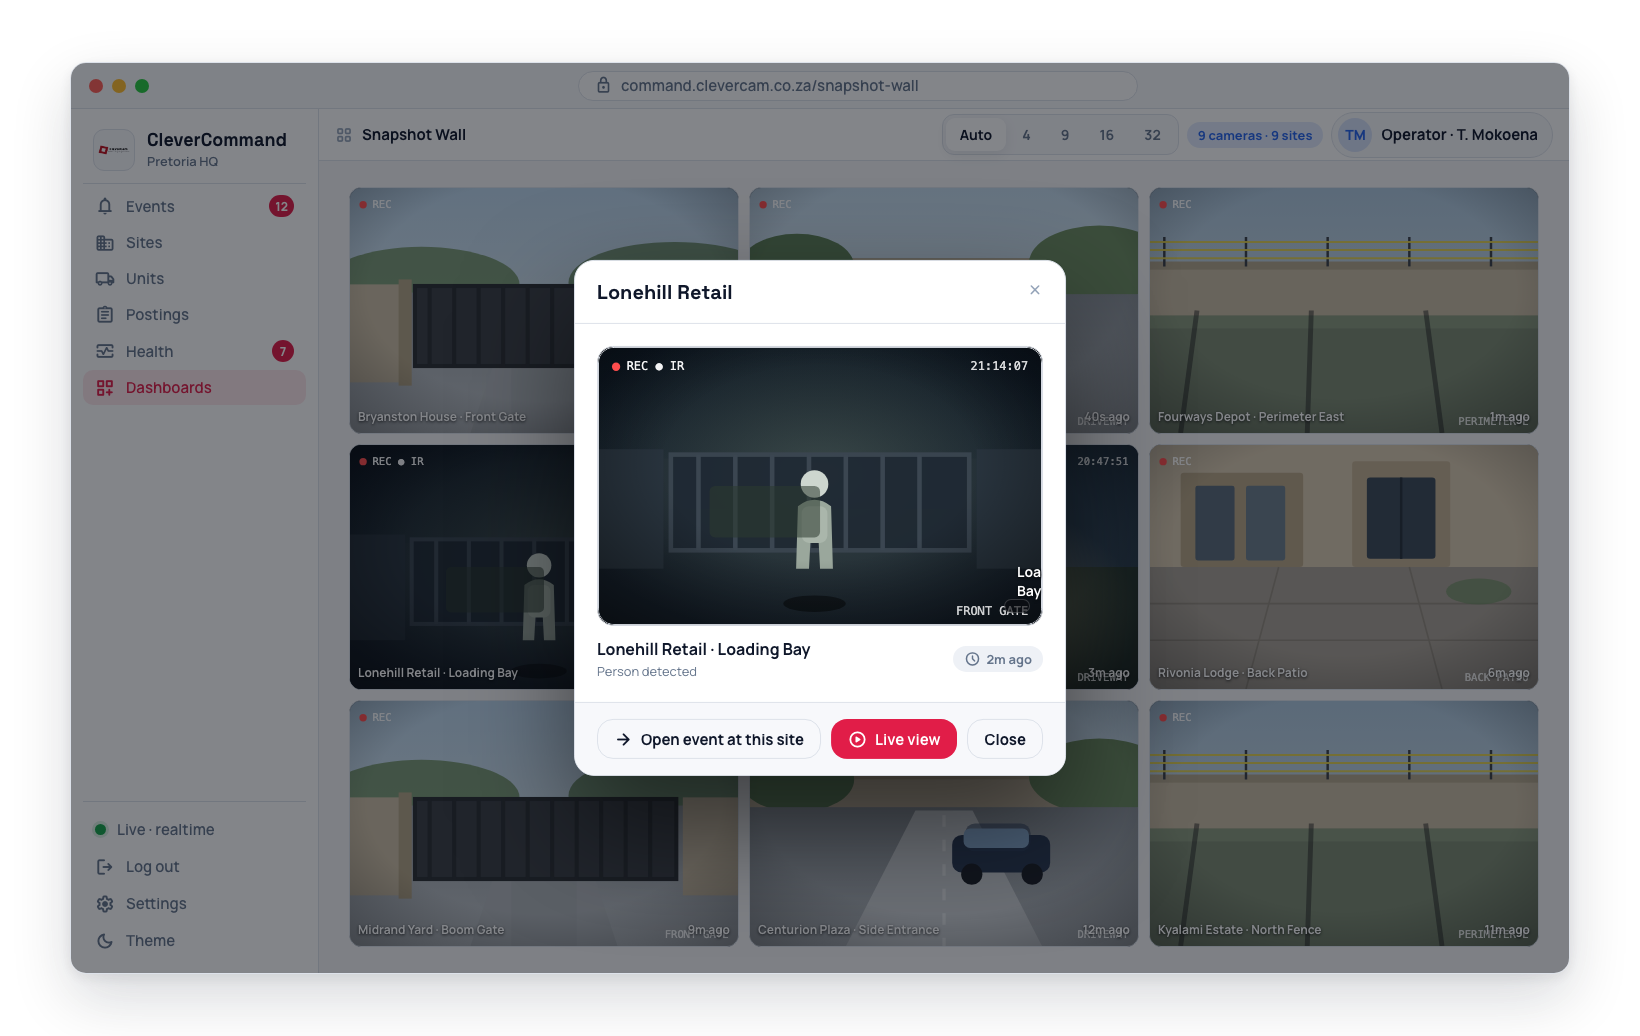
- Click a snapshot cell in the grid (a disabled camera's cell can't be clicked)
- The image opens in an overlay, enlarged and shown whole, with the site name, camera name and relative capture time beneath it
- The enlarged image keeps updating — if the camera sends a new snapshot while it is open, you see the new one
- Click outside the image, press Esc, or click the Close button to return to the grid
An enlarged tile closes by itself after two minutes without the mouse moving, and straight away if its event closes. A tile left open on a wall nobody is standing at would otherwise hide the whole room.
Grid and Active Events
The Snapshot Wall only shows snapshots from cameras with active events. This means:
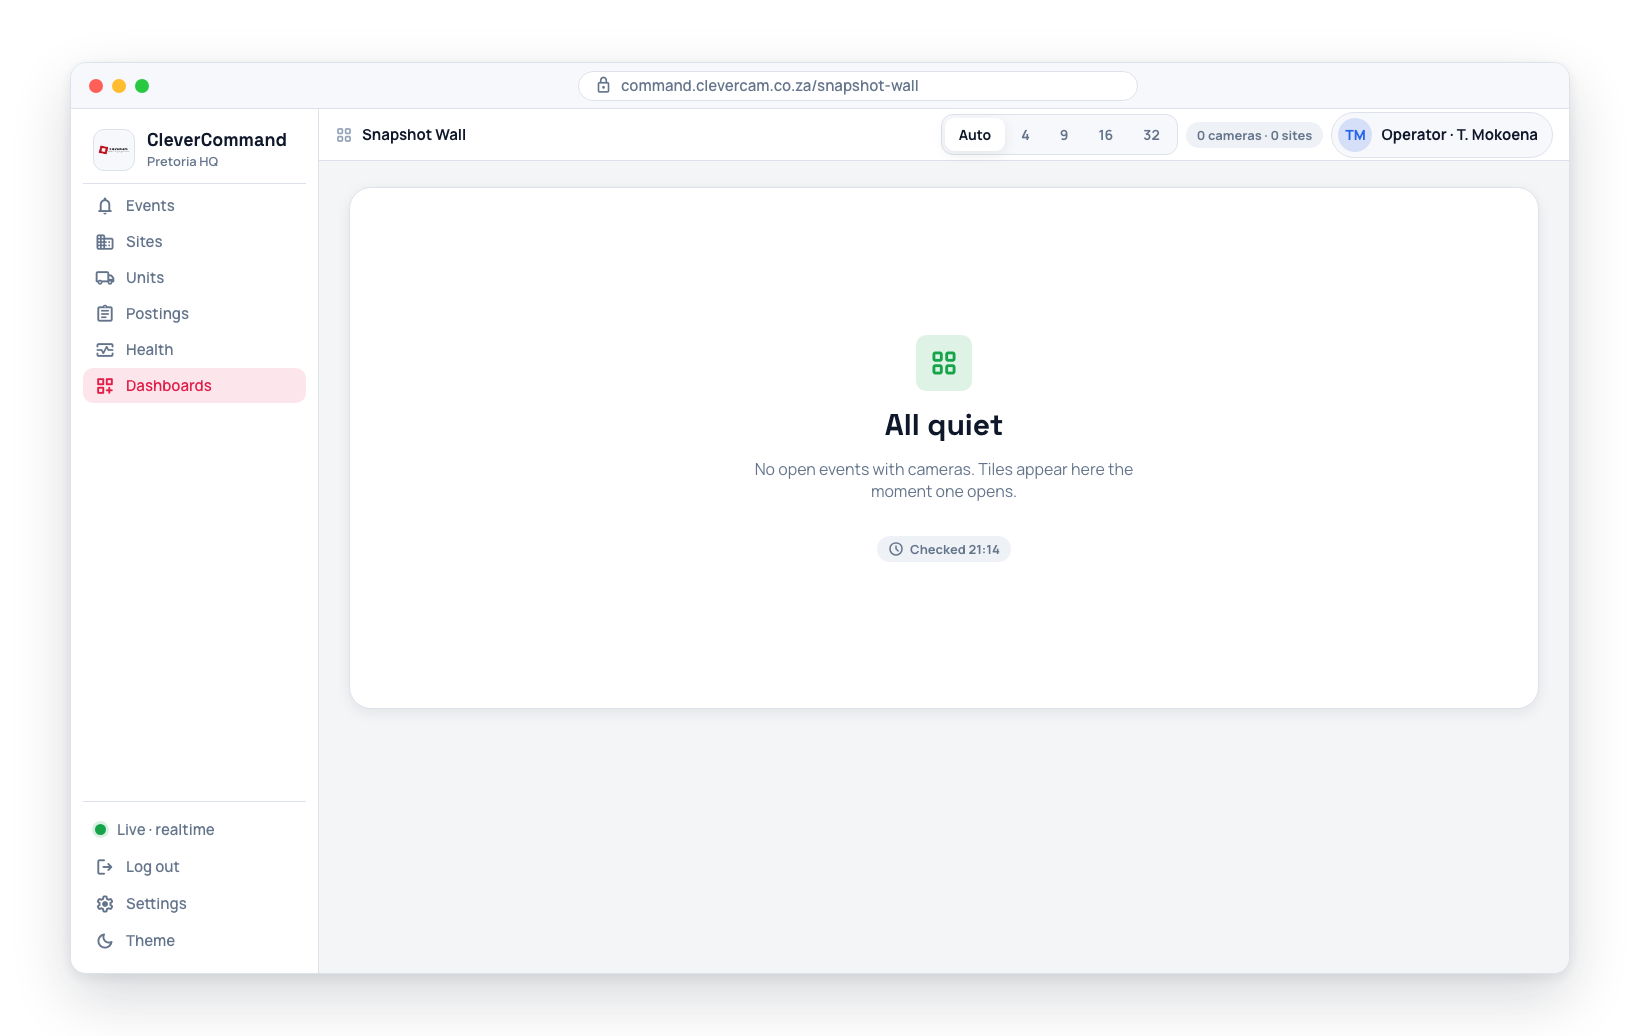
- If no open event has cameras, the wall shows All quiet, with the time it last checked — so a quiet room is visibly a live screen and not a broken one
- As events are created and closed, snapshots appear and disappear from the grid
- The grid provides a focused view of current activity, not a general surveillance wall
The Snapshot Wall is designed as a visual monitoring complement to the event queue. Use the event queue for detailed event handling and the snapshot wall for a high-level visual overview of current activity.